32
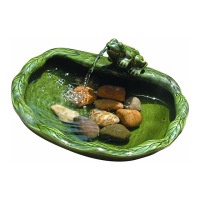
Anchor Sack
To prevent the pump moving around use the
anchor sack and line provided. Fill the sack
with stones and tie it to the pump, the length of
line can be altered to limit how far the pump
can move.
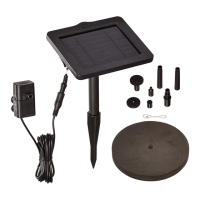
Solar Panel Mounting
Solar panel can be mounted using the
ground spike or wall/deck bracket. Slide
the pivot assembly onto the back of the
panel and then use with your selected
mounting option.
ü
û
Adjust solar panel angle to
maximise the amount of solar
energy collected.
Summer
0-30˚
Spring/Autumn
30-60˚
Position the solar panel so that it receives direct sunlight. The
fountain will not work if the solar panel is shaded. The fountain can
be placed anywhere within reach of the cable.
Solar Panel Position
Important!
Connection
ü
û
û
Connect the pump to the solar panel as shown .
Slightly twist the connectors when pushing together,
ensure the red sealing ring remains in it’s groove
and is not displaced.
0°C/32°F
û
ü
Frost can cause damage to the pump. The pump MUST be removed and
stored in a frost proof environment if the water is likely to freeze.
4-8"
10-20cm
8-16"
20-40cm
û
ü
û
Performance
This product is designed primarily to operate in summer months but will also work in spring and autumn
provided there is good sunshine. Performance is directly related to the amount and strength of sunlight
received.
4-8"
10-20cm
0-4"
0-10cm
4-12"
10-30cm
ü
0-4"
0-10cm
Frost