Fig. 45: Identifying Cover And Cutouts
Courtesy of MERCEDES-BENZ OF NORTH AMERICA.
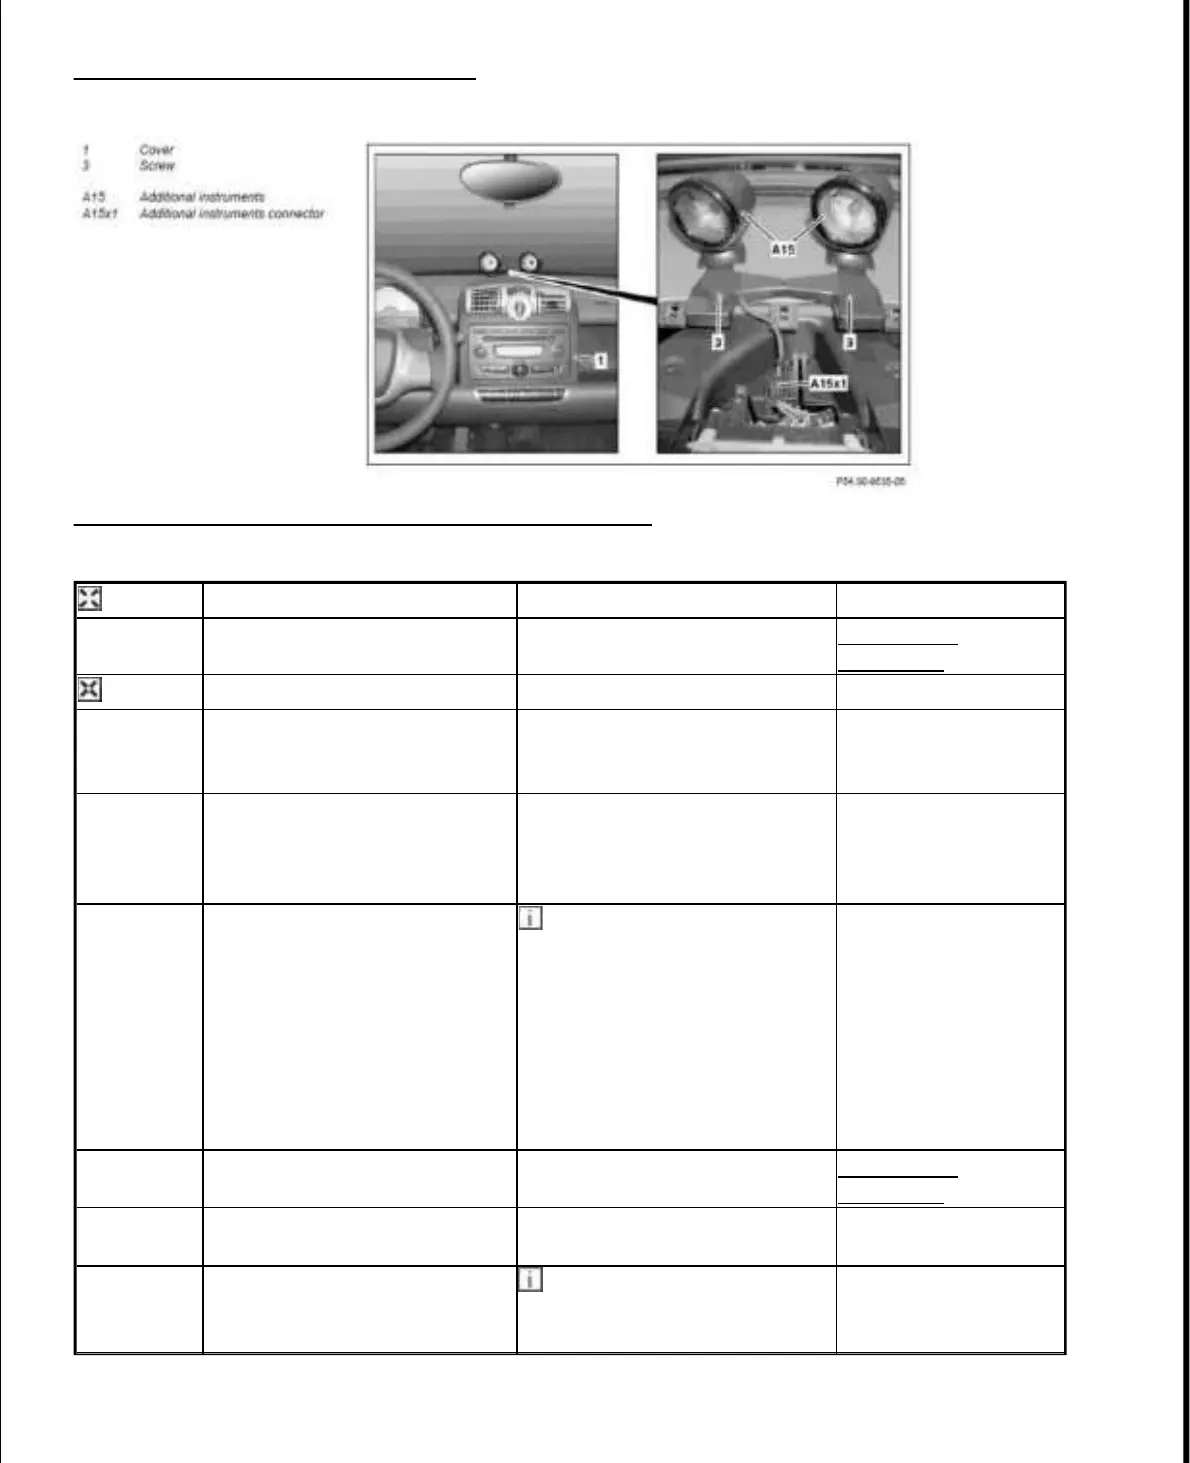
Fig. 46: Identifying Additional Instruments Components
Courtesy of MERCEDES-BENZ OF NORTH AMERICA.
RETROFIT ADDITIONAL INSTRUMENTS - AZ54.30-P-0001MCD
Remove
1 Remove cover (1) on center
console
AR68.20-P-
2350MCC
Install
2 Make the cutouts (2) to match
the perforation (arrows) on the
cover (1)
3 Position additional instruments
(A15) on dashboard upper
section and fasten in place
using the bolts (3)
4 Connect additional instruments
connector (A15x1)
The plug for the additional
instrument connector (A15x1) is
located in the attachment
between the air vents. If the plug
for the additional instrument
connector (A15x1) has not been
clipped into the attachment, then
the wiring harness is to be tied
back and down in a loop.
5 Fit cover (1) onto center
console
AR68.20-P-
2350MCC
6 Set clock of additional
instruments (A15)
7 Add special equipment to the
vehicle data card and to the
online vehicle data card
Code (V31) Cockpit clock
and tachometer package to be
added.
2010 Smart Fortwo Passion
2009 ACCESSORIES & BODY, CAB Electrical System, Equipment & Instructions - Fortwo (Cabrio)
15 октября 2019 г. 19:12:11 Page 51 © 2011 Mitchell Repair Information Company, LLC.

 Loading...