3
• Carefully install the lens making sure that there is an even, flat fit in the light body.
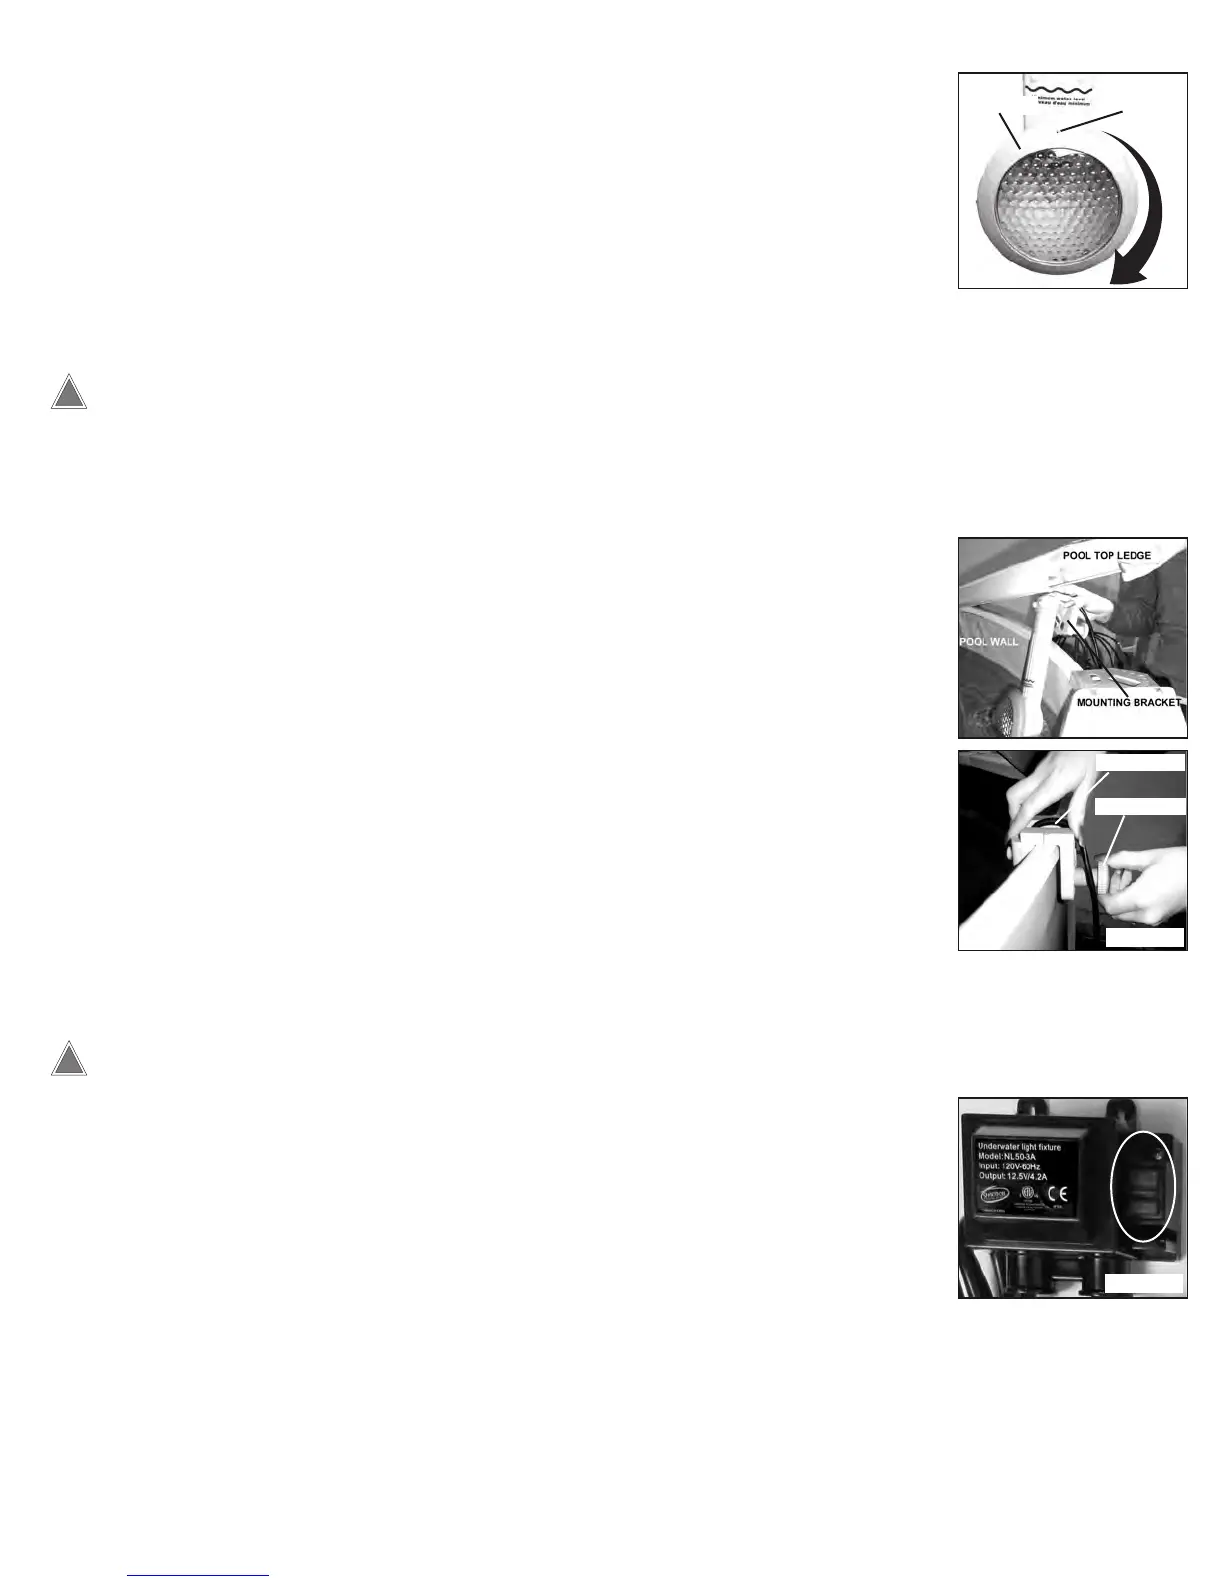
• Place the Seal Ring over the lens. Turn the ring in a clockwise direction until the ring is secure
and the Index Mark is centered with the body of the light as shown
in Figure 4.
NOTE: It is normal for the Seal Ring will make a clicking noise during installation. This is a safety
feature of the light to ensure the ring cannot be removed without the use of the Latch Key.
DO NOT OVERTIGHTEN THE SEAL RING OR TURN THE RING IN A COUNTER-
CLOCKWISE DIRECTION DURING INSTALLATION AS THIS COULD CAUSE THE
LIGHT TO LEAK.
SEALING THE LIGHT
FIGURE 4
Index Mark
Seal Ring
• Remove the top cap of the pool’s vertical post nearest to the point of installation.
• Lift one side of the pool’s top ledge as shown in Figure 5 (screws may have to be removed).
• Slide the light onto the pool wall so that the light is centered in the middle of the top ledge.
• Hold the light so the mounting bracket is flush with the top of the pool wall and turn the Thumb
Wheel in a clockwise direction to secure the light to the wall as shown
in Figure 6.
• Be sure the wire runs through the Wire Channel of the Mounting Bracket.
• Reinstall the top ledge and cap.
• Ensure the water level is above the minimum water line on the light as shown in Figure 4.
Add water if needed.
• Mount the transformer to a vertical surface that is at least 18 inches from the ground using the
provided screws.
INSTALLING THE LIGHT
FIGURE 6
Wire Channel
Thumb Wheel
FIGURE 5
OPERATING THE LIGHT
USE OF A GFI PROTECTED OUTLET IS REQUIRED. DO NOT USE AN EXTENSION CORD.
• To turn the light on, plug the power cord into a GFI protected outlet and turn the switch to the ON
position.
• To turn the light off, press the switch to the OFF position as shown in Figure 7.
FIGURE 7
 Loading...