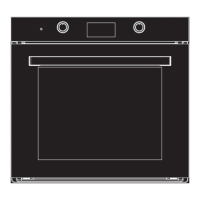
The Smith&Brown A68 is a built-in electric oven designed for domestic household use, suitable for installation in a standard kitchen cabinet or housing unit.
The appliance operates at a minimum temperature of 100°C above ambient room temperature. Certain types of vinyl or laminate kitchen furniture may be prone to heat damage or discoloration at lower temperatures. Any damage resulting from installation contravening this temperature limit or placing adjacent cabinet materials closer than 4mm to the appliance is the owner's responsibility.
When first switched on, the oven may emit an unpleasant smell due to the bonding agent used for insulating panels; this is normal and will dissipate. The appliance and its accessible parts become hot during use, so care should be taken to avoid touching heating elements. Children aged 8 and above, and persons with reduced physical, sensory, or mental capabilities, or lack of experience and knowledge, can use the appliance if supervised or instructed on safe use and understanding of hazards. Children should not play with the appliance or perform cleaning and user maintenance without supervision.
Do not use harsh abrasive cleaners or sharp metal scrapers on the oven glass. Ensure the appliance is switched off before replacing the oven lamp to prevent electric shock. Using the appliance for any other purpose or in any other environment without express agreement will invalidate warranty and liability claims. Repairs should only be carried out by authorized service agents.
The appliance is marked according to European directive 2002/96/EC on Waste Electrical and Electronic Equipment (WEEE). Proper disposal prevents potential negative consequences for the environment and human health. The symbol on the product indicates it should not be treated as household waste but handed over to an applicable collection point for recycling.
Installation and Specifications
The oven must be correctly installed by a suitably qualified person according to manufacturer's instructions. Improper use or installation may result in injury or damage. Heat, steam, and moisture will be created during use, so adequate room ventilation is essential; additional ventilation may be required for prolonged use.
Important Technical Specifications:
- Functions: 3, 4, or 7 functions (varies by model)
- Energy Efficiency Class: A / A+
- Oven Capacity: 85-88 litres
- Programmer: LED full programmer
- Cooling Fan: Tangential cooking fan to stabilize internal temperature and lower external surface temperature.
- Grill: Thermostatically controlled
- Door: Double-glazed removable door
- Light: Oven light
Dimensions (mm):
- Width: 595
- Height: 597
- Depth: 574
- Built-in recess: 560 (W) x 580-583 (H) x 570 min. (D)
- Support shelf ventilation opening: at least 400 cm² (20x20 cm)
Standard Accessories (Varies by model):
- Wire Shelves: For grill dishes, cake pans, roasting, and grilling.
- Universal Pan: For cooking large quantities of food (cakes, pastries, frozen food) or collecting fat/spillage and meat juices.
- Shelf Placement: Correct placement of side rails is imperative to ensure safe operation and prevent hot food items from sliding out during removal.
- Product Carrying Handle: Removable handle mounted in holes on the right and left side walls of the product.
Securing the Oven to the Cabinet:
- Fit the oven into the cabinet recess.
- Open the oven door.
- Install plastic parts into holes in the furnace body, then secure with wood screws.
- Secure the oven to the kitchen cabinet with four fasteners.
Control Panel and Functions (Varies by model)
The control panel features various buttons and a display for operating the oven.
Control Panel Elements:
- Oven function selection button: Selects cooking mode.
- Thermostat button: Adjusts oven temperature.
- Oven Timer: Sets cooking duration or minute minder.
- Full Screen: Display area.
Display and Touch Buttons (for models with digital display):
- Display Elements: Cooking Function Selector, Keylock, Time of day, Alarm volume, Display brightness, AM/PM icon, Thermostat on, Cooking duration, Cooking end time, Minute minder.
- Menu Button: Activates keylock, time of day (if cooking timer isn't set), alarm volume, and display brightness adjustment modes.
- Program Button: Activates cooking duration, cooking end time (if cooking time is set), and minute minder adjustment modes.
- Plus (+) Button: Increases value or activates a function. Holding for 5 seconds activates AM/PM time of day mode.
- Minus (-) Button: Decreases value or deactivates a function.
Power Up: The timer disconnects the cooking function selector for safety, rendering the oven inoperative. A flashing "OFF" and the (Time of day) icon appear. To enable the oven, adjust the time of day using the Plus (+) and/or Minus (-) buttons.
Options: Key lock activation, 24-hour or 12-hour time display, alarm tone selection, and screen brightness settings are available. These settings are not affected by power interruptions.
Key Lock Feature: Prevents unintended key presses.
- Activation: Press "Menu" once, (key lock) icon flashes, "OFF" appears. Press "Plus (+)" to activate; "ON" appears, (key lock) icon stays steady.
- Deactivation: Press "Menu" once, (key lock) icon flashes, "ON" appears. Press "Minus (-)" to deactivate; "OFF" appears, (key lock) icon disappears.
Time of Day Setting:
- Press "Menu" twice, (Time of Day) icon flashes.
- Adjust time with "Plus (+)" and "Minus (-)".
- End adjustment by pressing "Menu" or waiting 5 seconds.
- Cannot set clock during a running cooking program.
- 24h/12h Selection: Factory default is "24h". Press "Plus (+)" for ~5 seconds to switch to "12h" mode (and vice versa).
Alarm Tone Setting:
- Press "Menu" three times, (Alarm Volume) icon flashes.
- Select volume with "Plus (+)" or "Minus (-)".
- End adjustment by pressing "Menu" or waiting 5 seconds. Factory setting is "b-01" (highest volume). Display shows "b-01, b-02 or b-03".
Screen Brightness Adjustment:
- Press "Menu" four times, (Screen Brightness Adjustment) icon flashes.
- Select brightness with "Plus (+)" or "Minus (-)".
- End adjustment by pressing "Menu" or waiting 5 seconds. Factory setting is "b-03" (highest brightness). Display shows "d-01, d-02 or d-03".
Timer Functions
Auto cooking ends automatically according to a programmed setting.
Semi-Automatic Cooking: Starts cooking immediately for a set period.
- Press "Program" button; (Cooking time) icon flashes.
- Set cooking time with "Plus (+)" and "Minus (-)". After 5 seconds, the icon appears steadily. Remaining time counts down. Max 10 hours.
- Set cooking function and temperature knobs.
Fully Automatic Cooking (Delayed Cooking): Starts cooking at a programmed time.
- Set cooking period (as above).
- Press "Program" consecutively until (Cooking End Time) icon flashes.
- Set desired cooking end time with "Plus (+)" and/or "Minus (-)".
- Set cooking function and temperature using oven function and thermostat commutator.
- Both (Cooking period) and (Cooking End Time) icons will be visible. The (Cooking End Time) icon disappears when cooking starts, and only (Cooking time) remains.
When Cooking is Finished:
- (Cooking period) icon flashes, "End" appears, and a warning tone sounds for 7 minutes (if not cancelled).
- Press "Program" to cancel the tone; "End" disappears, current time shows. Oven is in manual mode; turn off function and thermostat knobs, or oven will continue heating.
- Any button press (except "Program") mutes the tone, but "End" remains, and oven stays inoperative.
To Cancel a Preprogrammed Automatic Cooking Period:
- Press and hold "Program" for 3 seconds. Cooking program and minute minder (if set) will be cancelled, and timer acts as if cooking is finished.
- Alternatively, press "Program", (Cooking time) icon flashes. Reset cooking period to 00:00 using "Minus (-)".
Minute Minder:
- Press "Program" consecutively 2 or 3 times until (Alarm) icon flashes.
- Set alarm period with "Plus (+)" and "Minus (-)". (Alarm) icon becomes steady after a few seconds, countdown starts. Max 23 hours 59 minutes.
When Countdown is Completed:
- (Alarm) icon flashes, and a buzzer tone sounds for 7 minutes (if not cancelled).
- Press any key to cancel the tone. Current time shows.
To Cancel Set Time:
- Press and hold "Program" for 3 seconds. Minute minder period and cooking program (if set) will be cancelled.
- Alternatively, press "Program", (Alarm) icon flashes. Reset minute minder period to 00:00 using "Minus (-)".
- If both minute minder and cooking duration are counting down, the shorter one is displayed.
Oven Knob Status Indication
Cooking Function Selector: When turned to an ON position, the (Cooking Function On) icon appears on the display.
Temperature Selector: When oven temperature is lower than the set temperature, the (thermostat on) icon appears on the display.
- Both icons are off when waiting for delayed cooking, after a program ends, and after power-up until time of day is adjusted.
How to Operate the Oven (for models with digital display)
Power On: When plugged in, the alarm sounds, display and button lighting activate for 1 second, then turn off for 0.5 seconds, and the oven enters "semi-automatic cooking mode".
Semi-Automatic Cooking Mode:
- When oven control is turned on for the first time, it activates in semi-automatic cooking mode.
- Resistance lamps flash, and resistance is selected by touching the and buttons.
- After resistance selection, touch the button; temperature setting changes, and the degree lamp flashes.
- Desired temperature is set by touching and buttons.
- After temperature setting, touch the button again; cooking time is set, and the min lamp flashes.
- Desired cooking time is set with and buttons.
- After resistance selection, cooking degree, and cooking time are set, cooking starts by touching the button.
Standby: Pressing the button while cooking is active changes the function to standby mode. Resistance selection, cooking degree, and cooking time settings can be changed in standby mode.
Lamp:
- Short touch: Oven interior light turns on for 30 seconds, then off.
- 0.8-second touch: Lamp lights up non-stop. Recommended for short checks to save energy.
Fan: Touching the button activates the oven fan motor and button lighting. The fan can be activated during cooking, or for defrosting without cooking function.
Automatic Meal Program:
- Touch the button; "F01" appears.
- Use and buttons to choose between "F01" and "F20" (pre-set food menus, see food list).
- After selecting, start cooking by touching the button.
Oven Functions (for models with knob control)
The oven function selector knob is used to select the cooking mode. Different elements within the oven cavity are utilized depending on the selected function. The power indicator light comes on when a function is selected.
- OVEN LIGHT: Separate control to switch the light on, even when not cooking.
- DEFROST MODE: Fan runs without heat to reduce defrosting time. Time depends on room temperature, quantity, and food type. Always check food packaging for instructions.
- FAN OVEN: Uses circular element (C2) with fan for faster, more economical cooking. Allows simultaneous cooking on different shelves, preventing smell/taste transfer.
- HALF GRILL MODE: Uses grill element to direct heat downwards. Suitable for grilling bacon, toast, meat portions.
- CONVENTIONAL OVEN: Uses top and lower elements for traditional cooking. Suitable for roasting and baking on one shelf only.
- FULL GRILL: Uses inner and outer parts of the top element to direct heat downwards. Suitable for grilling medium or large portions of sausages, bacon, steaks, fish.
- FAN AND GRILL: Uses top element with fan for quick heat circulation. Suitable for quick browning and "sealing" juices (steaks, hamburgers, vegetables).
- FAN AND LOWER ELEMENT: Uses bottom element with fan to circulate heat. Suitable for sterilizing and preserving jars. (Oven light switches on automatically with this function).
Thermostat Control Button: Sets required oven temperature (50-250°C). Rotate clockwise.
Oven Operation Lamp: Indicates heating units are in operation. Turns off when set temperature is reached, then cycles on/off. Do not put food in until correct temperature is reached.
Cooking Principles
- Refer to food packaging for temperature and time guidance. Adjust based on personal preference and appliance performance.
- Follow packaging instructions for fan oven use.
- Ensure frozen food is completely thawed unless packaging advises cooking from frozen.
- Preheat oven until operation lamp goes out. For fan oven mode, preheating is optional, but extend cooking time by ~10 minutes.
- Remove unused accessories before cooking.
- Place baking trays in the middle, leaving space for air circulation.
- Open door minimally to check food. Oven lamp stays on during cooking.
Warnings (Grill Function)
- Keep oven door closed during grill function.
- Do not use aluminum foil to cover grill tray or heat elements wrapped in foil; high reflectivity may damage grill element.
- Never cover oven base with aluminum foil or place pans/utensils directly on it.
- Grill heating element becomes extremely hot; avoid touching.
- Exercise caution when opening door to avoid hot parts and steam.
- Drip tray handle is for repositioning only, not removing from oven cavity. Always use oven gloves for removal.
- Do not leave drip tray handle in place when appliance is open.
Cleaning and Servicing
Cleaning should only be done when the oven is cold and disconnected from mains supply.
- Thoroughly clean oven before first use and after every use to prevent residual food from cooking on.
- Never clean surfaces with steam.
- Clean oven cavity with warm soapy water and a sponge/soft cloth. No abrasive cleaners.
- Food splashes on oven floor are normal; ensure appropriate cooking temperatures and utensil sizes.
- Clean external components with warm soapy water and a sponge/soft cloth. No abrasive cleaners.
- If using oven cleaner, check compatibility with manufacturer.
- Damages from cleaning products are not covered by warranty.
Removable Oven Ceiling Covering:
- Appliance has a ceiling covering over the grill unit.
- Remove and thoroughly clean after every use.
- Do not allow oil/grease to accumulate to prevent fire hazard.
Replacing the Oven Bulb:
- IMPORTANT: Disconnect oven from mains supply.
- Remove all oven racks, drip tray, and side rack on the lamp side.
- Remove lamp cover by turning counter-clockwise.
- Turn bulb clockwise and remove.
- Replace with a 25 W/300°C screw-type pygmy bulb. Do not use other bulb types.
- Replace lamp cover.
Removing the Oven Door for Cleaning:
- IMPORTANT: Support the door and place on safe materials when cleaning.
- Two movable bolts on hinges. Raise both bolts to separate hinges from oven housing.
- Hold door edges in the middle, tilt towards oven cavity, and slowly pull out.
- Clean door and glass with damp cloth and small amount of detergent (no cleaning products/chemicals beforehand).
- To reinstall, slide hinges into slots and fully open door.
- IMPORTANT: Fix movable bolts back to original positions before closing cover.
- CAUTION: Do not remove hinge lock system; mechanism has strong spring.
Removing the Inner Cover Glass for Cleaning:
- Do not submerge door in water.
- Do not use abrasive cleaning agents. Scratched glass surfaces may lead to dangerous deterioration.
- Inner door glass can be removed by unscrewing the 2 screws on the sides of the metal upper profile.
Installation (Electrical)
Installation must be by a qualified person according to current versions of:
- British Regulations and Safety Standards (or European equivalents).
- Building Regulations (published by Ministry of the Environment).
- Building Standards.
- IEE Electrical Installation Regulation.
- Electrical Regulation in the Workplace.
- Regulations concerning electrical energy at the workplace.
- Ensure supply voltage on Rating Plate matches mains supply.
WARNING: THIS APPLIANCE MUST BE EARTHED.
- Equipped with a 13 A double pole switched fused flat (spur) socket with 3 mm contact separation, placed in an easily accessible location next to the appliance.
- Loosen and remove terminal block cover to access contacts for power cable. Make connection, secure cable with provided clamp, and immediately close cover.
- If replacing power cable, earth wire (yellow/green) must always be 10 mm longer than line wires.
- Power cable temperature must not exceed 75°C.
- Damaged power cable must be replaced with appropriate spare from Parts Department.
Troubleshooting
My appliance does not operate correctly:
- Oven does not work:
- Check if oven is in manual operation mode.
- Check if cooking function and temperature are selected.
- No power to oven and grill:
- Check if appliance is correctly connected to mains supply.
- Check if mains fuses are operational.
- Check if instructions for setting clock and switching to manual operation were followed.
- Grill function works, but main oven does not:
- Ensure correct cooking function is selected.
- Grill and upper oven unit are not working or are cut off for long periods:
- Allow oven to cool for about 2 hours. Check if appliance works correctly when cooled.
- Food is not cooked correctly:
- Choose correct temperature and cooking function. Adjust temperature by +/- 10°C for best results.
- Food is not cooked evenly:
- Check if oven is installed correctly and is straight.
- Check if correct temperatures and rack positions are used.
- Oven lamp does not work:
- Refer to "Replacing the oven bulb" section.
- Oven is fogging up:
- Steam and fog are natural by-products of cooking high-water-content foods (frozen food, chicken).
- Fogging in oven cavity and between door glasses is not necessarily a malfunction.
- Do not leave food in oven to cool after cooking.
- Use closed containers to reduce steam.
IMPORTANT: If appliance does not seem to be working correctly, disconnect from mains supply and contact nearest authorized service center. DO NOT ATTEMPT TO REPAIR THE APPLIANCE YOURSELF.
Cooking Table (Example values)
| Food Name |
Tray |
Degree |
Shelf |
Pre heating |
Minute |
| Cake |
Available |
180 |
3 |
None |
22-28 |
| Cake in the mold |
Cake mold |
180 |
2 |
5 DK |
35-45 |
| Pastry |
Available |
200 |
3 |
5 DK |
30-35 |
| Cookie |
Available |
180 |
3 |
5 DK |
18-25 |
| Pogaca |
Available |
200 |
3 |
5 DK |
25-30 |
| Pizza |
Available |
200 |
3 |
5 DK |
20-25 |
| Pie |
Pie Mold |
180 |
2 |
5 DK |
20-25 |
| Flaked veal |
Available |
220-240 |
3 |
5 DK |
65-75 |
| Chicken |
Available |
220-240 |
3 |
5 DK |
55-65 |
| Fish |
Available |
200 |
3 |
5 DK |
35-40 |
| Note: Values are laboratory results; adjust based on experience and taste. Pre-heat 5-10 minutes before cooking. |
|
|
|
|
|