WWW.SMITTYBILT.COM
Installation Instructions
Scout Trailer Kit
Part#87400/87400-01
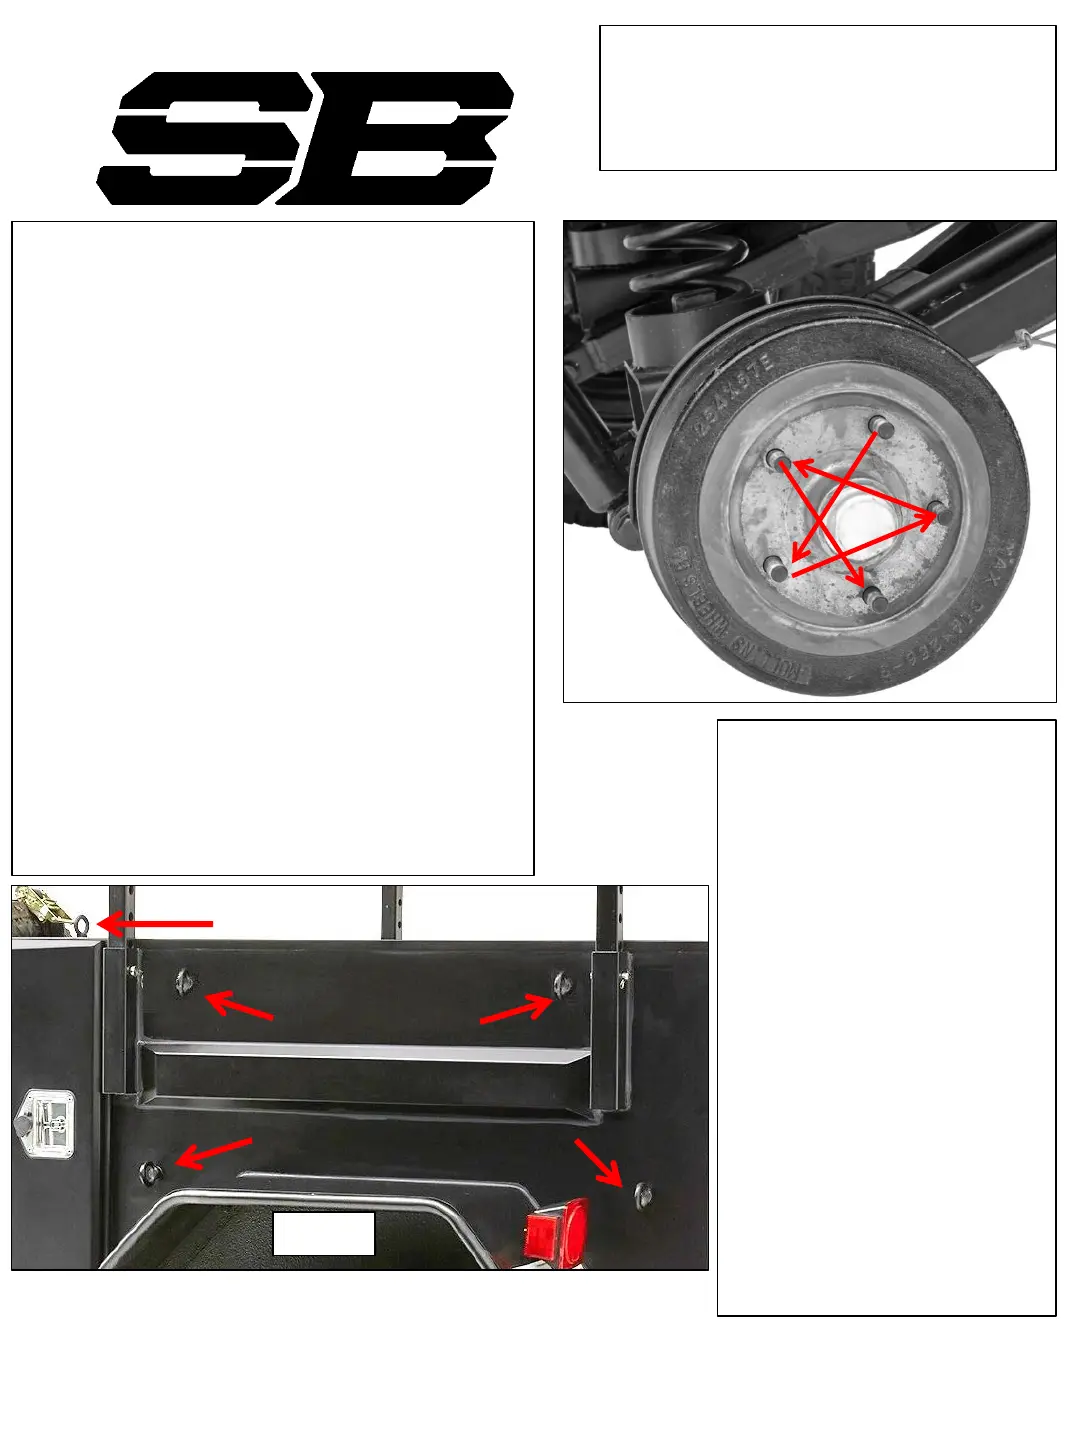
20. Install tires and wheels on to axles. Make sure
center caps are inside of the wheels before
installing. (only if wheels use push thru cap)
you may want to apply anti-seize to the wheel
mounting surface to help prevent corrosion
and will make the wheel easier to remove
when rotating tires, you may also apply a small
amount of anti-seize to the lug studs. The
trailer kit comes with 60° conical seat lug nuts,
make sure your wheels have a compatible
seat. Make sure lug nuts have at least ½” of
thread engagement. Tighten the lug nuts in a
star pattern. Make sure to properly torque the
wheels. Then re-torque after the first 25 miles
and then each 50 miles till they hold their
torque. Always check wheel manufactures
torque recommendations/specifications. Do
not exceed 95 ft. lb. Lower torque ratings
when using anti-seize on the threads,
generally about 25% less torque is required
when using anti-seize. Generally ½” lug nuts
need to be torqued to 85-95 ft. lb. Fig 14.
Fig 14
21. Install all eyebolts. They
may be installed in any
clocking position but we
have found the best is a
vertical orientation. Seal all
eyebolts with black silicon
sealant to prevent ingress
of dust/water. Each eyebolt
assembly consists of a male
and female eyelet, one side
will be on the outside of
the trailer and the other
will be on the inside. On
the roof of the trailer in the
front near the spare tire
you will use a male eyebolt
only. It will thread into the
threaded hole . This
eyebolt can be used to tie
down the spare tire. Fig 15.
Fig 15
20
 Loading...