Do you have a question about the Smooth Fitness AGILE DMT and is the answer not in the manual?
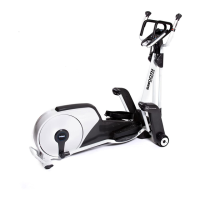
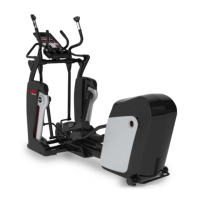
| Brand | Smooth Fitness |
|---|---|
| Model | AGILE DMT |
| Category | Fitness Equipment |
| Language | English |
Explains proper electrical connection, grounding, and the use of surge protectors for safe operation.
Step-by-step guide for attaching the main frame to the base frame using specified bolts.
Instructions for connecting the incline transmission tube using bolts and nuts.
Guide for attaching the left and right undercarriage covers using screws.
Instructions for threading and maneuvering pivot arm covers into their final position.
Guide for attaching uprights to the handlebar and base frame, including securing bolts.
Instructions for assembling the right and left pivot arm covers using press-fit pins and screws.
Instructions for connecting the pedal arm to the pedal swing arm using a specific bolt.
Guide for assembling pivot caps and side caps onto the pedal swing arm using screws.
Instructions for connecting wires and attaching the console support tube using bolts.
Guide for attaching the fixed handlebar to the console support tube and crossbar with bolts.
Instructions for fully tightening all previously installed bolts using the specified Allen keys and wrench.
Instructions for pressing the left and right upright side covers into place on the uprights.
Guide for connecting the action handlebar to the moving linkage using bolts, washers, and sleeves.
Instructions for pressing pedal arm front pivot covers into the ends of the action handlebar and pedal arm.
Instructions for securing the pedal swing arm using M5 x 6mm screws and a 2.5mm Allen Key.
Guide for attaching front side panels to the uprights using screws, referencing specific holes.
Instructions for connecting wires and attaching the computer to the console support tube.
Instructions for attaching taper fixing inserts and the console back cover to the computer.