8 www.snapper.com
Step 2: Oil and Fuel
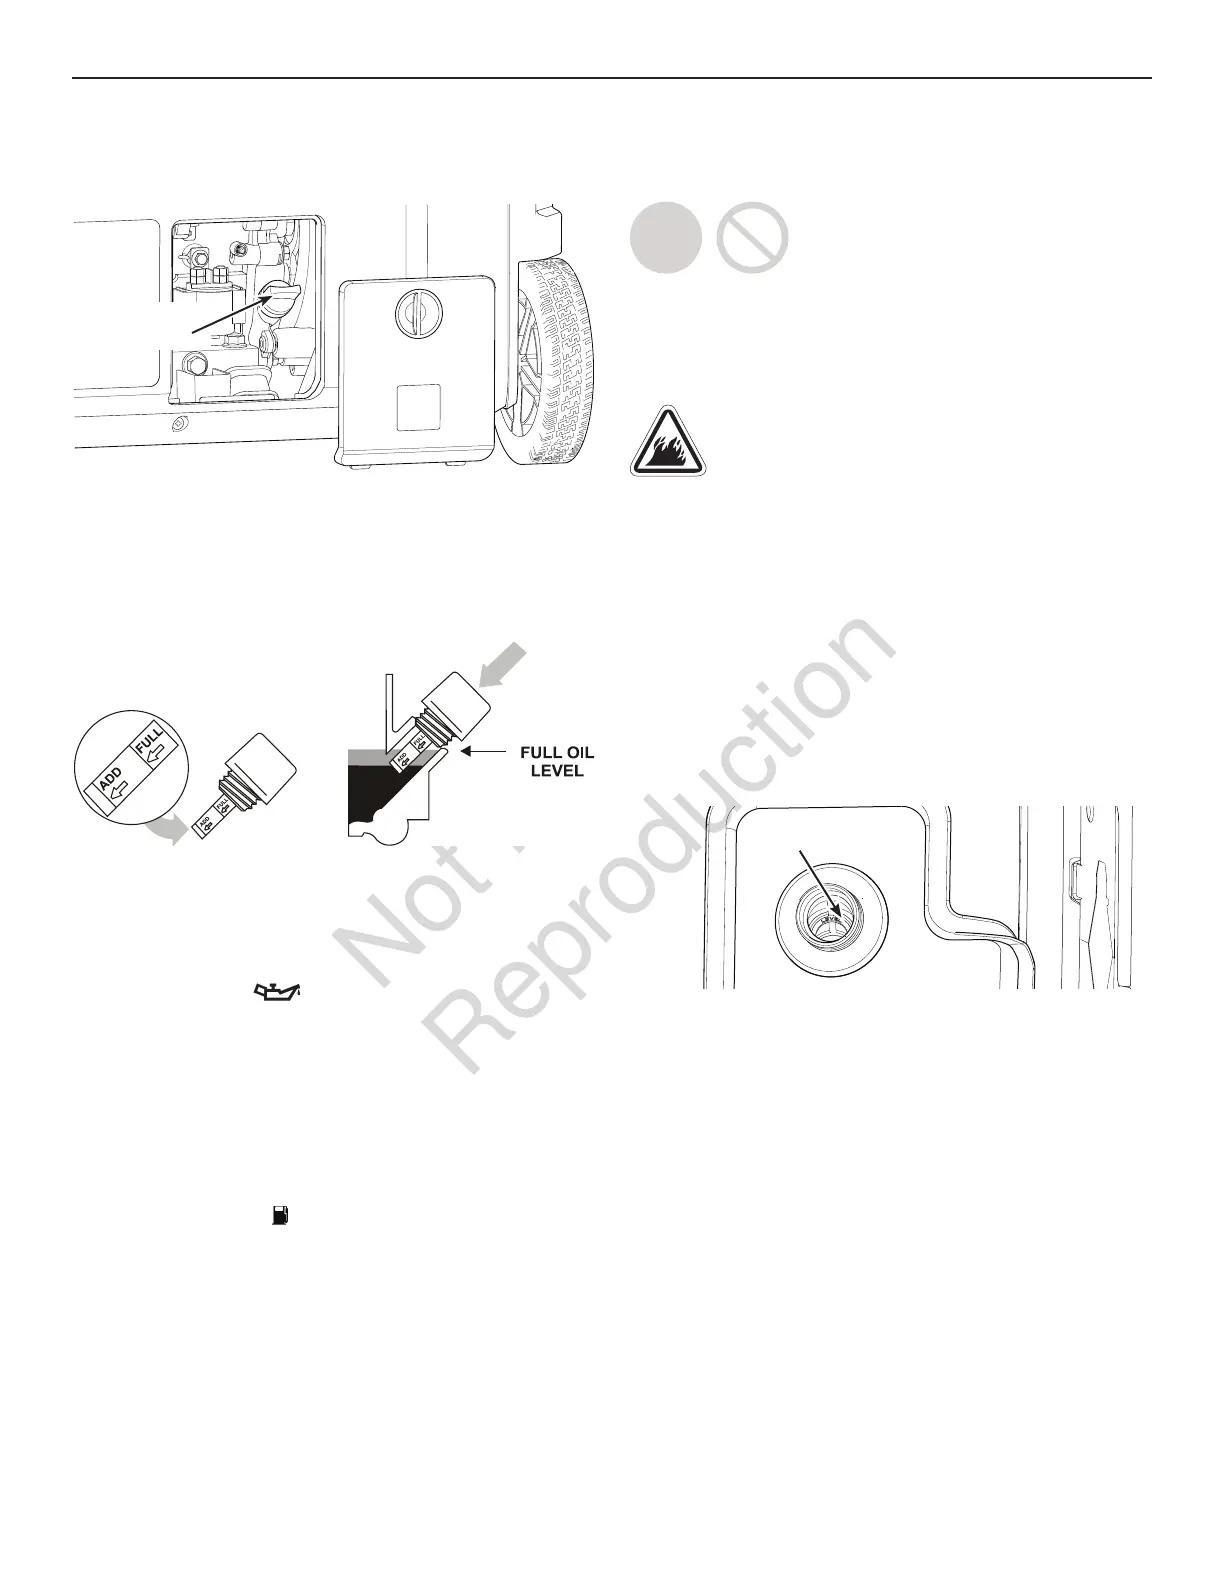
1. Move generator outdoors to a flat, level surface.
2. Turn dial and open cover over oil fill area.
3. Clean area around oil fill and remove oil fill cap/dipstick.
4. Using an oil funnel, slowly pour contents of oil bottle
into oil fill opening. Checking oil level frequently, fill to
point of overflowing.
NOTICE Do not screw in dipstick when checking oil level.
NOTICE Pause to permit oil to settle. Wipe dipstick clean
each time oil level is checked. DO NOT overfill.
5. Replace and fully tighten oil fill cap/dipstick.
6. Replace cover over oil fill area.
Low Oil Indicator
The low oil indicator system is designed to prevent engine
damage caused by not enough engine oil. If engine oil level
drops below a preset level, the yellow LED low oil indicator
light comes on and an oil level switch will stop the engine. If
engine stops or the yellow LED low oil indicator light comes
on when you try to start the generator, check the engine oil
level.
Fuel Level Monitor
There are 5 LED’s to indicate the level of fuel in the fuel
tank. The yellow bottom LED indicates your fuel tank
is empty or near empty. The remaining 4 green LED’s
indicate the fuel level in 25% increments from the bottom to
the top; 25%, 50%, 75% and 100%.
Fuel must meet these requirements:
• Clean, fresh, unleaded fuel with a minimum of 87 octane.
• Gasoline with an ethanol content up to 10% is acceptable.
E10
E15
NOTICE Do not mix oil in fuel or modify engine to run on
alternate fuels. Use of unapproved fuels could damage
engine and will not be covered under warranty.
See High Altitude for 5,000 ft. and above.
WARNING! Fuel and its vapors are extremely
flammable which could cause burns or fire
resulting in death or serious injury.
• Do not refuel during operation.
• Do not smoke during refueling.
• Turn engine off and let it cool at least 2 minutes before
removing fuel cap.
• Fill fuel tank outdoors. Keep fuel away from sparks, open
flames, pilot lights, heat, and other ignition sources.
Check fuel lines, tank, cap and fittings frequently for
cracks or leaks. Replace if necessary.
7. Slowly remove fuel cap to relieve pressure in tank.
8. Slowly add unleaded fuel to red max fill indicator in fuel
tank. Be careful not to fill above the indicator. This allows
adequate space for fuel expansion.
9. Install fuel cap and let any spilled fuel evaporate
before starting engine.
High Altitude
At altitudes over 5,000 ft. (1524 m), a minimum 85 octane
fuel is acceptable. To remain emissions compliant, high
altitude adjustment is required. Operation without this
adjustment will cause decreased performance, increased
fuel consumption,
and increased emissions.
See an authorized Briggs & Stratton dealer for high altitude
adjustment information. Operation of the engine at altitudes below
2,500 ft. (762 m) with the high altitude kit is not recommended.
Transporting
When transporting equipment, turn starting dial to off
position. Do not tip engine or equipment at an angle which
causes fuel to spill.
Operation
Max Fill Indicator
Oil Fill Cap/
Dipstick
 Loading...