13
EN
STEP 1
The ATyS M is delivered with
padlocking configured to the
O position.
To allow padlocking in all
positions (I - O - II), configure
the ATySM as follows before
installation. (Screw is located
at the back of the product).
STEP 3
Posidriv PZ2
2,2 lb-in 0,25 Nm
Posidriv PZ2
Posidriv PZ2
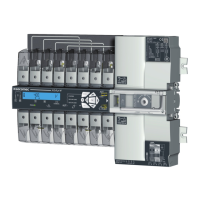
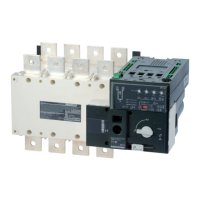
Installation
Padlocking configuration
Caution: Ensure that the product is installed on a flat rigid surface.
53
46
73,5
45
340
326
131,5
131,5
52 104 176
47
Recommended orientation
Recommended Ok Ok Ok Ok Ok
Posidriv PZ1
1 Nm
Tighten to avoid
movementonthe DINrail.
DIN RAIL
IEC 60715
6 mounting brackets
6x M6 screw - 2,5 Nm
2x
2x
STEP 2
Power Terminal Connections
Source supply side
Hexagonal Metric
Allen size 4
5,0 Nm
It is essential to tighten all used
terminals, with cables and/or
bridging bars, before use.
Hexagonal Metric
"
AWG
10 to 70 mm
2
6 to 70 mm
2
*
AWG
!
X8
Voltage taps provide 2x ≤ 1.5mm
2
connections.
They can be fitted in any terminals on the source
supply side. Do not use on the load side when
equipped with a bridging bar.
Load side
bridging bar.
125A: 1309 4006
160A: 1309 4016
Slotted head 3,5 mm
0,45 Nm
0,5 to 2,5 mm²
0,5 to 1,5 mm²
6 mm
10 to
70 mm²
15mm
MAX : 2
340
26
116
245
143
350
18
13
324
!
40-160A (4P)
Risk of electrocution, burns or injury to persons and /
details refer to the product instruction manual available on
the SOCOMEC website.
This product must always be installed and commissioned
by qualified and approved personnel.
Maintenance and servicing operations should be
performed by trained and authorised personnel.
Do not handle any control or power cables connected to
the product when voltage may be, or may become present
confirm the absence of voltage.
Ensure that no metal objects are allowed to fall in the
cabinet (risk of electrical arcing).
Failure to observe good enginering practises as well as to
others to serious injury or death.
Bridging bars 125A or 160A.
Additionnal aux contact block.
Polycarbonate enclosure.
Polycarbonate extension box.
Dual Power Supply (DPS).
ATS Control relay ATyS C30 + D10 or D20.
www.socomec.com/en/atys-d-m
To download, brochures, catalogues and technical manuals.
1 color Black. White paper 90g/m
Printing size: 420x297. Final size 210x297. This page visible first.
Cabinet / Back CONTROL /
Control by an external
STEP 3
CONTROL / AUX POWER
Terminals and wiring
t the product is in Manual Mode (front cover open).
ifok power up theproduct.
receive order inputs based on the following logic.
For contactor logic bridge
y contacts:
One module factory fitted (1309 0001).
1309 0001 or 1309 0011
To fit an AC, the switch must first be put in position 0. An auxiliary contact module comprises:
one NO/NC changeover contact for each position (I-0-II). To install use the long screws supplied
with the module.
1: Position I order
2: Position II order
3: Position 0 order
4: Power supply I (230 VAC)
5: Power supply II (230 VAC)
6: Voltage tap
7: Auxiliary contact block -
1 NO/NC contact per position I,
0, II (1x factory fitted )
A: Bridging bar (accessory)
B: Single-phase voltage sensing tap
(accessory)
C: F1/F2 = fuse 10 A gG
* Remote orders from ATS
controller such as ATyS C20/
C30/C40 or PLC, BMS, etc.
Type Terminal no. Description Characteristics
Recommanded
connection
cross-section
Inputs 101 / 102 Source 1 power supply
220Vac -20% (176Vac) to 240Vac
+20% (288Vac) 45 to 65Hz
0,5 to 2,5 mm²
(rigid)
0,5 to 1,5mm²
(stranded)
201 / 202 Source 2 power supply
313 Position 0 order if closed with 317.
Also allows control logic selection: contactor
(always closed) / impulse (close to switch)
Do not connect to any power supply
314 Position II order if closed with 317
315 Position I order if closed with 317
317 Common control terminal for 313 to 315
Auxiliary
contacts
unit.
11/12/14 Position I
Dry potential free contact
250Vac 5A AC1
24Vdc 2A
21/22/24 Position II
01/02/04 Position 0
Control of position I and II have priority on control of position 0.
LOAD
•
•
•
indicator before operating.
Slotted head 3mm 0,5 Nm
0,5 to 2,5 mm²
0,5 to 1,5 mm²
6 mm
5 A AC1
250 Vac
22 24 21
11 14 12
01 04 02
1309 0001
5 A AC1
250 Vac
22 24 21
11 14 12
01 04 02
1309 0011
!
Use 35mm
screws for
2 modules
Pozidriv PZ2 - 1 Nm
•
•
•
Configurable to I-0-II (see step 1).
Step 1
Step 2
Step 3
 Loading...