2726
V INSTALLATION
6 Make sure that the appliance and containers are clean and free of damage to
prevent contaminating any food.
1. Place the appliance on a stable, at, and heat and moisture resistant surface.
4
Make sure to have enough space around the appliance to process the bags with food.
2. Plug the power cable e into a power outlet.
The appliance switches on. The indicator light at the VACUUM & SEAL button lights up blue.
V CREATING A BAG FROM VACUUM FILM
1. Cut the vacuum lm to the desired size. The bag should be at least 10 cm larger than the food.
2. Pull up the release buttons 1.
3. Open the cover 3.
4. Place one open end of the vacuum lm on the sealing bar 8. Do not let the vacuum lm extend
into the vacuum chamber 9.
5. Close the cover 3.
6. Push down the cover 3 until you hear a click on both sides of the appliance.
6 Do not press the release buttons to close the cover.
7. Press the SEAL button y to seal the vacuum lm.
The green indicator light ashes. The process is done when the light switches o.
8. Pull up the release buttons 1.
9. Open the cover 3.
10. Remove the vacuum lm from the appliance. The vacuum lm should now be shaped like a bag,
with just one open end.
11. Check if the seal seam is straight and without creases. If this is not the case, cut o the seam and
repeat the process.
V VACUUMING AND SEALING A FILLED BAG
1. Pull up the release buttons 1.
2. Open the cover 3.
3. Fill a vacuum bag with food. The bag should be at least 10 cm larger than the food.
4
You can purchase accessories for your vacuum sealer at your supplier or Solis.
4. Clean the inside and outside of the open end of the bag.
5. Smooth out the open end of the bag. Make sure there are no wrinkles.
6. Place the open end of the bag inside the vacuum chamber 9.
6 Do not cover the air-extraction opening with the bag.
7. Push down the cover 3 until you hear a click on both sides of the appliance.
6 Do not press the release buttons to close the cover.
8. Press the VACUUM & SEAL button r to start the vacuum and sealing process.
• During the vacuum process, make sure liquid is not sucked into the vacuum
chamber. If liquid is sucked into the vacuum chamber, this is collected by the
drip tray. Remove and empty the drip tray. Wipe away the remaining liquid in
the vacuum chamber.
• Do not use oils or lubricants with this appliance. Lubricants and other liquids
can lead to damage to the appliance.
Safety instructions regarding maintenance
6 WARNING
• Switch o and unplug the appliance before service and when replacing parts.
• Let the appliance cool down before cleaning.
• Never immerse the appliance in water or place it in a dishwasher.
• Do not use abrasive chemical cleaning agents such as ammonia, acid or
acetone when cleaning the appliance. This can damage the appliance.
• Do not make any adjustments to the appliance, cable, plug or accessories.
V CONTENTS
Please check the contents of the package:
1x VAC SMART
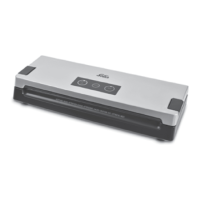
V APPLIANCE DESCRIPTION (SEE IMAGE A)
1 Release buttons
2 Membrane keyboard
3 Cover
4 Locking catches
5 Upper and lower seal
6 Rubber contact strip
7 Canister switch button
8 Sealing bar
9 Vacuum chamber
q Drip tray
w Air extraction opening
e Power cable in cable compartment
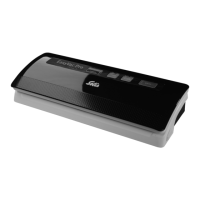
V CONTROL BUTTONS (SEE IMAGE B)
r VACUUM & SEAL button
t CANCEL button
y SEAL button