the Power Indicator LED (B) will flash on and off for approximate-
ly 45 seconds. During this time, the signal outputs are muted
while the two 6922 tubes are warming up and stabilizing.
As soon as the Power Indicator LED (B) stops flashing and lights
green, the SFD-2 is ready to play. Turn on the digital source and
the amplification system and select your source via the Input
Signal Selector Switch (E). The Signal Locking Indicator LED (C)
should light green when the powered digital source is selected.
Put the digital source in “PLAY” mode. You are now ready to sit
back, listen and enjoy.
At this point, if all is operating correctly, one may wish to experi-
ment with the phase feature. Move the Phase Control Switch (A)
from the 0° to the 180° position (or vice versa) to find the most
desirable and pleasurable effect and/or correction to the particu-
lar recording.
T R O U B L E S H O O T I N G
If at any time the SFD-2 Digital Processor fails to work properly, consult
this checklist:
1. Check that the AC Detachable Power Cord is plugged into the
SFD-2 Detachable Power Cord Socket (H) and is connected to a l i v e
source of AC power. For instance, if using a power bar, check that
the bar is turned o n.
2. Ensure that the digital source is connected to the appropriate digital
input (J,K & L) as selected by the Input Signal Selector Switch (E).
3. DISCONNECT THE AC POWER CORD from the SFD-2, remove
the chassis cover and check that:
• A “fast-blo” fuse, with a rating of 1.5 Amp/250 V (.075
Amp/250 V for European and Asian versions), is installed in the cylin-
drical tube next to the AC power socket (Figure 5).
• The AC power fuse is intact and has not blown. If the fuse has
blown the thin metal conductor will have melted and the glass may
appear “smoked”. If the fuse has blown, replace with a fuse of the
same rating (1.5 Amp/250V fast-blo for 100 to 120 volt countries
and 0.75 Amps/250V fast-blo for 200 to 240 volt countries). See
Figure 5 for location and removal.
NOTE: Under no circumstances should you replace the AC power
fuse with one of a higher current rating! Doing so may cause further
damage to the SFD-2 and will also void the warranty. In addition,
your continued protection from risk of fire or shock would be seriously
c o m p r o m i s e d .
4. DISCONNECT THE AC POWER CORD, remove cover and ensure
the 6922 tubes (or equivalent replacements) are plugged firmly into
their sockets as described in “INSERTION OF THE TUBES” .
5. Be sure the rest of the system is functioning properly (i.e. digital
source, power amplifiers, cables and connections, etc.).
6. Check that both the front panel Power Indicator LED (B) and the
Signal Locking Indicator LED (C) are lighted (glowing light green). If at
any time the Signal Locking Indicator LED (C) fails to light, check to see
that a CD is properly loaded in the transport or CD player and that the
unit is in the “P L A Y” mode. If all of the above troubleshooting steps
have been followed (including step 2) and the LEDs are not lighted
(dark green), contact your dealer or distributor for assistance.
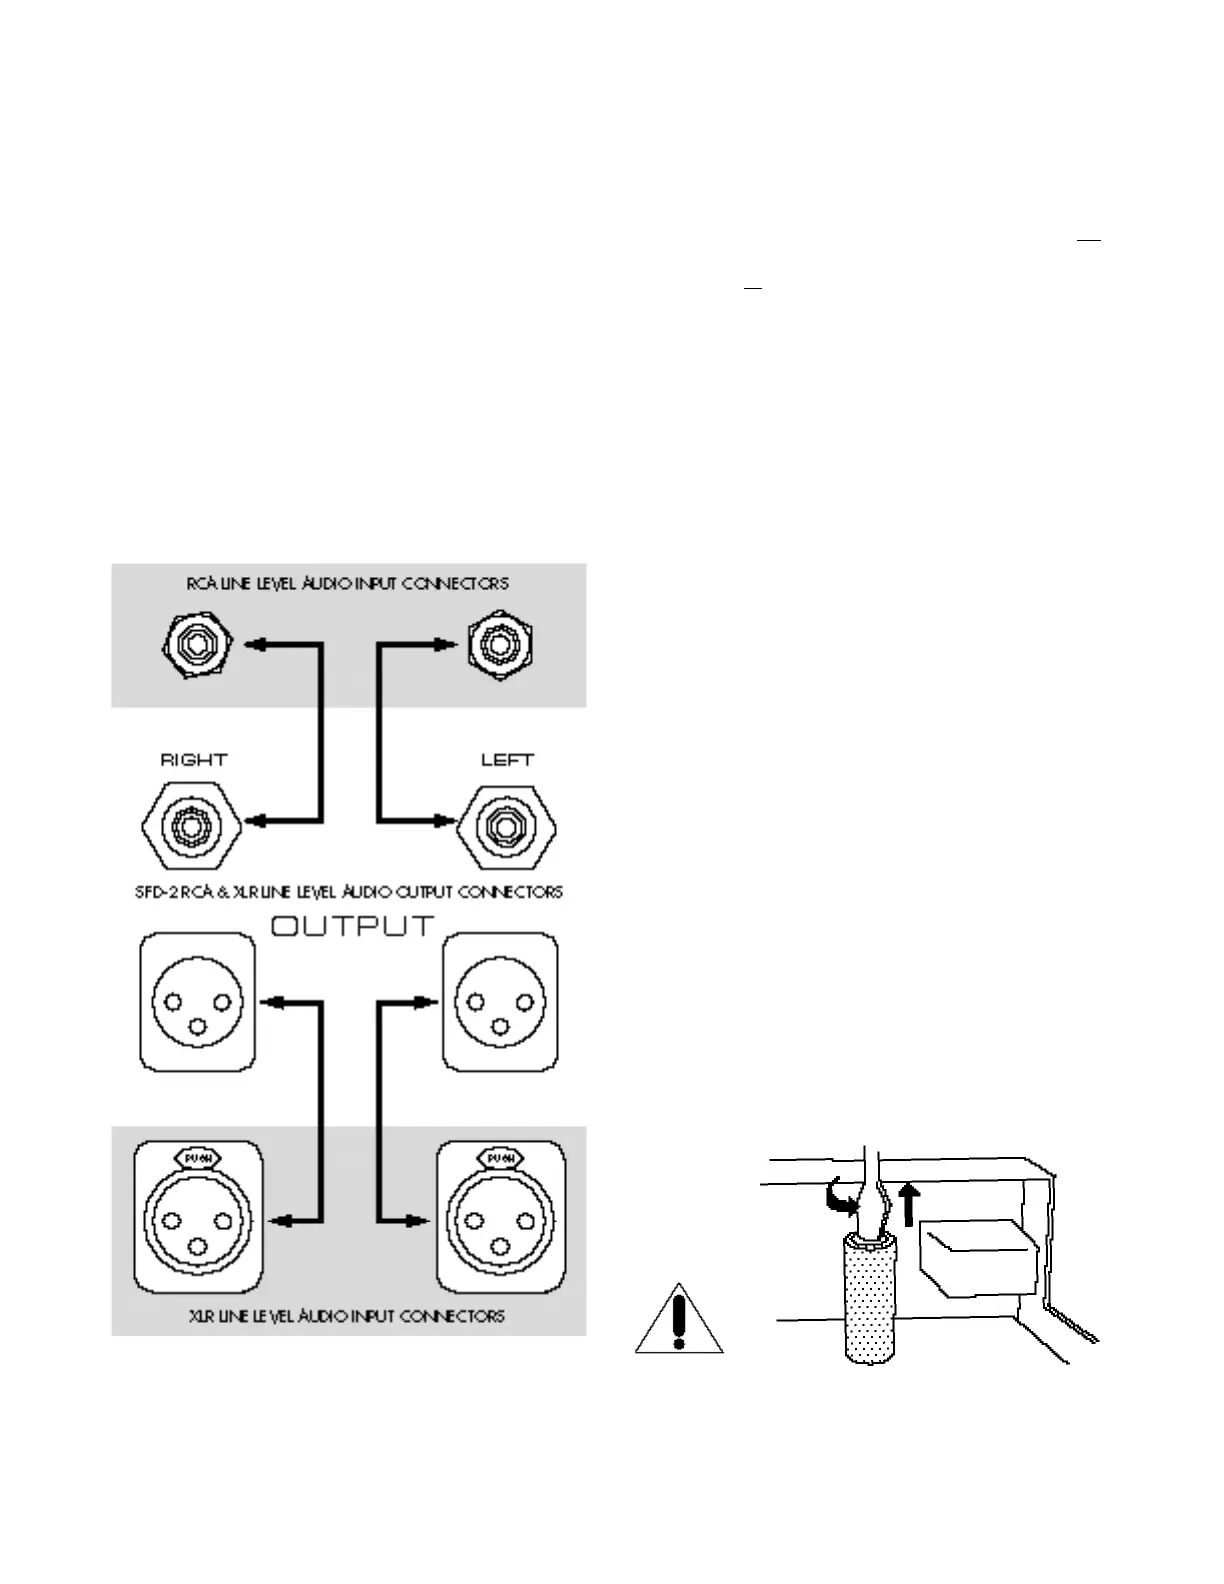
Figure 5 - Fuse location, next to AC power socket.
W A R N I N G
D I S C O N N E C T the AC Detachable Power Cord from the SFD-2
b e f o r e removing the chassis cover.
Figure 4- The SFD-2 XLR balanced and RCA single-ended audio
output connections to a line level amplification device - right chan-
nel to right channel and left channel to left channel. Both the XLR
and RCA output connections can be hooked up in unison,
although this setup would be system dependent.
 Loading...