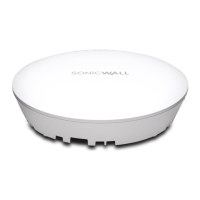
The large T-bar mounting bracket or the small T-bar mounting clips can be
used to mount the Access Point on a drop-ceiling T-bar.
Large Mounting Bracket for Crossed Slots Access Point:
To attach the bracket to the Access Point:
1 Press the flat side of the bracket to the underside of the Access Point,
lining up the holes in the bracket with the screw insertion points in the
slot centers on the Access Point.
2 Insert the provided screws (#6 Phillips thin head (3.5mm)) and tighten
them with a screwdriver to attach the bracket to the Access Point.
To mount the Access Point to a ceiling T-bar using the bracket:
1 Supporting the Access Point in one hand, position the T-bar clips on
the bracket over the edge of the ceiling T-bar.
2 Rotate the Access Point counterclockwise (to the left when looking up
at it) until the bracket is securely attached to the T-bar.
Small T-bar Mounting Clips:
To attach the mounting clips and mount the Access Point to a T-bar:
1 Use the included small screws to attach the mounting clips to the
underside of the Access Point, making both brackets parallel.
2 Supporting the Access Point in one hand, clip the edge of each bracket
over the edge of the T-bar. Make sure the Access Point is securely
attached to the T-bar before releasing it.
If T-bar mounting is not appropriate, you can mount the Access Point on
the ceiling or wall using the provided screws and anchors.
To mount the crossed slot Access Point using screws and anchors:
1 Measure the distance between the screw insertion points on the
underside of the Access Point.
2 On the mounting surface, mark the location to make two screw holes
separated by the above measurement. The marks should be
horizontally parallel to each other.
3 Screw the drywall anchors into the ceiling tile or drywall to their full
depth.
4 Insert the screws into the anchors, and screw them in deep enough to
leave minimal space between the screw heads and the wall surface.
5 Supporting the Access Point in your hands, securely fit the mounting
slots of the Access Point onto the screw heads.
Copyright © 2020 SonicWall Inc. All rights reserved.
SonicWall is a trademark or registered trademark of SonicWall Inc. and/or its affiliates in the
U.S.A. and/or other countries. All other trademarks are property of their respective owners.
The information in this document is provided in connection with SonicWall Inc. and/or its
affiliates' products. No license, express or implied, by estoppel or otherwise, to any
intellectual property right is granted by this document. SonicWall Inc. and/or its affiliates do
not make any commitment to update the information contained in this document. For more
information, visit http://www.sonicwall.com/legal.
SonicWall SonicWave/SonicPoint Mounting and Installation Guide
Updated - July 2020
232-005304-50 Rev A
NOTE: To remove the Access Point from the ceiling T-bar, gently
press it upward and rotate it clockwise (to the right when looking up
at it) until the bracket detaches from the T-bar.
SonicWall
®
SonicWave/SonicPoint
Mounting and Installation
Guide

 Loading...