Speaker Installation Guide
Guide d’installation des enceintes
4-456-343-42(1)
©2013 Sony Corporation Printed in Malaysia
(1)
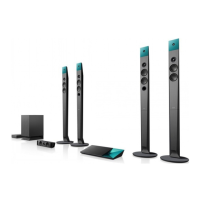
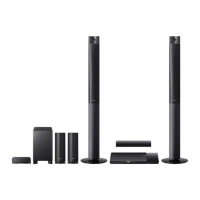
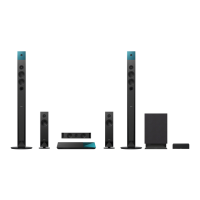
Assembling the tall-type speakers (BDV-N9100W/N8100W only)
Assemblage des enceintes colonne (BDV-N9100W/N8100W uniquement)
(BDV-N9100W/N8100W )
(BDV-N9100W/N8100W )
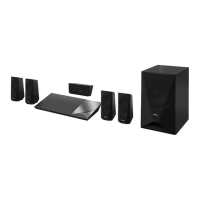
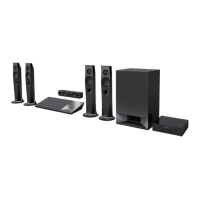
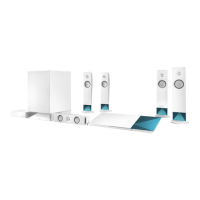
List of parts/Liste des pièces/ /
To install speakers on a wall and satellite speaker on the stand, see the reverse side.
Pour installer les enceintes au mur et l’enceinte satellite sur le support, reportez-vous au
verso.
.
.
Note on carrying the subwoofer
Remarque relative au transport du caisson de graves
Place your hand into the hole at the slit of the subwoofer when carrying it.
Placez la main dans le trou au niveau de la fente du caisson de graves lorsque vous transportez ce
dernier.
.
.
Hole
Trou
Slit
Fente
1
2
3
,
4
Colored tube
Tube de couleur
5
* BDV-N9100W only
* BDV-N9100W uniquement
BDV-N9100W
*
BDV-N9100W
*
.
.()
() () 1
.
) 2
() . 70 () .(
.()
:)L( :)R(
:
*)L( :*)R(
.() (* ) 3
.()
.(
) 4
() () 5
.(* )
.BDV-N9100W *
.
. () () ()
1
.
) 2
. () 70 . (
. () ()
:)L( :)R(
:
*)L( :*)R(
. () (* ) 3
. ()
. (
) 4
() () 5
. (* )
.BDV-N9100W *
,
BDV-N9100W/N8100W/N7100W
*
English
Spread a cloth on the floor to avoid damaging the floor when you
assemble the speakers.
1 Place the base () on the lower part of the speaker (), and secure it with
three screws (
).
Be sure use three screws for each speaker.
2 Choose a speaker cord by matching the color of the label on the back of a
speaker with the speaker cord’s connector (see below). Fold the speaker cord
(
) over about 70 cm and twist it. Thread the speaker cord up through the base
() and out the top of the lower part of the speaker ().
Front left speaker )L(: White Front right speaker )R(: Red
Surround left speaker )L(*: Blue Surround right speaker )R(*: Gray
3 Place the upper part of the speaker ( and *) onto the lower part of the
speaker (). Then secure the upper and lower parts of the speaker with a screw
().
4 Connect the speaker cord (
).
5 Remove any slack from the speaker cord (
) by pulling it from below the base
(), and then slide the speaker cord into the indentation at the rear of the
upper part of the speaker ( and
*).
* BDV-N9100W only.
Français
Recouvrez le sol d’un linge pour éviter de l’endommager lors de
l’assemblage des enceintes.
1 Placez la base () sur la partie inférieure de l’enceinte () et fixez-la au moyen
de trois vis ().
Veillez à utiliser trois vis par enceinte.
2 Choisissez un cordon d’enceinte de sorte que la couleur de l’étiquette située à
l’arrière d’une enceinte corresponde au connecteur du cordon d’enceinte (voir
ci-dessous). Pliez le cordon d’enceinte () sur 70 cm environ et tordez-le. Faites
passer le cordon d’enceinte vers le haut à travers la base () et faites-le
ressortir par le haut de la partie inférieure de l’enceinte ().
Enceinte avant gauche )L( : Blanc Enceinte avant droite )R( : Rouge
Enceinte surround gauche )L(* : Bleu Enceinte surround droite )R(* : Gris
3 Placez la partie supérieure de l’enceinte ( et *) sur la partie inférieure de
l’enceinte (). Fixez ensuite les parties supérieure et inférieure de l’enceinte à
l’aide d’une vis ().
4 Raccordement du cordon d’enceinte (
).
5 Tendez le cordon d’enceinte (
) en tirant dessus à partir du dessous de la base
(), puis faites-le glisser dans le retrait situé à l’arrière de la partie supérieure
de l’enceinte ( et
*).
* BDV-N9100W uniquement.