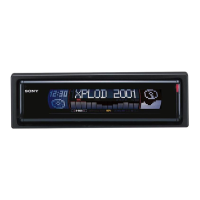
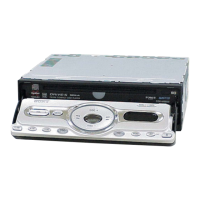
T
O
P
182 mm
53 mm
T
O
P
M ount ing t he unit in a Japanese
car (6)
You may not be able to install this unit in some
makes of Japanese cars. In such a case, consult
your Sony dealer.
Note
To prevent malf unct ion, install only wit h the
supplied screw s 3.
Warning w hen installing in a car
w it hout ACC (accessory)
posit ion on t he ignit ion key
sw itch
Be sure t o press (OFF) on the unit f or t w o
seconds t o t urn off the clock display aft er
turning off the engine.
When you press (OFF) only momentarily, the
clock display does not turn off and this causes
battery wear.
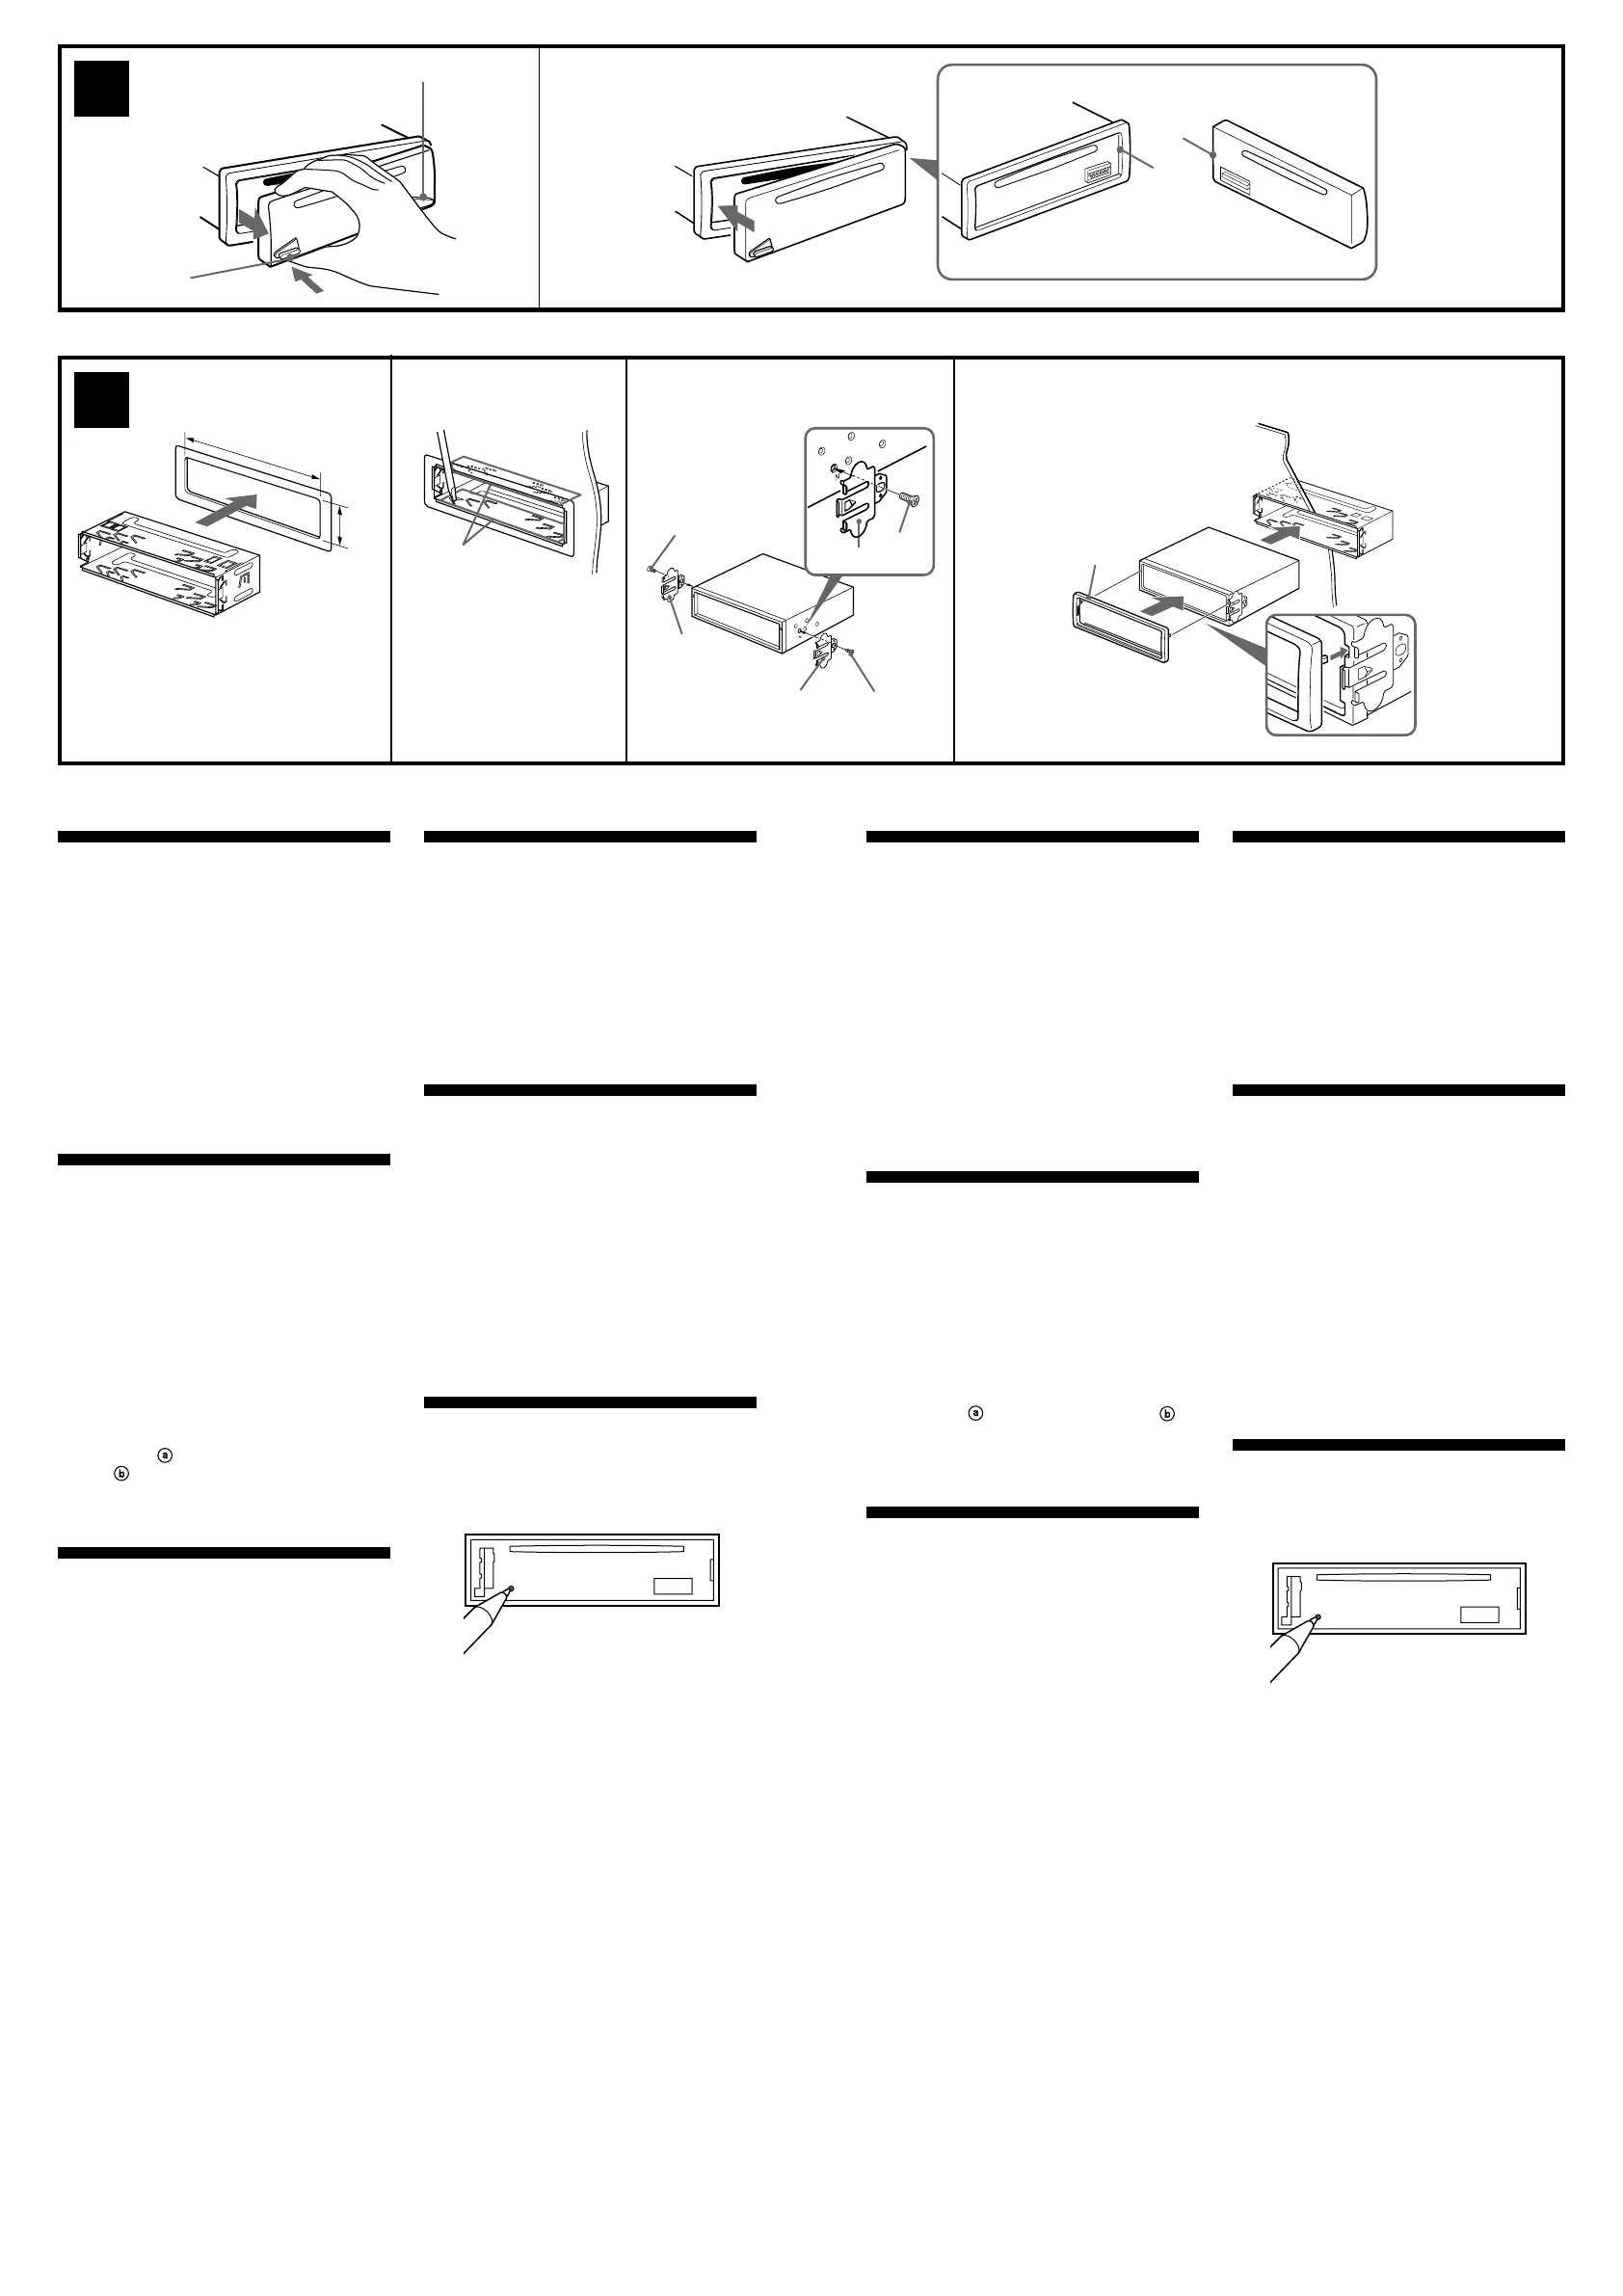
RESET but t on
When the installation and connections are
completed, be sure to press the RESET button
with a ball-point pen, etc.
1
To support the unit
Pour installer l’appareil
Sujeción de la unidad
Dashboard
Tableau de bord
Salpicadero
With the TOP marking up.
Avec l’inscription TOP vers le haut.
Con la marca TOP hacia arriba.
Bend these claws outward
for a tight fit, if necessary.
Plier ces griffes pour assurer
une prise correcte si
nécessaire.
Si es necesario, doble estas
uñas hacia fuera para que
encaje firmemente.
2
2
3
23
34
1
1
4
5
A
Precaut ions
•Choose the installation location carefully so
that the unit will not interfere with normal
driving operations.
•Avoid installing the unit in areas subject to
dust, dirt, excessive vibration, or high
temperatures, such as in direct sunlight or near
heater ducts.
•Use only the supplied mounting hardware for
a safe and secure installation.
M ount ing angle adjustment
Adjust the mounting angle to less than 60°.
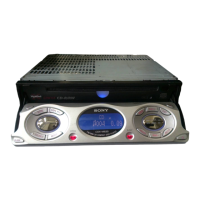
How t o det ach and at t ach the
front panel (4)
Before installing the unit, detach the front
panel.
4-A To det ach
Before detaching the front panel, be sure to
press (OFF) first. Then press (RELEASE) to
open the front panel, then slide the front panel
to the right side, and pull out the left side of the
front panel.
4-B To at t ach
Place the hole
in the front panel onto the
spindle on the unit as illustrated, then push
the left side in.
M ount ing example (5)
Installation in the dashboard
B
2
34
Précaut ions
•Choisir soigneusement l’emplacement
d’installation pour que l’appareil ne gêne pas
le chauffeur pendant la conduite.
•Eviter d’installer l’appareil dans un endroit
exposé à des températures élevées, comme en
plein soleil ou à proximité d’une bouche d’air
chaud, ou à de la poussière, saleté ou
vibrations violentes.
•Pour garantir un montage sûr, n’utiliser que le
matériel fourni.
Réglage de l’angle de m ontage
Ajuster l’inclinaison à un angle inférieur à 60°.
Retrait et pose de la façade (4)
Avant d’installer l’appareil, déposer la façade.
4-A Pour ret irer
Avant de retirer la façade, ne pas oublier
d’appuyer d’abord sur (OFF). Appuyer sur
(RELEASE), puis faire glisser la façade vers la
droite et la retirer par la gauche.
4-B Pour att acher
Fixez la partie
de la façade sur la partie
de
l’appareil, comme indiqué sur l’illustration, puis
appuyez sur le côté gauche jusqu’au déclic.
Exemple de m ont age (5)
Installation dans le tableau de bord
Installat ion de l’appareil dans
une voit ure japonaise (6)
Cet appareil ne peut pas être installé dans
certaines voitures japonaise. Consultez, dans ce
cas, votre concessionnaire Sony.
Remarque
Pour évit er t out dysfonct ionnement, ut ilisez
uniquement les vis 3 pour le montage.
Avertissem ent en cas
d’inst allat ion dans une voit ure
dont le contact ne comporte
pas de position ACC
(accessoires)
N’oubliez pas d’appuyer sur le bout on
(OFF) de l’appareil pendant deux
secondes après avoir coupé le m ot eur de
façon à désactiver l’aff ichage de l’horloge.
Si vous appuyez brièvement sur (OFF),
l’affichage de l’horloge n’est pas désactivé, ce
qui provoque une usure de la batterie.
Touche RESET
Quand l’installation et les connexions sont
terminées, appuyer sur la touche RESET avec un
stylo à bille, etc.
(OFF)
(RELEASE)
A
B
Downloaded from: https://www.usersmanualguide.com/
 Loading...