Do you have a question about the Sony DSC-T200 Cyber-shot® and is the answer not in the manual?
Guides users on how to shoot images using the camera's automatic adjustment features.
Explains how to adjust focus, metering, ISO sensitivity, and exposure value.
Guide on how to change between shooting modes like Auto Adjustment, Scene Selection, and Program Auto.
Describes various scene modes and their optimal usage conditions for better image capture.
Explains how to access and view images through the camera's HOME screen interface.
Covers options for editing and enhancing still images after capture.
Details how to manage memory cards and internal memory, including formatting and folder creation.
Explains how to adjust various camera settings like beep sounds, function guides, and initialization.
Provides instructions for connecting the camera to a TV for image viewing using a standard cable.
Introduces software and procedures for using the camera with a Windows computer.
Step-by-step guide on installing the necessary software from the provided CD-ROM.
Outlines the different methods available for printing captured still images.
Details the process of printing images directly from the camera to a PictBridge compatible printer.
Guide on how to use photo printing services with your memory card.
Offers solutions for common problems encountered while using the camera.
Explains various warning codes and messages displayed by the camera and their meanings.
Advises on power source compatibility and usage when operating the camera internationally.
Provides information on compatible Memory Stick Duo types and proper usage.
Covers battery charging, usage tips, life, and compatible battery types.
Explains how to use the battery charger and troubleshooting for charging issues.
Explains the process of achieving sharp focus on a subject using the camera's autofocus.
Details how exposure settings like shutter speed and aperture affect image brightness.
Explains the relationship between pixel count, image quality, and file size.
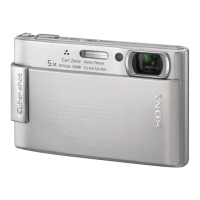
Identifies the key physical components of the DSC-T200 camera model.
Describes the various icons and indicators visible on the screen during still image shooting.
Explains how to interact with the camera's touch screen interface and its buttons.
Covers options for customizing the on-screen display, including normal, simple, and image-only modes.
Discusses how images are stored in the camera's internal memory and how to manage them.
Instructions on framing the subject and initiating focus by touching the screen.
How to activate the camera's playback mode to review captured images.
Method for navigating between images in playback mode using touch controls.
Initial step to access images for deletion via the playback function.
Procedure for deleting images using the camera's main menu options.
Explains the HOME screen as the central hub for accessing all camera functions and settings.
Overview of various pre-set shooting modes tailored for specific scenes like Landscape or Night.
Explains how to set the camera for normal shooting or burst shooting.
Details how to adjust color tones based on lighting conditions for accurate colors.
Allows users to modify image colors, choosing from Normal, Vivid, or Natural effects.
How to view individual images one by one.
Displays multiple images as thumbnails for quick browsing.
Automatically plays back images in a sequence, often with music.
Provides tools to modify images, such as applying soft focus or partial color effects.
Allows users to remove unwanted images from the memory.
Enables protection of images against accidental deletion or formatting.
Instructions on how to access the painting function to add drawings or stamps.
Explains how to modify default settings for memory management and general camera options.
Adjusts basic settings like beep sounds, function guide display, and camera initialization.
Configures USB connection modes and video output types (SD/HD).
Adjusts shooting-related settings like AF illuminator and grid lines.
Instructions for connecting the camera to an HD TV for high-definition image viewing.
Step-by-step guide on installing the necessary software from the provided CD-ROM.
Summarizes the capabilities and features of the Picture Motion Browser software.
Explains the steps to establish a connection between the camera and the computer for data transfer.
Lists the recommended hardware and OS specifications for Macintosh computers.
Instructions for viewing the Cyber-shot Step-up Guide on a Windows computer.
Details the process of printing images directly from the camera to a PictBridge compatible printer.
Guide on how to use photo printing services with your memory card.
Offers solutions for common problems encountered while using the camera.
Explains various warning codes and messages displayed by the camera and their meanings.
Provides information on compatible Memory Stick Duo types and proper usage.
Covers battery charging, usage tips, life, and compatible battery types.
Explains how to use the battery charger and troubleshooting for charging issues.
Information about optional Cyber-shot stations for faster charging and connectivity.
Details how to use the remote control for the Cyber-shot Station accessory.
| Sensor Resolution | 8.1 Megapixels |
|---|---|
| Optical Zoom | 5x |
| LCD Screen Size | 3.5 inches |
| Image Stabilization | Optical |
| ISO Sensitivity | Auto, 80, 100, 200, 400, 800, 1600, 3200 |
| Battery Type | NP-BD1 Lithium-Ion |
| Camera Type | Compact |
| Sensor Type | CCD |
| Image Sensor Size | 1/2.5 inch |
| Digital Zoom | 2x |
| Shutter Speed | 1/4 - 1/1000 sec |
| Storage Media | Memory Stick Duo / PRO Duo |
| Video Resolution | 640 x 480 |
| Dimensions | 93.5 x 59.3 x 20.4 mm |
| Focal Length | 35 - 175 mm (35mm equivalent) |
| Aperture | f/3.5 - f/4.4 |


 Loading...