Do you have a question about the Sony Handycam DCR-HC28 and is the answer not in the manual?
Guidelines for safe operation, covering power sources, polarization, overloading, and handling objects.
Instructions for cleaning the unit and safety guidelines for installation, including water and ventilation.
Measures for lightning protection and procedures for damage requiring service.
Information on returning used rechargeable batteries for recycling.
Section to record model and serial numbers for future reference.
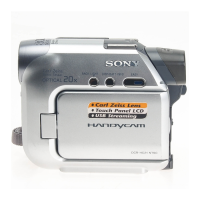
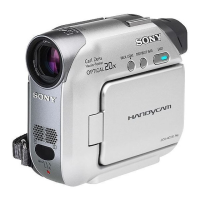
Important usage tips, including cassette compatibility and component information.
Verification of all items included in the camcorder package.
Step-by-step instructions for charging the rechargeable battery.
Procedure for turning on the camcorder and holding it correctly.
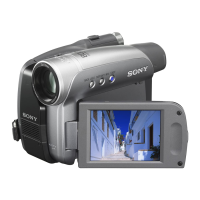
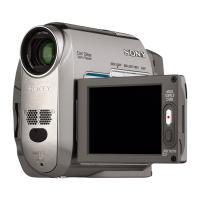
Guide to optimizing screen and viewfinder visibility for recording.
Instructions for operating the camcorder via the touch screen interface.
Procedure for configuring the camcorder's internal clock settings.
Instructions for loading a mini DV cassette into the camcorder.
Simplified operation mode with automatic settings for ease of use.
Fundamental steps for starting and stopping video recording.
Instructions for playing back recorded video content.
Overview of essential features like zoom, focus, and special effects.
Explanation of on-screen indicators during recording and playback.
Methods to locate specific points on the tape, such as END SEARCH and EDIT SEARCH.
Viewing recently recorded scenes and connecting for TV playback.
General guide to navigating and selecting menu options.
Details on functions assigned to physical buttons and their availability.
Categorized list of available menu settings like Manual, Camera, VCR, Tape, and Setup.
Instructions for copying footage to external recording devices using various cables.
Capturing video from TV or VCR/DVD devices using an i.LINK cable.
Adding new audio to existing recordings without erasing original sound.
Identification of connection ports like DV Interface and A/V OUT.
Troubleshooting common operational issues and Easy Handycam mode problems.
Resolving power-related problems and battery charging/discharge issues.
Addressing display anomalies, rippling effects, and viewfinder problems.
Solutions for cassette ejection, indicator, and noise issues.
Troubleshooting recording failures and problems with focus, SteadyShot, and backlight.
Resolving playback errors, sound issues, and unavailable menu items.
Troubleshooting connection, dubbing, and computer recognition problems.
Interpreting and responding to various system alerts and messages.
Guidelines for power supply and TV color systems when traveling internationally.
Information on compatible tape formats, handling, and preventing accidental erasure.
Features, charging, usage, and storage information for the InfoLITHIUM battery.
Explanation of the i.LINK digital interface, its capabilities, and connection methods.
Care instructions for the camcorder, LCD screen, lens, and general handling advice.
Verification of all items included in the package.
Procedure for charging the camcorder's InfoLITHIUM battery.
Instructions for turning on the camcorder and holding it firmly.
Guide to optimizing screen and viewfinder settings for clear viewing.
Operating the camcorder via the touch-sensitive screen for playback and settings.
Procedure for configuring the camcorder's internal clock.
Instructions for loading a mini DV cassette into the camcorder.
Fundamental steps for initiating video recording.
Instructions for playing back recorded video content.
| imaging device | 1/6" CCD |
|---|---|
| pixel gross | 680K |
| video actual | 340K Pixels |
| steadyshot image stabilization | Yes |
|---|---|
| minimum illumination | 5 Lux |
| low light capability | NightShot Plus system |
| analog audio/video outputs | Yes (Multi A/V) |
|---|---|
| digital audio/video inputs | Yes (via i.LINK) |
| digital audio/video outputs | Yes (via i.LINK) |
| lcd size | 2.5" |
|---|---|
| lcd resolution | 123K Pixels |
| viewfinder resolution | 123K Pixels |
| 35mm equivalent | 44-880mm (4:3), 48-960mm (16:9) |
|---|---|
| aperture | f1.8-3.1 |
| optical zoom | 20X |
| power consumption | 1.8W/2.1W (VF/LCD) |
|---|---|
| battery type | InfoLITHIUM (NP-FP30) |
| power requirements | 7.2V (battery), 8.4V (AC Adaptor) |
| weight | 14 oz (420g) |
|---|---|
| measurements | 2 5/8" x 3 1/8" x 4 1/2" (65 x 79 x 113mm) |