EasyManua.ls Logo

Sony HT-SD40 - User Manual

Sony HT-SD40
4 pages
Print Icon
To Next Page IconTo Next Page
Loading...
Please read this manual carefully before operating your unit and
retain for future reference.
814100250
PRINTED IN MEXICO
Elbrd: J.M.
SC: 06-19-2024
OBPN: 5-034-823-11
SHDM: HTSD40
NOTE: The remote control vary depend of model: The buttons on the remote control may
have a di erent name or location than the remote control shows in this manual.
The image shown here is for illustrative purposes only and may be subject to change.
NOTE: The actual number of ports and their locations may vary depending on the model.
impimir solo por este
programa:
motivo: la resolucion
(kit not included)
814100250
*814100250*
Question and Answer IconNeed help?

Do you have a question about the Sony HT-SD40 and is the answer not in the manual?

Summary

Installation Methods

Shelf or Stand Installation

Instructions for placing the soundbar and subwoofer on a surface for setup.

Wall Mounting Installation

Guide for securing the soundbar and subwoofer to a wall.

Connecting to Your TV

HDMI ARC Connection

Connects the system via HDMI cable, utilizing the ARC feature for audio transmission.

Optical Digital Connection

Connects the system via an optical digital cable when ARC is not supported.

Power Connection and Initial Power-On

Connecting AC Power Cords

Details on connecting the AC power cords for the TV and speaker system.

Listening to Sound

Basic Operation and Volume Adjustment

Guide on powering on, selecting input, and adjusting volume and bass levels.

Overview

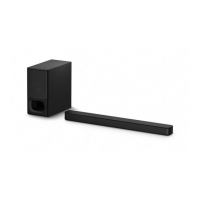
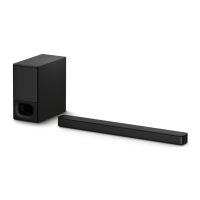
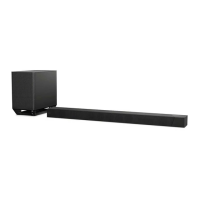
This document describes the Sony Sound Bar, a speaker system designed to enhance TV audio. It functions as an external audio output for televisions, offering improved sound quality for various media content. The system typically includes a bar speaker and a subwoofer, which work together to deliver a more immersive audio experience.

Function Description:

The Sony Sound Bar primarily serves as an audio enhancement system for televisions. It connects to a TV to output audio, providing clearer dialogue, richer bass, and a more dynamic soundstage compared to a TV's built-in speakers. The system supports various audio inputs, allowing it to be connected to different devices such as Blu-ray Disc players, set-top boxes, and gaming consoles.

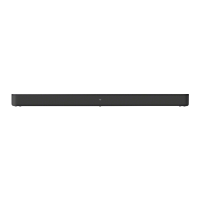
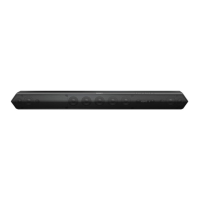
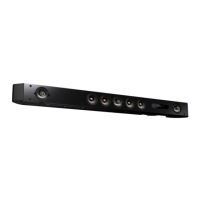
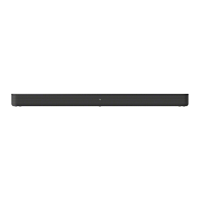
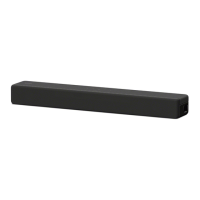
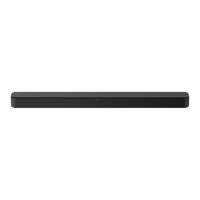
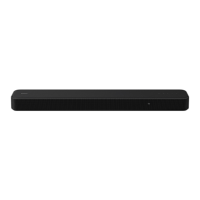
The bar speaker houses multiple drivers to produce mid-range and high-frequency sounds, often designed to be placed directly in front of or below the TV. The subwoofer is dedicated to reproducing low-frequency sounds (bass), adding depth and impact to movies, music, and games. The wireless connection between the bar speaker and the subwoofer simplifies setup and allows for flexible placement of the subwoofer within the room.

The sound bar system can be controlled using a dedicated remote control, which allows users to power the system on/off, select input sources, adjust volume levels for both the main system and the subwoofer, and potentially apply various sound modes or effects. The system's front panel display provides visual feedback on the current status, such as the selected input or volume level.

A key feature is its compatibility with HDMI ARC (Audio Return Channel), which allows audio to be sent from the TV to the sound bar through a single HDMI cable, simplifying connectivity and enabling control of basic sound bar functions (like power and volume) using the TV's remote. For TVs without ARC, an optical digital cable can be used to transmit audio.

The sound bar is designed for both shelf/stand placement and wall mounting, offering flexibility to integrate into different home entertainment setups.

Usage Features:

  1. Installation Flexibility: The sound bar can be installed in two primary ways:

    • On a shelf/stand: The bar speaker is placed horizontally in front of or below the TV, and the subwoofer is positioned nearby.
    • Mounting on a wall: The bar speaker can be mounted on the wall below the TV, and the subwoofer is placed on the floor. The subwoofer should be placed at least 5 cm (2 inches) away from TV racks, walls, or other obstructions to ensure optimal performance and prevent interference. It should not be laid on its side.
  2. Connection to TV:

    • HDMI ARC Connection (Recommended): If the TV has an HDMI IN jack labeled "ARC," a single HDMI cable connects the TV's HDMI ARC port to the sound bar's HDMI OUT (ARC) port. This simplifies wiring and enables the TV to send audio to the sound bar while also allowing some control of the sound bar via the TV remote.
    • Optical Digital Cable Connection: If the TV does not support ARC, an optical digital cable is used to connect the TV's optical digital output to the sound bar's TV IN (OPTICAL) jack. An HDMI cable would still be needed for video pass-through if other devices (like Blu-ray players) are connected to the sound bar, but audio from the TV itself would come via the optical cable. It is crucial to correctly orient the optical cable connector to avoid damage.
  3. Power Connection: After connecting the audio cables, the AC power cords (mains leads) for both the bar speaker and the subwoofer are connected to AC outlets. It's important to connect the TV's power cord and turn on the TV first. The sound bar system will display "HELLO" on its front panel during startup, and the remote control will not function until this message disappears.

  4. Basic Operation:

    • Power On/Off: The system is powered on or off using the (power) button on the remote control.
    • Subwoofer Status: The power indicator on the subwoofer should light up green, confirming a successful wireless connection with the bar speaker.
    • Input Selection: The INPUT button on the remote control is used to select the desired audio input, typically "TV" for TV audio.
    • Volume Adjustment: The (volume) +/- buttons adjust the overall speaker system volume.
    • Bass Adjustment: The BASS +/- buttons adjust the subwoofer's volume independently, allowing users to customize the bass level.
  5. Troubleshooting Muting: If the system enters muting mode, especially if the TV and sound bar are turned on in a specific order, it is recommended to turn on the TV first, then the sound bar.

Maintenance Features:

The document does not explicitly detail specific maintenance features, but general best practices for electronic devices apply:

  • Cleaning: The device should be kept clean. Dusting the bar speaker and subwoofer regularly with a soft, dry cloth can prevent dust buildup, which can affect performance and aesthetics. Avoid using liquid cleaners or abrasive materials.
  • Cable Management: Ensure all cables are securely connected and not strained or kinked, which can lead to damage over time.
  • Environmental Conditions: The device should be operated within recommended environmental conditions (e.g., temperature, humidity) to ensure longevity. Avoid placing it in direct sunlight, near heat sources, or in excessively humid environments.
  • Software Updates: While not explicitly mentioned in the provided excerpts, modern sound bars often receive firmware updates to improve performance, add features, or fix bugs. Users should check the manufacturer's website for any available updates and follow the instructions for installation.
  • Battery Replacement: The remote control requires batteries (not included with the unit). Users should replace them when the remote's functionality diminishes.

The remote control design and button layout may vary slightly depending on the specific model, but the core functions remain consistent across the Sony Sound Bar range. The images provided in the manual are for illustrative purposes and may differ slightly from the actual product.

Sony HT-SD40 Specifications

General IconGeneral
Wall mounting kitNo
HDMI in0
Line-in-
Bluetooth version5.0
Number of HDMI outputs1
Connectivity technologyWired & Wireless
Power sourceAC
Power consumption (typical)0.5 W
Subwoofer connectivityWireless
Woofer diameter (subwoofer)7.5 \
Soundbar speaker RMS power330 W
Audio output channels2.1 channels
Product colorBlack
Volume controlButtons
Country of originMalaysia
Audio formats supportedDTS, LPCM, SBC
Package depth968 mm
Package width248 mm
Package height53 mm
Package weight13000 g
Weight and Dimensions IconWeight and Dimensions
Depth64 mm
Width900 mm
Height88 mm
Weight2400 g
Cord length- m
Subwoofer depth387 mm
Subwoofer width192 mm
Subwoofer height400 mm
Subwoofer weight7300 g

Related product manuals