You will find
information
on
using lens in this manual. Precautions
common
to lenses, such as notes
on
use will be
found
in
"Precautions
before using"
on
a separate sheet. Be
sure
to
read
both
documents
before
using the lens.
This
manual
is for use with several different lenses.
This lens is designed for
Sonya
mount
cameras (models
equipped
with APS-
e sized image sensor). You
cannot
use
on
35mm-format
cameras.
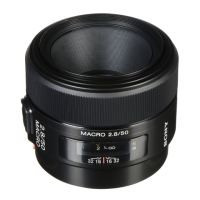
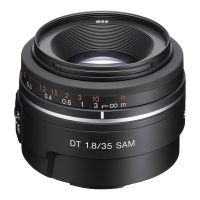
• The
DT
50mm FI.8
SAM
is
used for illustrations
in
this book, unless otherwise
mentioned.
Notes on use
• When you carry the camera with the lens attached, make sure to hold both the
camera and the lens steadily.
• Do not hold
by
any part ofthe lens that protrudes when focusing.
Precautions for flash use
• When using a built-in camera flash, make sure to shoot from at least
1m
(3.3
feet)
away from your subject. With certain oflenslflash combinations, the lens
may partially block the light
of
the flash, resulting in a shadow at the bottom
of
the picture.
• When using the Ring Light' or Macro Twin Flash
Kit*,
use the Macro Light
Adaptor'.
• Ring Light,
Macro
Twin
Flash Kit
and
Macro
Light
Adaptor
are
sold
separately.
Vignetting
• When you
use
lens, the corners
of
the screen become darker than the center. To
reduce this phenomena (called vignetting), close the aperture
by
I to 2 stops.
mNames
of
parts
1...Focusing ring 2
...
Distance scale 3
...
Distance index 4
...
Lens contacts
5...Focusing
mode
switch 6
...
Mounting
index
m
Attaching/detaching
the
lens
To attach
the
lens (See illustration
ID-[I].)
1 Remove the rear and front lens caps and the camera
body
cap.
•
You
can attach/detach the front lens cap
in
two ways,
(I)
and (2).
2 Align the orange index on the lens barrel
with
the
orange
index on the camera (mounting index), then insert the lens
into
the camera
mount
and rotate
it
clockwise
until
it
locks.
• Do not press the lens release button on the camera when mounting the lens.
• Do not mount the lens at
an
angle.
To remove
the
lens (See illustration
ID-C2J.)
While pressing and holding
the
lens release button on
the
camera,
rotate
the
lens counterclockwise until it stops, then detach
the
lens.
[!J
Focusing
When
using
auto
focus, the
camera
adjusts
the
focus automatically.
• While the camera
is
focusing automatically, do not touch the rotating focusing
ring.
• The camera's direct manual focus function cannot be used with this lens. (Some
cameras do not have the direct manual focus function.
If
your camera has this
function, this restriction
is
explained in
th~
section
on
focusing, in your camera's
instruction manual).
• You cannot switch between
AF/MF
mode with the
AF/MF
button on the camera
(Depending
on
the camera, the
AF/MF
button may not exist.
If
your camera
has this function, this restriction
is
explained in the section on focusing,
in
your
camera's instruction manual).
In MF
(Manual
Focus)
mode,
rotate
the
focusing ring while looking
through
the
viewfinder
to
focus. (See illustration [!].)
• The focus signal
in
the Viewfinder indicates the current degree
of
fOCUSing.
To switch
AF
{Auto Focus)/MF (Manual Focus) mode
You can switch between AF
(automatic
focus)
and
MF
(manual
focus)
with
the
focusing
mode
switch
on
the
lens. Make sure
to
set
the
focusing
mode
switch (lever)
on
the camera to AF.
• Make sure to set the focusing mode switch to
MF
for manual focus. Do not
rotate the focusing ring without setting to
MF.
Rotating the focusing ring
forcibly without switching to
MF
may damage the focusing ring.
To shoot a subject
at
infinite distance in MF
mode
The
infinity position provides for
some
adjustment
to
compensate
for focus
shift caused by
change
in
temperature.
To
shoot
a subject at infinite distance
in MF
mode,
use
the
Viewfinder
and
set focus.
 Loading...