2-8
PVM-14L2/20L2
2-7. Landing Adjustment
1. CONTRAST... MAX
BRIGHT... Conspicuous position
2. Roughly adjust the white balance, G2, and conver-
gence.
3. Switch the video signal generator output signal to
green only.
4. Move back the DY backward (in the direction toward
neck).
5. Adjust the purity knob so that the green will come to
the center of the screen. Make R and B almost
identical. (Fig. 2-1)
6. Switch to B only, R only, and G only and verify each.
7. Bring the deflection yoke gradually forward and adjust
the deflection yoke so that R and B on both sides of
the screen will be green. (Fig.2-2 → Fig. 2-3)
8. If the deflection yoke comes forward too much, the
pattern shown in Fig.2-4 will appear. If so, move the
deflection yoke backward. (Fig.2-4 → Fig.2-3)
9. Switch the signal generator output signal to the BLUE
only color and confirm the screen. (Fig. 2-6)
10. Switch the signal generator output signal to the RED
only color and confirm the screen. (Fig. 2-9)
11. When two colors are mixed, set the mixed color as the
standard, and repeat operations 6 and 7.
12. Switch to an all-white signal and check the uniformity.
13. When the deflection yoke position is determined,
fasten it with the fixture.
Fig. 2-1
GGBR
B
R
BRG
RGB
BGR
RBG
GRB
GB
A’
R
A
A’ = A
Fig. 2-2 Fig. 2-3 Fig. 2-4
Fig. 2-5 Fig. 2-6 Fig. 2-7
Fig. 2-8 Fig. 2-9 Fig. 2-10
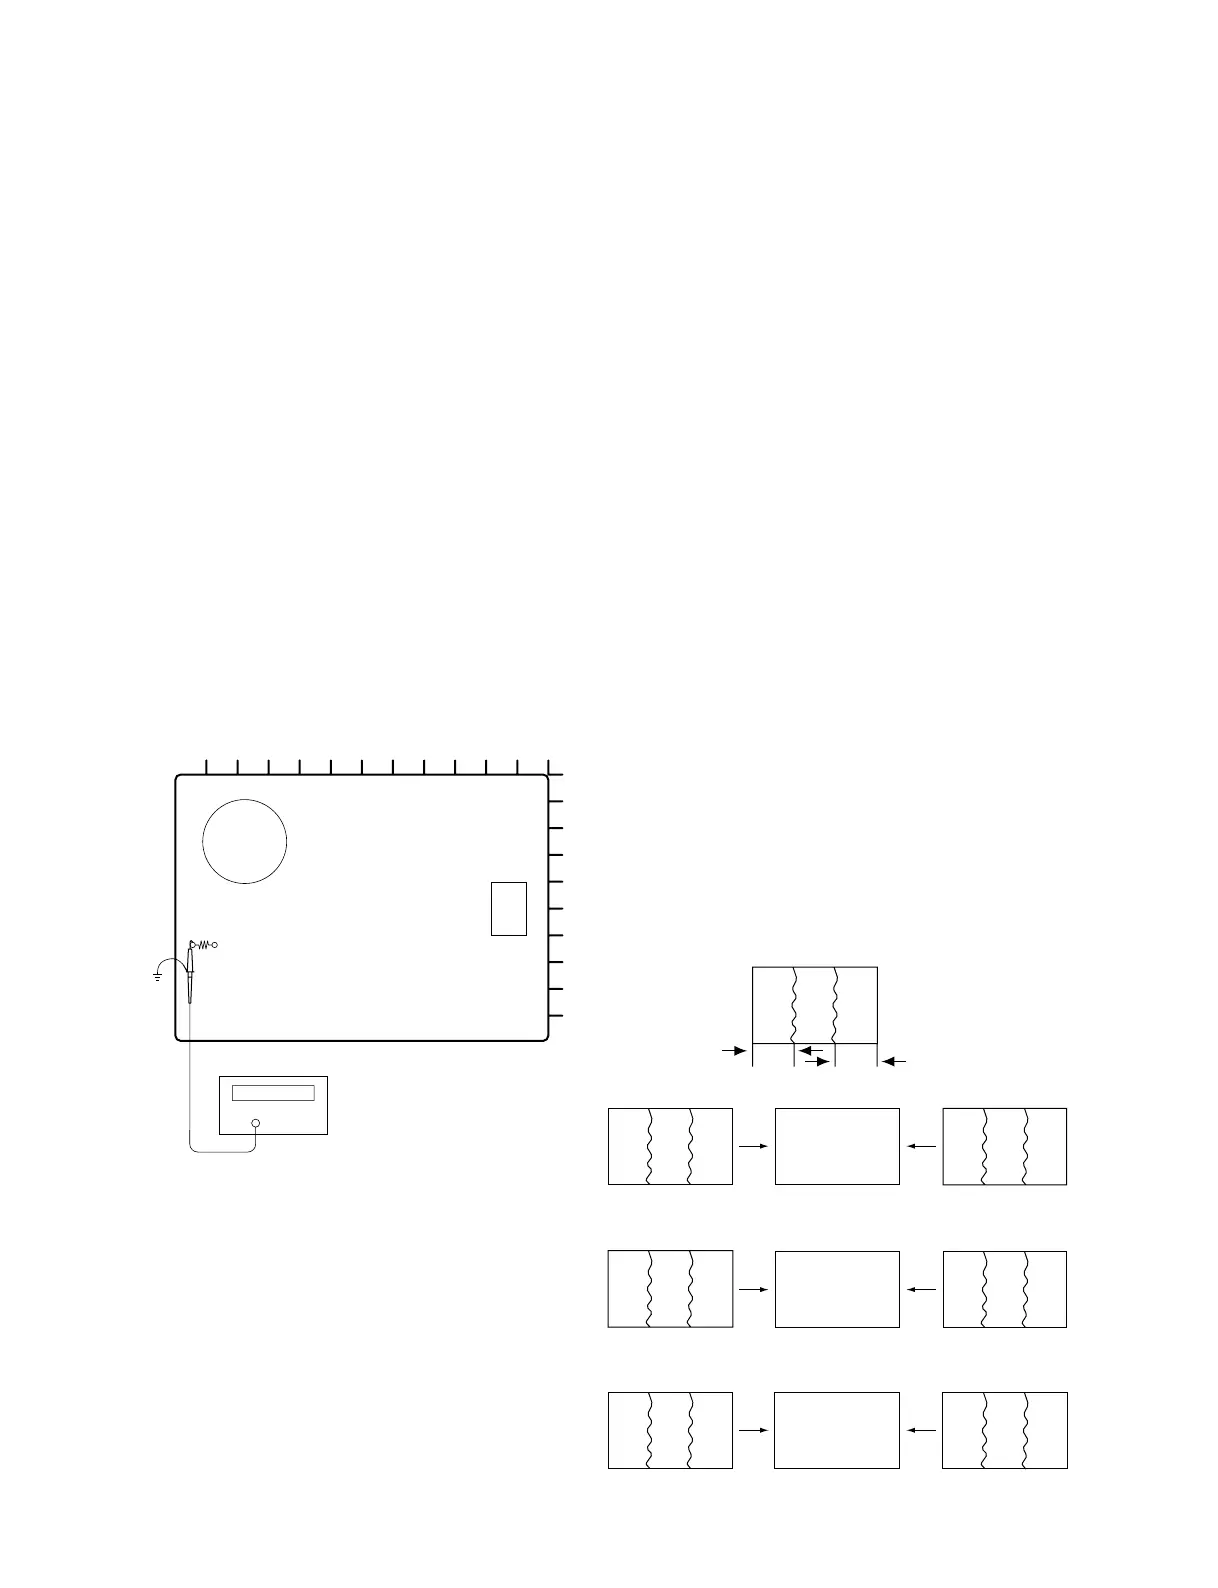
2-6. Free-run Frequency Adjustment
Find the following adjustment menu in the layer under the
DEFLECTION menu of the service mode.
FOCUS
H PLL
HFV SENCE
HFV CONTROL
1. Connect the 480/60I cross hatch signal to the G/Y
terminal of RGB/COMPONENT IN connector.
2. Enter the service mode.
3. Switch H PLL of the menu from LOCK to FREE
RUN.
4. Adjust HFV SENSE and HFV CONTROL of the
menu until number of screens losing sync is minimal.
When a frequency counter is used for this adjustment,
connect the frequency counter probe between the
outside terminal of R1523/G board and chassis ground.
Adjust HFV SENSE and HFV CONTROL of the
menu so that frequency becomes 15,734 ±30 Hz.
5. Switch H PLL of the menu from FREE RUN to
LOCK. Confirm that the screen is locked.
1
2
3
4
5
6
7
8
9
10
ABCDEFGHIJKL
Frequency counter
T502
L602
R1523
(CHASSIS)

 Loading...