3-862-559-52 (1)
Installation/Connections
Installation/Connexions
Installazione/Collegamenti
Instalace/Zapojení
Kurma/Bağlantılar
Installation
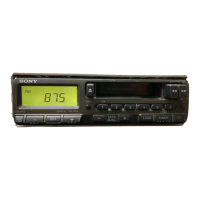
XR-1800
Sony Corporation 1998 Printed in Malaysia
Parts for Installation and Connections
Pièces de montage et de raccordement
Componenti per installazione e collegamenti
Prvky pro instalaci a zapojení
Kurma ve Bağlantı Parçaları
FM/MW/LW
Cassette Car
Stereo
13
The release key 4 is used for dismounting the unit. See the operating instructions manual for details.
La clé 4 sert à détacher l’appareil. Se reporter au mode d’emploi pour les détails.
La chiavetta di rilascio 4 serve per smontare l’apparecchio. Per i dettagli, fare riferimento alle
istruzioni per l’uso.
Uvolňovací klíč 4 je používán na demontáž přístroje. Dalπí podrobnosti naleznete v Návodu k
použití.
Release anahtarı 4 ünitenin sökümü için kullanılır. Detaylar için kullanım kılavuzuna bakınız.
Caution
Cautionary notice for handling the bracket 1.
Handle the bracket carefully to avoid injuring your fingers.
Attention
Remarque importante pour la manipulation du support 1.
Manipulez précautionneusement le support pour éviter de vous
blesser aux doigts.
Attenzione
Avvertenza sulla manipolazione della staffa 1.
Maneggiare la staffa con cautela per evitare di farsi male alle dita.
Pozor
Bezpečnostní upozornění pro zacházení s konzolí 1.
S konzolí zacházejte opatrně, abyste si přitom neporanili prsty.
Dikkat
Destekle 1 ilgili dikkat ikazı.
Parmaklarınızın yaralanmaması için desteğe dokunurken dikkat
ediniz.
2
45
Precautions
• Choose the mounting location carefully
so that the unit will not interfere with
the normal driving functions of the
driver.
• Avoid installing the unit where it
would be subject to high temperatures,
such as from direct sunlight or hot air
from the heater, or where it would be
subject to dust, dirt or excessive
vibration.
• Use only the supplied mounting
hardware for a safe and secure
installation.
Mounting angle adjustment
Adjust the mounting angle to less than
20°.
How to Detach and Attach
the Front Panel
Be sure to detach the front panel
before you start installing the unit.
To detach
Press the RELEASE button to open up
the front panel, then pull it out.
To attach
Align parts A and B, and push the
front panel until it clicks.
Instalace
B
A
123
1
To detach
Dépose du panneau avant
Per staccare
Sejmutí
Sökmek için
RELEASE button
Touche RELEASE
Tasto RELEASE
Tlačítko RELEASE
RELEASE anahtarı
Main unit
Appareil principal
Apparecchio principale
Přístroj
Ana ünite
2
3
Bezpečnostní
upozornění
• Místo pro instalaci přístroje zvolte tak,
aby řidič nebyl ruπen při běžném řízení
auta.
• Neinstalujte přístroj na místa, kde by
byl vystaven vysokým teplotám, jako
např. přímému slunečnímu záření nebo
teplému vzduchu z topení, nebo kde
by byl vystaven nadměrné praπnosti,
vlhkosti nebo příliπným vibracím.
• Pro bezpečnou a jistou instalaci
používejte výhradně nářadí a součásti,
které jsou součástí přísluπenství.
Úhel montáže
Úhel montáže by neměl přesahovat 20° .
Kurma
Tedbirler
• Sürücünün normal sürüş işlevine engel
olmaması için ünitenin kurma mekanını
dikkatle seçiniz.
• Üniteyi doğrudan güneş ışığı veya
ısıtıcıdan çıkan sıcak hava gibi yüksek
ısıya veya toz, kir veya aşırı vibrasyona
maruz kalacak yerlerde monte
etmeyiniz.
• Kurma işleminin emniyetli ve güvenli
olabilmesi için yalnız ünite ile verilen
montaj aletlerini kullanınız.
Montaj açı ayarı
Montaj açısını 20°'nin altına ayarlayınız.
Snímání a nasazování
předního panelu
Než začnete s montáží přístroje,
sejměte přední kryt.
Sejmutí
Stiskněte tlačítko RELEASE, abyste
uvolnili přední panel a sejměte ho.
Nasazení
Nasaïte části A a B a zatlačte na
přední panel, dokud nezaklapne.
Ön Panel Nasıl Takılır ve
Nasıl Sökülür
Üniteyi kurmaya başlamadan
önce ön paneli söktüğünüze emin
olunuz.
Sökmek için
Ön paneli sökmek için RELEASE tuşuna
basınız, ardından çekerek çıkarınız.
Takmak için
A ve B parçalarını bir hizaya getiriniz,
ön paneli klik sesi gelene kadar içeriye
doğru itiniz.
To attach
Pose du panneau avant
Per attaccare
Nasazení
Takmak için
Rear of the front panel
Arrière du panneau avant
Retro del pannello anteriore
Zadní strana předního panelu
Ön panelin arkası
Příklad montáže
Instalace do přístrojové desky
Montaj Örneği
Kontrol Paneline Kurma
Bend these claws, if necessary.
Si nécessaire, plier ces griffes.
Piegare questi morsetti se necessario.
Je-li to nezbytné, přihněte tyto jazýčky.
Gerektiği takdirde bu tırnakları
eğebilirsiniz.
Dashboard
Tableau de bord
Cruscotto
Přístrojová deska
Kontrol paneli
Fire wall
Paroi ignifuge
Parete tagliafiamma
Protipožární deska
Yangın muhafazası
Installation
Précautions
• Choisir soigneusement l’emplacement
de l’installation pour ne pas gêner la
conduite.
• Eviter d’installer l’appareil là où il
serait soumis à des températures
élevées, comme en plein soleil ou à
proximité d’une bouche d’air chaud, à
de la poussière, de la saleté ou des
vibrations violentes.
• Pour garantir un montage sûr,
n’utiliser que le matériel fourni.
Réglage de l’angle de montage
Ajuster l’inclinaison à un angle inférieur
à 20°.
Dépose et pose du
panneau avant
Avant d’installer l’appareil, veiller à
enlever le panneau avant.
Dépose
Appuyer sur la touche RELEASE avant
d’ouvrir le panneau avant, puis le tirer
vers vous.
Pose
Aligner les pièces A et B et pousser le
panneau avant jusqu’à enclenchement.
Installazione
Precauzioni
• Scegliere con attenzione il luogo di
installazione in modo che
l’apparecchio non interferisca con le
operazioni di guida del conducente.
• Evitare di installare l’apparecchio dove
sia soggetto ad alte temperature, come
alla luce solare diretta o al getto di aria
calda dell’impianto di riscaldamento, o
dove possa essere soggetto a polvere,
sporco e vibrazioni eccessive.
• Usare solo il materiale di montaggio in
dotazione per un’installazione stabile e
sicura.
Regolazione dell’angolo di montaggio
Regolare l’angolo di montaggio in modo
che sia inferiore a 20°
Come staccare e attaccare
il pannello anteriore
Prima di installare l’apparecchio
staccare il pannello anteriore.
Per staccare
Premere il tasto RELEASE per aprire il
pannello anteriore e quindi tirarlo verso
l’esterno.
Per attaccare
Allineare le parti A e B e spingere il
pannello anteriore fino a udire uno
scatto.
Mounting Example
Installation in the dashboard
Exemple d’installation
Encastrement dans le tableau de bord
Esempio di installazione
Installazione sul cruscotto
6
182 mm
53 mm
1
6
Caution
Remove the protection collar 6 before
installing.
Attention
Déposez le collier de protection 6 avant
l’installation.
Attenzione
Rimuovere il collare di protezione 6
prima dell’installazione.
Release the catch lock as illustrated.
Dégagez l’arrêt de fixation comme illustré.
Rilasciare il fermo come illustrato.
Uvolněte zajiπ»ovací jazýčky podle ilustrace.
Kancalı kilidi gösterildiği üzere açınız.
First attach 6 to the unit, then insert the unit into 1.
Fixez d’abord 6 sur l’appareil et introduisez ensuite l’appareil
dans 1.
Innanzitutto applicare 6 all’apparecchio, quindi inserire
quest’ultimo in 1.
Napřed nasaïte na přístroj 6, potom vložte přístroj do 1.
Önce 6 yı üniteye bağlayınız, ardından üniteyi 1 e
yerleştiriniz.
Pozor
Před začátkem instalace odstraňte
ochranný rám 6.
Dikkat
Kurmadan önce koruma kılıfını 6
çıkarınız.
6
1
7