EasyManua.ls Logo

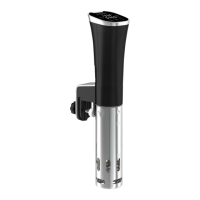
SOUSVIDE ART Mini Sous Vide Cooker User Manual

SOUSVIDE ART Mini Sous Vide Cooker
16 pages
To Next Page IconTo Next Page
Page #1 background imageLoading...
Page #1 background image
Register your Sous Vide Cooker at
WWW.SOUSVIDEART.COM/WARRANTY
and get 1 year of warranty
Mini Sous Vide Cooker
USER MANUAL

Questions and Answers:

SOUSVIDE ART Mini Sous Vide Cooker Specifications

General IconGeneral
Power800W
Water CapacityUp to 10 liters
Control TypeDigital
Circulation PumpYes
Voltage220-240V
Safety FeaturesOverheat protection
MaterialPlastic and stainless steel
Temperature Accuracy±0.1°C (±0.2°F)
TimerUp to 99 hours 59 minutes

Summary

Safety Precautions

General Safety Rules

Key safety guidelines for operating the sous vide cooker, including handling hot surfaces and electrical safety.

Features of Sous Vide Cooker

Control Panel and Operation

Buttons Description

Explains the function of each button on the control panel for operation and settings.

Setting Range

Details the adjustable temperature and time ranges for cooking.

How to Set Up Mini Sous Vide Cooker

Step-by-step guide on how to connect and configure the sous vide cooker for operation.

Cooking Menus Overview

Ideal Foods for Sous Vide Cooking

Lists recommended types of food, including meats, poultry, fish, seafood, vegetables, and fruits for sous vide preparation.

Steps to Sous Vide Cooking

Step 1. Seasoning your food

Guidance on marinating or adding spices, herbs, butter, or oil to food before vacuum sealing.

Step 2. Vacuum sealing your food

Instructions for vacuum sealing food to preserve taste, quality, and allow marinades to absorb.

Step 3. Cooking your food

Procedure for placing vacuum-sealed pouches into the water bath for even cooking.

Step 4. Searing your food

Technique for searing cooked food to enhance appearance and flavor, especially for meats.

Storage

Clean and Maintenance

Trouble Shooting

Error Codes Explanation

Details common error codes (E1-E6) and their causes, such as low water level or sensor issues.

Correct Disposal of this product