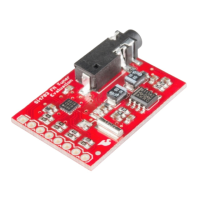
Undersideofbreakoutboardshowingpinlabels
Forcommunication,thebreakoutboardprovidesaccesstoSDIOandSCLKforI Ccommunication.TheRSTpinisalsobrokenoutforeaseofresettingthemodule.
SENisalsobrokenout,andenablestheusertochangethemodeoffunctionalityoftheIC.SENispulledhighonthebreakoutboardtoenableI Ccommunicationas
mentionedpreviously.However,bychangingthestateofSENalongwithSDIO,youcanchangethemodeoffunctionalitybetweena3wireinterfaceand2wireinterface.
Finally,thelasttwopinsbrokenoutaretheGPIO1andGPIO2pins.Thesecanbeusedasgeneralinput/outputpins,butalsocanbeusedforthingsliketheRDSready,
seekingortuningfunctions.
Theboarddoesnothaveabuiltinantennaonit.However,byusingheadphonesora3footlong3.5mmaudiocable,thewireswillfunctionasanantennaandwill
thereforenegatetheneedforanexternalantennaontheboard.Ifyouarenotplanningonusingeitherofthese,youwillneedtomodifytheboardtoaddinanantenna.
HookingUptoanArduino
First,youwillneedtoprepareboththeSi4703boardandtheArduinoProMini.Solderonthemaleheaderstobothboards.YouwillneedheadersonboththeFTDI
header,aswellasthepinsthatyouwillbeconnectingtotheSi4703.
PinConnections
Onceyouhaveheaderssoldered,youwillneedtousethejumperwirestoconnectbetweentheSi4703andtheProMin.Remember,weareusinga3.3VProMinito
preventdamagetothelogicontheSi4703.
Si4703→3.3VProMini
GND→GND
3.3V→VCC
SDIO→A4
SCLK→A5
RST→D2
YouwillthenalsoneedtohookuptheProMinitotheFTDIboard,andconnecttoyourcomputeroverUSB.
InstallingtheLibrary
Nowthatthehardwareishookedupandconnected,it’stimetopreparetouploadcode.FirstyouneedtoinstalltheArduinolibraryintotheIDE.Ifyouareunawarehowto
dothis,pleasecheckoutourtutorialhere.Youcandownloadthecodehere.
Oncethelibraryisproperlyinstalled,pleaseopenuptheexamplesketchlabeled“Si4703_Radio_Test”.Makesureyouselectthe“ArduinoProorProMini(3.3V,8MHz)w/
ATMega328”underthe“Tools>Boards”heading.SelecttheproperCOMportforyourFTDIdeviceunder“Tools>SerialPort”.Uploadthesketchtotheboard.
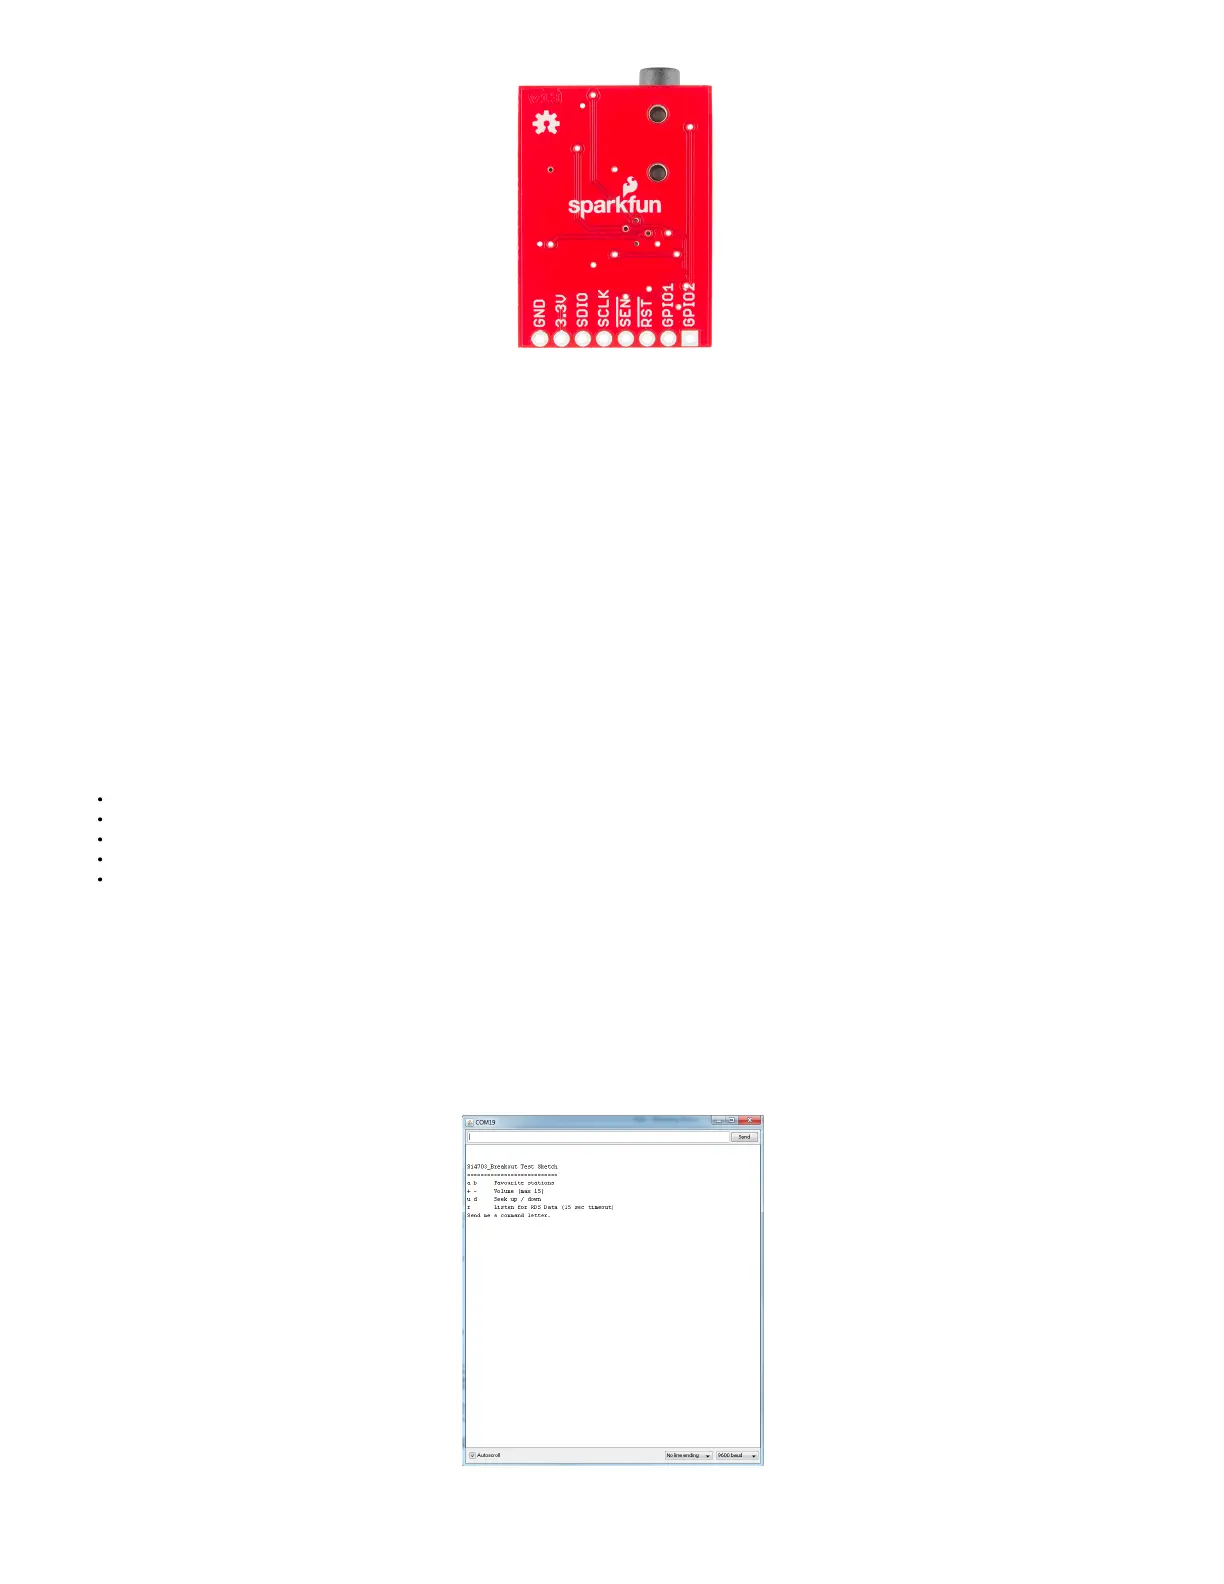
Onceyouhaveituploaded,openupyourSerialterminal(eitherthroughtheArduinoIDEoryourfavoriteterminalprogram).Opentheconnectionwiththesettings
9600bps,8,N,1,andyoushouldseethefollowingdisplayedontheterminal.
Youcanthenchoosefromanyoftheoptionslisted.Ifyouinitiallysendtheboardoption“a”,youshouldseethefollowingdisplayedback.
2
2
 Loading...