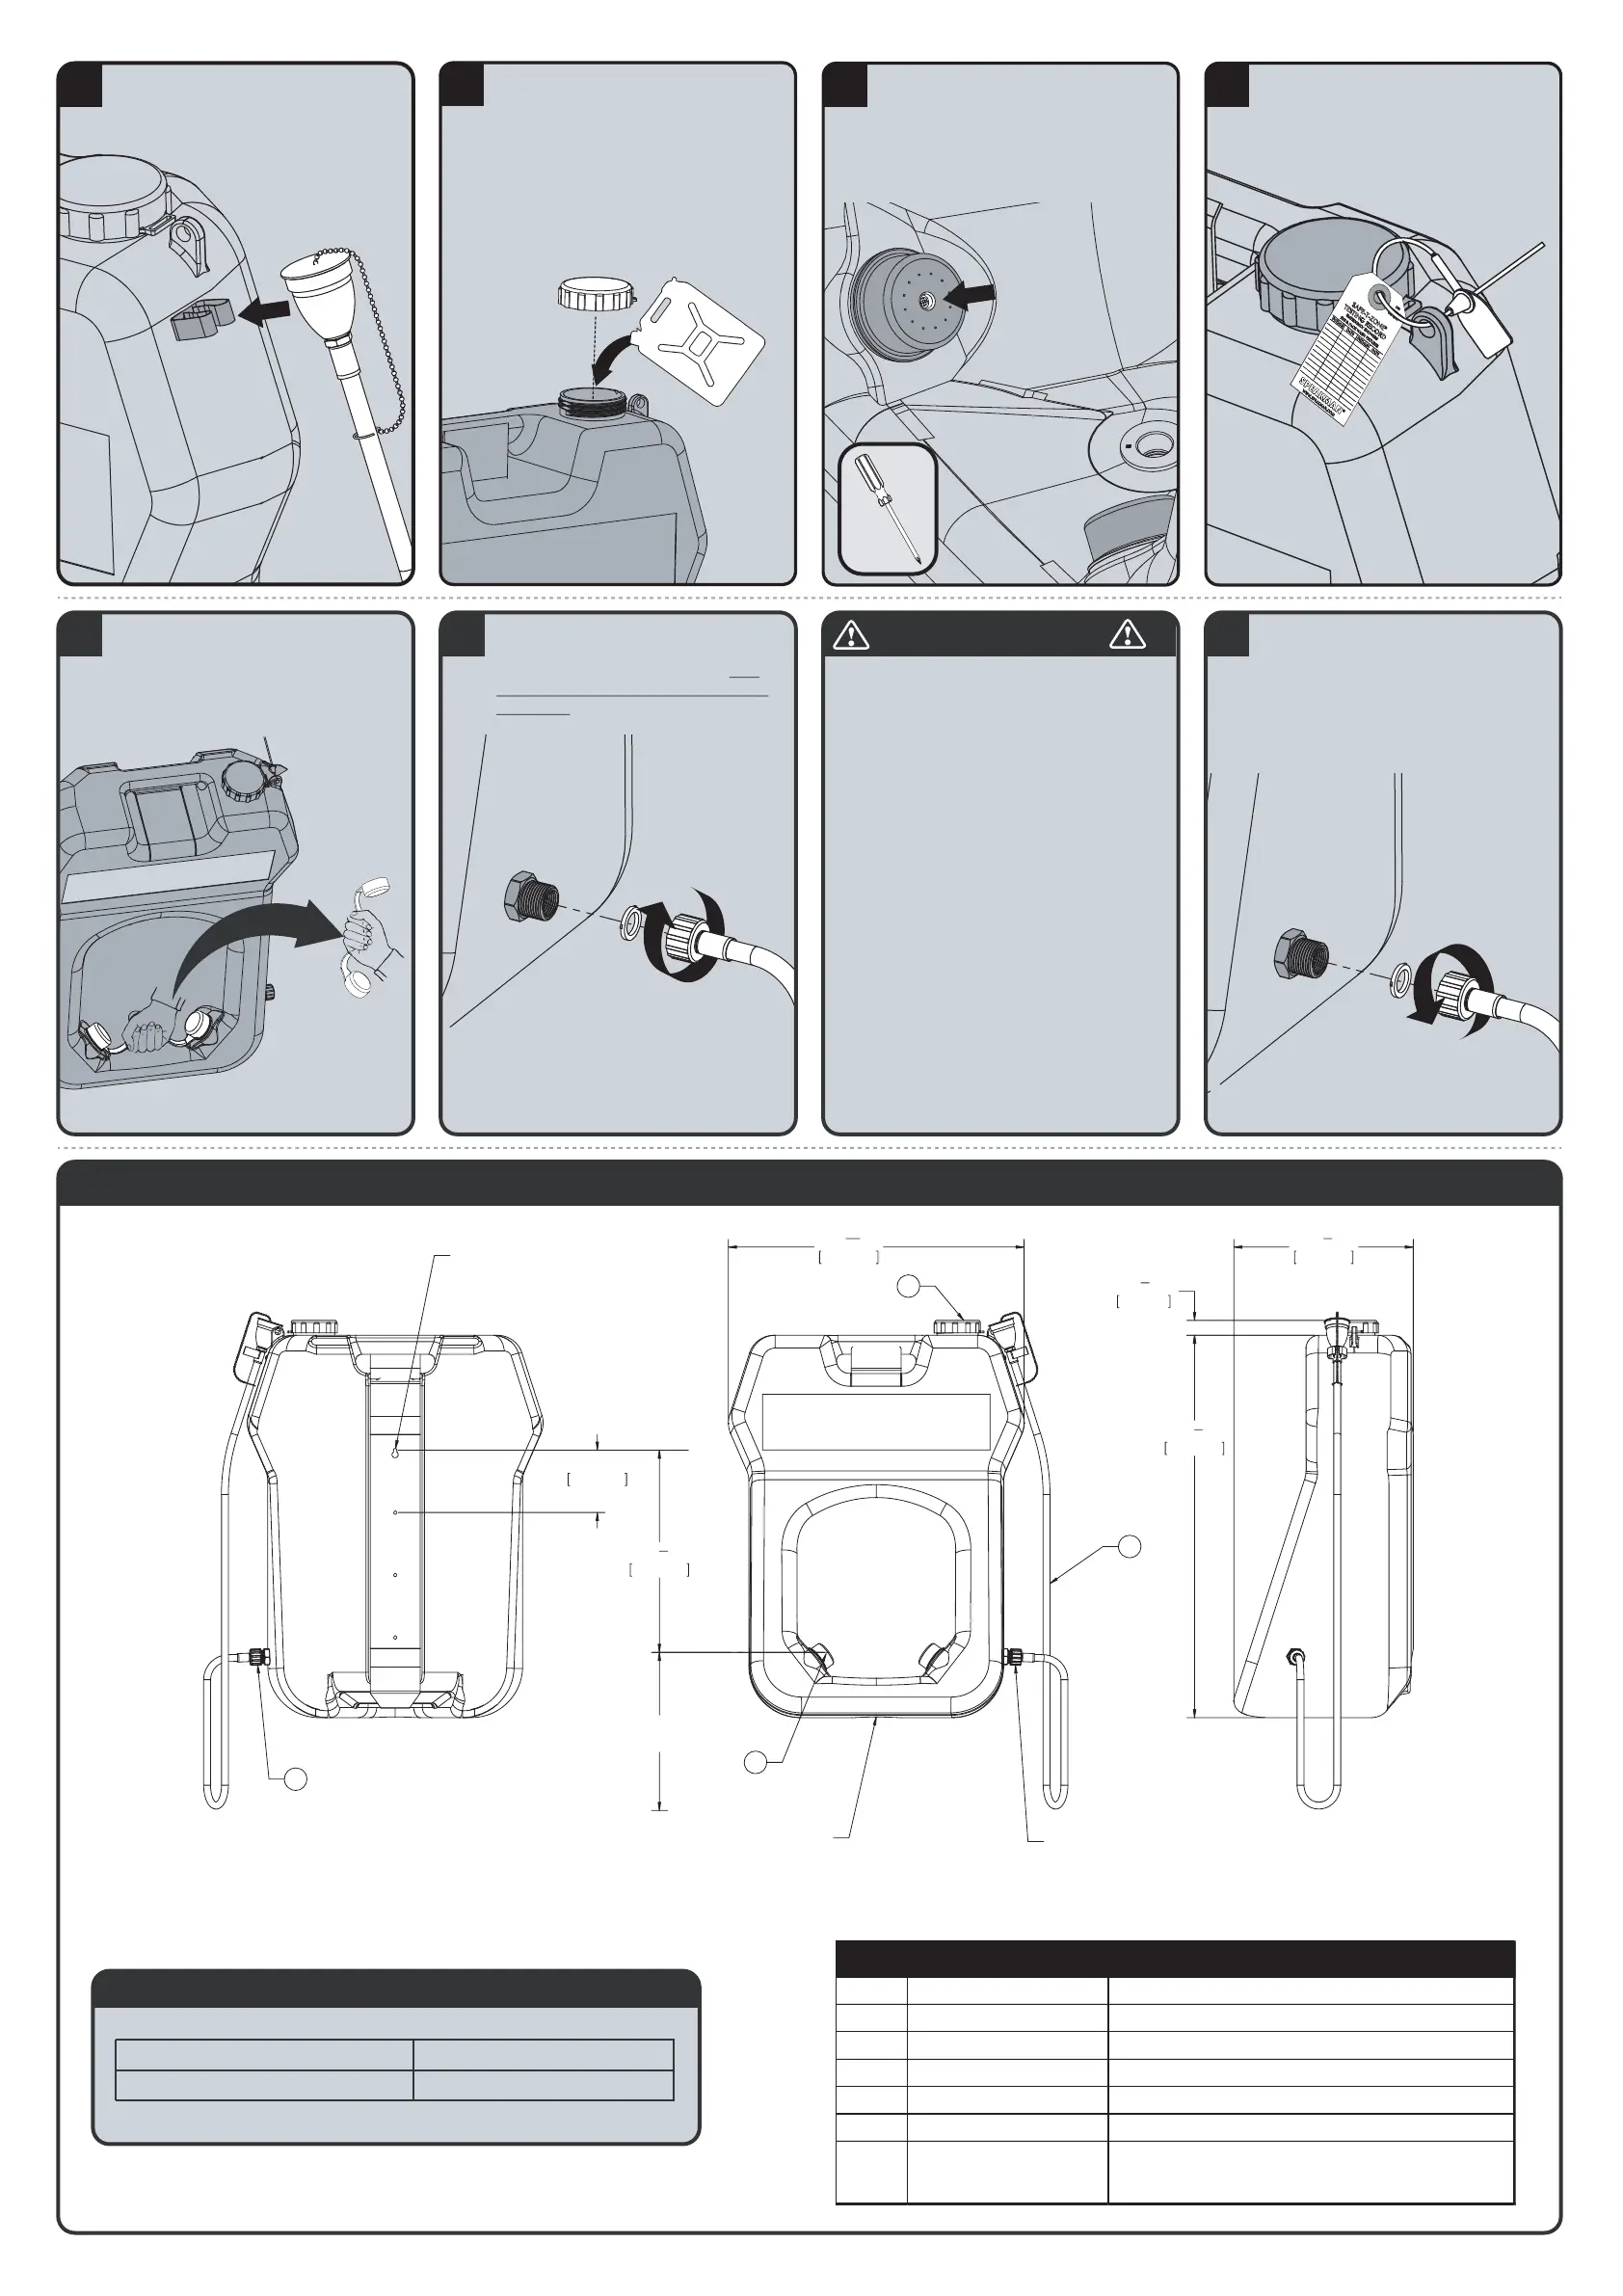
10
Hook the hose into the hose clip.
11
H20
Remove Fill Cap and fill the Tank with
potable water (approximately 20 gallons).
Failure to use potable water can result in
emergency units producing impure or
contaminated water, possibly causing
further injury. Inspect for leaks. If leak
occurs, gradually tighten coupling nut to
add further compression to rubber washer
as outlined in Step 8.
12
If the spray head area develops a leak,
remove the Pull Strap and tighten the center
screw using a Phillips Screwdriver. Take
care to not over tighten or damage may
occur. Reinstall the Pull Strap, and refill the
tank. (See Step 11)
13
Reinstall Fill Cap and secure it with the
tamper-evident Seal Tie. Update and secure
the Maintenance Tag to the Tank in a
location where it can be easily checked.
14
To activate the flow of water, pull upwards
on the Pull Strap, fully removing both
covers from the Spray Heads.
15
If the drench hose connection port area
should develop a leak, simply snug the
retaining nut to compress the seal. Take
extra care to not over tighten or damage
may occur.
Self-contained eyewash equipment shall be visually
checked frequently to determine if flushing fluid
needs to be changed or supplemented. Frequency
of these inspections is dependent on environment
conditions, but at a minimum weekly. Failure to
conduct visual checks could lead to further injury.
Customer shall take precautions to help prevent
the growth of potentially harmful bacteria in
eyewash tanks. Either of the following procedures
is recommended.
Procedure 1: Use suitable Bacteriostatic
preservative to help prevent growth of bacteria in
eyewash tank. Eyewash tank should be drained,
flushed and refilled with clean potable water and
Bacteriostatic preservative added as directed by
the preservative’s manufacturer.
Procedure 2: Drain, flush and refill units with
clean potable water at least once every week
unless site conditions require more frequent
changing. Thoroughly cleanse tank at least once
every month. See “Maintenance” Section for
further information of cleaning unit.
16
To periodically drain the unit, remove the
lower drench hose connection. Once all
water is removed, reinstall connection and
hand tighten into position. Take care to not
over tighten or damage may occur.
SE-4300 ROUGH-IN DIAGRAM / REPAIR PARTS
SPEAKMAN
®
DIMENSIONS SUBJECT TO CHANGE WITHOUT NOTICE.
FLOW DATA:
RUN TIME (FULL TANK)
15 MINUTES (minimum)
FLOW RATE IN gpm (L/min)
.4 (1.5) MINIMUM
ITEM PART NUMBER DESCRIPTION
1 RPG07-0021 FILL CAP
2 RPG38-0433 (2) SPRAY HEAD ASSEMBLIES
3 RPG07-0022 SIDE OUTLET CAP
N/S RPG56-0039 PULL STRAP ACTIVATOR
N/S RPG05-0935 (3) 12" TAMPER EVIDENT SEAL TIES
N/S RPG05-0901
PULL STRAP ACTIVATOR & DRAIN
BULKHEAD FITTING
"
364.81mm
14
1
2
"
411.17mm
16
1
4
33" - 45"
(833mm-1143mm
TO FLOOR
"
601.50mm
23
11
16
(TYP. 4 PLACES)
HOLES Ø1/4" THRU HOLE
WALL BRACKET MOUNTING
3
5"
126.95mm
(TYP. 3 PLACES)
30
5
"
8
777.24mm
1
1
4
"
30.31mm
4
(UNDERSIDE OF TANK)
3/4" GHT MALE DRAIN OUTLET
2
1
3/4" GHT MALE SIDE OUTLET
(WHEN CAP IS REMOVED) FOR
ATTACHING DRENCH HOSE
 Loading...