Do you have a question about the SR Research EyeLink 1000 and is the answer not in the manual?
Guidance on arranging EyeLink 1000 equipment for optimal experimental setup and lighting.
Instructions for unpacking EyeLink 1000 components and handling precautions.
Guidance on setting up the Display PC and its hardware requirements for the system.
Steps for setting up the Host PC, including pre-configured systems and required components.
Instructions for setting up a Host PC when not pre-configured, detailing specifications and compatibility.
Instructions for connecting cables to the Host PC and Camera Base Box.
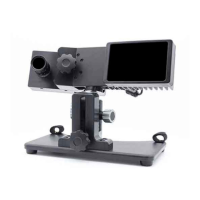
Steps for installing the standard EyeLink 1000 camera system.
Checklist of components required before installing the standard camera system.
Detailed steps for wiring the standard camera system to the Host and Display PCs.
Steps for installing the Fiber Optic camera system.
Checklist of components required before installing the Fiber Optic camera system.
Detailed steps for wiring the Fiber Optic camera system to the Host and Display PCs.
Instructions for inserting the Fiber Optic Camera Head into the Camera Adapter.
Instructions for installing optional response devices like button boxes or gamepads.
Overview of installing the optional Data Translation analog card.
Checklist for components needed for analog card installation.
Details on wiring the analog card and breakout board.
Guide to selecting appropriate lenses based on viewing distances and mount types.
Instructions for securely mounting the EyeLink 1000 Tower assembly onto a table.
Steps for mounting the high-speed camera and connecting its cables for the Tower Mount.
Wiring instructions for the standard camera in the Tower Mount setup.
Wiring instructions for the Fiber Optic camera in the Tower Mount setup.
Guidance on adjusting forehead and chinrest components for optimal positioning.
Steps for mounting the high-speed camera and connecting cables for the Desktop Mount.
Wiring instructions for the standard camera with the Desktop Mount.
Wiring instructions for the Fiber Optic camera with the Desktop Mount.
Guidance on adjusting the Desktop Mount for different tracking modes.
Specific hardware adjustments for EyeLink Remote use with the Desktop Mount.
Criteria for selecting a suitable table for mounting the LCD Arm Base.
Instructions for securely attaching the LCD Arm Base to a tabletop.
Steps for assembling the LCD Arm, including extenders and the camera/LCD assembly.
Instructions for attaching the EyeLink 1000 camera to the LCD Arm assembly.
Detailed instructions for connecting all necessary cables for the LCD Arm Mount.
Guidance on adjusting joint tension for smooth movement of the LCD Arm.
Adjustments for the LCD Arm Mount in monocular/remote modes, referencing PHYSICAL.INI.
Procedures for safely disassembling and transporting the LCD Arm Mount.
Considerations for hardware setup and optical alignment for the Primate Mount.
Overview of the components that make up the Long Range Mount system.
General steps for setting up the Long Range Mount, focusing on illuminator alignment.
Instructions for attaching and orienting the Fiber Optic Camera Head to the Mounting Bar.
Steps for mounting the Long Range Mount Illuminator onto its clip.
Instructions for attaching the Mounting Bar to various bases or tripods.
Instructions for connecting fiber optic cables for the Long Range system.
General setup process for the camera and illuminator for Long Range tracking.
Measuring distances for lens selection and configuration in PHYSICAL.INI.
Positioning and securing the Camera Head and Illuminator on the Mounting Bar.
Aligning the camera and illuminator for optimal illumination and view.
Positioning the mount and finding the subject's eye using the camera view.
Specific setup procedures for installing the EyeLink 1000 in an MRI environment.
Choosing the appropriate mount and configuration for MRI systems.
Instructions for using the Tray Mount with Siemens Full Body scanners.
Instructions for using the Screen Mount with various scanner types.
Instructions for using the Desktop Base in MRI environments.
Instructions for the Allegra Mount for short bore scanners.
Assembling camera head and illuminator onto the mounting bar for MRI.
Importance of head coil mirrors for eye tracking signal quality in MRI.
Measuring eye-to-camera distance for lens selection and configuration.
Aligning camera and illuminator as per Section 7.7.3 for MRI.
Positioning for fine-tuning camera and illuminator with a volunteer present.
Configuring calibration and drift correction for the Long Range system.
Customizing calibration target positions for non-standard display areas.
Methods for defining custom calibration points for unique display setups.
Scaling calibration points using INI file parameters for non-standard settings.
Enabling and using drift correction for improved accuracy with the Long Range mount.
Steps to start and access the EyeLink Host application program.
Lists common error messages and their solutions for the host software.
Resolving errors related to missing camera-specific .SCD files.
Troubleshooting the "No Hardware" error indicating network connection issues.
Solutions for the "EyeLink CL camera not found" error.
Troubleshooting the "no sync found" error, often due to loose cable connections.
Resolving the "No Optilink head found" error specific to fiber optic cameras.
Information on where EyeLink EDF files are saved and backup recommendations.
Configuring PHYSICAL.INI for accurate visual angle and eye velocity calculations.
Method for measuring and entering screen physical coordinates in PHYSICAL.INI.
Method for measuring and entering screen distance values in PHYSICAL.INI.
Procedures for entering physical configuration values into the PHYSICAL.INI file.
Steps for installing EyeLink software components on a Windows Display PC.
Installing the API and example files for experiment programming.
Installing the driver for accessing IO ports for TTL signaling.
Installing optional software for data viewing and experiment building.
Installing drivers and activating the USB license key for software.
Configuring the network connection between the Display PC and Host PC.
Information on programming tools and environments used for EyeLink software.
Steps for installing EyeLink software components on a Mac OSX Display PC.
Instructions for inserting the High-Speed Frame Grabber PCI card into the Host PC.
Instructions for installing the Ethernet card into the Host PC.
Instructions for installing the optional Data Translation Analog output card.
Installing System Commander for managing multiple operating systems on the Host PC.
Resizing the disk partition to create space for the EyeLink Host Application.
Creating the FAT32 partition for the EyeLink Host software.
Copying EyeLink Host application files from the CD to the new partition.
Notes on the recommended PS/2 keyboard driver setup.
Making the EyeLink partition bootable using the ROM-DOS Boot Disk.
Configuring the OS selection menu in System Commander for booting.
Setting up automatic booting into the EyeLink OS via System Commander.
Formatting the hard drive using ROM-DOS for Vista installation.
| Brand | SR Research |
|---|---|
| Model | EyeLink 1000 |
| Category | Accessories |
| Language | English |