EasyManua.ls Logo

STARLUNA 1579002 - User Manual

STARLUNA 1579002
8 pages
Print Icon
To Next Page IconTo Next Page
Loading...
Revision 2.1
30
1579002
32W LED
incl. LED Board: L9002156
Motor: 5/8/14/24/38W
220-240V ~ 50Hz
(DE) Bestimmungsgemäße Verwendung
(GB) Intended use / (FR) Utilisation conforme / (NL) Beoogd gebruik / (PL) Stosowanie zgodnie z przeznaczeniem /
(NO) Riktig bruk / (DK) Korrekt brug / (SE) Avsedd användning / (FI) Määräystenmukainen käyttö
(IT) Impiego appropriato / (ES) Uso prescrito / (CZ) Použití v souladu s určením / (PT) Utilização correta / (GR) Ενδεδειγμένη χρήση
(DE)
Ortsfeste Verwendung als Deckenventilator mit Beleuchtung im
Innenbereich
(GB)
Provided for stationary use as ceiling fan with light, indoors
(FR)
En tant que ventilateur de plafond lumineux, à l'intérieur
(NL)
Vast gebruik als plafondventilator met verlichting binnenshuis
(PL)
Do montażu stacjonarnego jako wentylator sufitowy do wnętrz
(NO)
Til stasjonært bruk som takviften med belysning innendørs
(DK)
Til stationær brug som Loftventilator med lys indendørs
(SE)
Används som fast takfläkt inomhus
(FI)
Kiinteä käyttö sisätilojen kattotuulettimena
(IT)
Impiego fisso come ventilatore da soffitto in ambienti interni
(ES)
Empleo fijo en tanto ventilador de techo en interiores
(CZ)
Stacionární použití jako stropní ventilátor v interiéru
(PT)
Aplicação fixa como ventilador de teto em interiores
(GR)
Σταθερή χρήση ως ανεμιστήρας οροφής σε εσωτερικό χώρο
(DE) Verwendete Symbole
(GB) Safety Precautions / (FR) Symboles utilisés / (NL) Gebruikte symbolen / (PL) Stosowane symbole / (NO) Brukte symboler /
(DK) Brugte symboler / (SE) Använda symboler / (FI) Käytetyt symbolit / (IT) Simboli usati / (ES) Símbolos empleados /
(CZ) Použité symboly / (PT) Símbolos utilizados / (GR) Χρησιμοποιούμενα σύμβολα
IP 20
(DE) Lieferumfang
(GB) Package contents / (FR) Contenu de la livraison / (NL) Bij de levering inbegrepen / (PL) Zakres dostawy / (NO) Levering /
(DK) Leveringsomfang / (SE) Leveransomfattning / (FI) Toimitussisältö / (IT) Fornitura / (ES) Volumen de suministro /
(CZ) Rozsah dodávky / (PT) Material fornecido / (GR) Παραδοτέος εξοπλισμός
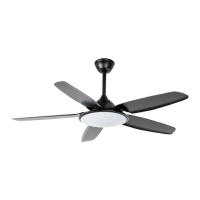
(DE)
1 Deckenventilator
Montagematerial
Montageanleitung
(GB)
1 ceiling fan
Installation hardware
Mounting instructions
(FR)
1 Ventilateur de plafond
Matérial de montage
Instructions de montage
(NL)
1 Plafondventilator
Monteringsmateriale
Montagehandleiding
(PL)
1 Wentylator sufitowy
Elementy montażowe
Instrukcja montażu
(NO)
1 Takviften
Monteringsmateriale
Brukerveiledning
(DK)
1 Loftventilator
Monteringsmateriale
Brugervejledning
(SE)
1 Takfläkt
Monteringsmaterial
Monteringsanvisning
(FI)
1 Kattotuuletin
Asennus materiaali
Asennusohjeet
(IT)
1 Ventilatore da soffitto
Materiale di montaggio
Istruzioni di montaggio
(ES)
1 Ventilador de techo
Material de montaje
Instrucciones de montaje
(CZ)
1 Stropní ventilátor
Materiál pro montáž
Návod k montáži
(PT)
1 Ventilador de teto
Material de montagem
Instruções de montagem
(GR)
1 Ανεμιστήρας οροφής
Υλικό συναρμολόγησης
Οδηγίες συναρμολόγησης
Question and Answer IconNeed help?

Do you have a question about the STARLUNA 1579002 and is the answer not in the manual?

Overview

This document describes the STARLUNA 1579002 ceiling fan with light, providing technical specifications, usage instructions, and maintenance information.

Function Description

The STARLUNA 1579002 is a ceiling fan designed for stationary use indoors, featuring an integrated LED light. It provides both air circulation and illumination, controlled via a remote. The fan offers multiple speed settings and a forward/reverse function for seasonal use, while the light provides different color temperatures and a night light mode.

Important Technical Specifications

  • Model: STARLUNA 1579002
  • LED Power: 32W
  • LED Board: L9002156
  • Motor Power: 5/8/14/24/38W
  • Voltage: 220-240V ~ 50Hz
  • IP Rating: IP20 (suitable for indoor use, protected against solid objects larger than 12.5mm, no protection against water)
  • Light Source Energy Efficiency Class: E
  • Replaceable Components:
    • LED light source (LED only) is replaceable by a professional.
    • Control gear is replaceable by a professional.

Usage Features

Package Contents

The package includes:

  • 1 Ceiling fan
  • Installation hardware
  • Mounting instructions

Components Overview

The fan consists of several key components:

  1. Safe steel wire
  2. J hook (for temporary hanging during wiring)
  3. Mounting bracket
  4. Nuts
  5. Receiver
  6. Remote control
  7. Hanger ball
  8. Down rod
  9. Upper canopy
  10. Screws
  11. Yoke cover
  12. Cross pin
  13. Cotter pin
  14. Screws
  15. Motor Housing
  16. Screws
  17. Motor
  18. Light kit plate fixing bracket
  19. Light kit plate
  20. Screws
  21. Blades
  22. LED light kit
  23. Shade

Installation Instructions

  1. Assemble Down Rod: Insert the down rod over the upper canopy, then insert the cross pin over the yoke and cotter pin. Secure with the two screws that fix the down rod.
  2. Install Mounting Plate: Attach the mounting plate to the ceiling using screws.
  3. Prepare Motor: Loosen the screw from the motor housing.
  4. Install Blades: Attach the blades to the motor using screws.
  5. Mount Fan to Bracket: Ensure the fan is disconnected from the electrical supply. Carefully insert the fan into the mounting bracket. Rotate the fan until the notch of the hanger ball engages the pin of the mounting bracket. Firmly fix the screws.
  6. Connect Electrical Components:
    • Assemble the LED light plate to the light kit fixing bracket using screws.
    • Connect the LED light kit using the male and female plug.
    • Insert the remote control receiver onto the mounting bracket.
    • Connect the motor wires, LED light wires, and receiver's power wires to the receiver using male and female plugs.
    • Connect the ground wire using a male and female plug.
    • Connect the power supply to the fan.
  7. Attach Shade and Canopy: Assemble the shade to the light plate and the upper canopy to the mounting bracket. Both rotate clockwise when assembling.
  8. Completion: The fan installation is now complete.

Wiring Diagram

The wiring diagram illustrates the connections between the light source, motor, receiver, and power supply.

  • Light Source to Receiver: Connected via a 2-way male & female plug (White/Blue wires).
  • Motor to Receiver: Connected via a 3-way male & female plug (Pink/Red/Gray wires).
  • Receiver to Power Supply:
    • Brown wire (Live) to L terminal.
    • Blue wire (Neutral) to N terminal.
    • Yellow/Green wire (Ground) to ground terminal.
  • Receiver to Downrod: Yellow/Green wire for ground.

Remote Control Usage

The remote control operates the fan and light functions. It requires a 12V battery.

  • FAN ON/OFF (1): Turns the fan on or off.
  • LAMP ON/OFF (2): Turns the light on or off and cycles through color temperatures.
  • Fan Speed Gear Control (3): Adjusts the fan speed.
  • Fan Forward/Reverse Control (4): Changes the direction of fan rotation.
  • Fan Timing Control (5): Sets a timer for fan operation (1H, 4H, 8H).
  • LED Indicator (6): Shows the status of the remote.

Light Operation

The light cycles through different color temperatures and a night light mode with successive presses of the LAMP ON/OFF button:

  1. Power on: Light is on with 6500K.
  2. 1st press: Light is off.
  3. 2nd press: Light is on with 3000K.
  4. 3rd press: Light is off.
  5. 4th press: Light is on with 4000K.
  6. 5th press: Light is off.
  7. 6th press: Light is on with night light.

Remote Control Pairing (Learning Code Matching Mode)

To pair the remote control with the receiver:

  1. Turn "ON" the supply power to the fan.
  2. Within 30 seconds, press and hold the "FAN ON/OFF" button on the remote for 5 seconds.
  3. The device will load normally after a long "bee" sound, indicating successful pairing.
  • Note: Learning mode is not accepted if the supply power has been on for more than 30 seconds.

Maintenance Features

Troubleshooting Remote Control Issues

If the remote control cannot control the receiver:

  • Battery Check: Verify that the battery switch is touching normally, and the positive and negative poles are correctly oriented. Check if the battery is full or empty. Low battery voltage affects remote sensitivity; replace the battery if the indicator light flashes.
  • Interference Check: Check for similar remote-controlled products nearby that might be operating on the same frequency and causing interference.
  • Battery Removal: Remove the battery from the remote control if it will not be used for a long time.

Installation Precautions

  • Ground Wire: Connect the ground wire correctly to prevent micro-light or flash issues with the light.
  • Antenna/Wires: When installing the fan, ensure the fan ceiling cover does not press on the antenna or other wires, as this can easily damage the wires and cause short circuits.

General Notes

  • Refer to the actual product at the time of purchase, as specifications may vary depending on the model.
  • The maximum load of lighting should be checked in the "POWER PARAMETER LIST" (not provided in this excerpt).

STARLUNA 1579002 Specifications

General IconGeneral
BrandSTARLUNA
Model1579002
CategoryFan
LanguageEnglish