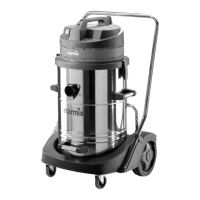
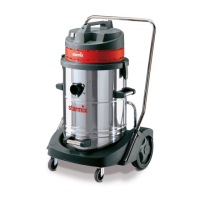
Product: Vacuum cleaner for wet
and dry applications
Type:
GS
The structure of the equip-
ment is in accordance
with the following relevant
regulations:
EC Machinery Directive
2006/42/EU
EMC Directive 2004/108/
EC
Angewendete harmonisier-
te Normen:
EN 12100–1, EN 12100–2,
EN 60335–1,
EN 60335–2–69,
EN 55014–1, EN 55014–2,
EN 61000–3–2
Angewendete nationale
Normen und technische
Spezikationen:
DIN EN 60335–1,
DIN EN 60335–2–69
Read the operating manual carefully before starting to use the
vacuum cleaner. It provides important instructions for the operation,
safety, care and maintenance. Keep the operating manual in a safe
place and, in case you sell the unit, hand it on to the next owner.
The manufacturer reserves the right to carry out modications to
the design and equipment.
Any other work not covered by this operating manual must not be
carried out.
1 Before use
▶ When unpacking, check that the delivery is complete and that
there is no transport damage.
▶ Before using, the operators should be provided with information,
instructions and training for the use of the vacuum cleaner
and the substances that it is to be used for, including the safe
procedure for the removal of the gathered material.
2 Only use original accessories
See enclosed sheet.
Further accessories are given in the special acessories list or
upon request.
3 Fields of application
For wet and dry suction cleaning. Not suitable for vacuuming
health hazardous dusts. The suction cleaner with socket and ON/
OFF automatic switching system is intended for the connection of
electric tools.
4 Assembly
When unpacking, check that the appliance is complete and that
there is no transport damage.
4.1 Container ⑫
Open the lock-in closures ⑭ of the 20-l and 32-l container, and
lift off the top section ①. Tip over the container and press in the
steering rollers with pivot ⑰ until they lock into place. Screw the
large wheels ⑮ onto the axles ⑯; see g. A.
The supplied steel axle ⑯ for the 45-l container is pushed through
the guide on the container, after which the wheels ⑮ and steering
rollers ⑰ are mounted as indicated in g. B.
The steering rollers ⑰ for appliances with 22-l, 35-l and 55-l
stainless steel containers with chassis crosshead are mounted as
indicated in g. C.
Insert suction tube ⑲ (when contained in scope of supply) into the
container guide from above and push down until it engages.
4.2 Filters ⑧ - ⑪
Fitting the lters, depending upon the given model:
- Push the folded lter cartridge ⑩ in a straight manner over
the case ⑤, right up to the stop point, and lock the bayonet
mount ⑪; see g. D. The folded lter is suitable for wet and dry
suction cleaning.
- Foam lter
To suction the water, rst remove the folded lter; push the foam
lter ⑧ over the casing ⑤, see Fig. E
- Take hold of the paper lter bag ⑱ at the ang and push ver-
tically from above into the guide of the cyclone suction opening
⑬ until the stop point is reached. The bag must rest against the
container wall; see g. F.
For stainless steel containers, push the ange onto the suction
opening at the bottom rst and then at the top, then keep
pushing as far as it will go.
- The bag increases the dust retaining capacity and is
intended for hygienic disposal. Paper lter bags can only
be used for dry suction cleaning.
- Place the lter sack ⑨ in the container ⑫ respectively for
stainless steel containers slip over the edge of the container,
see g. G.
Remove the lter for wet suction cleaning.
4.3 Top section ①
From time to time, or when the suction force decreases, take out
the motor protection lter ⑦ for cleaning; see g. I. Place the top
section ① right-way-round on the container as indicated in g. H.
Observe the anti-rotation protection. The paper lter bag ⑱ must
not be damaged, and the lock-in closure ⑭ must engage securely..
4.4 Socket with ON/OFF automatic switching system
For suction cleaners with socket and ON/OFF automatic switching
system.
 Loading...