4
16
16
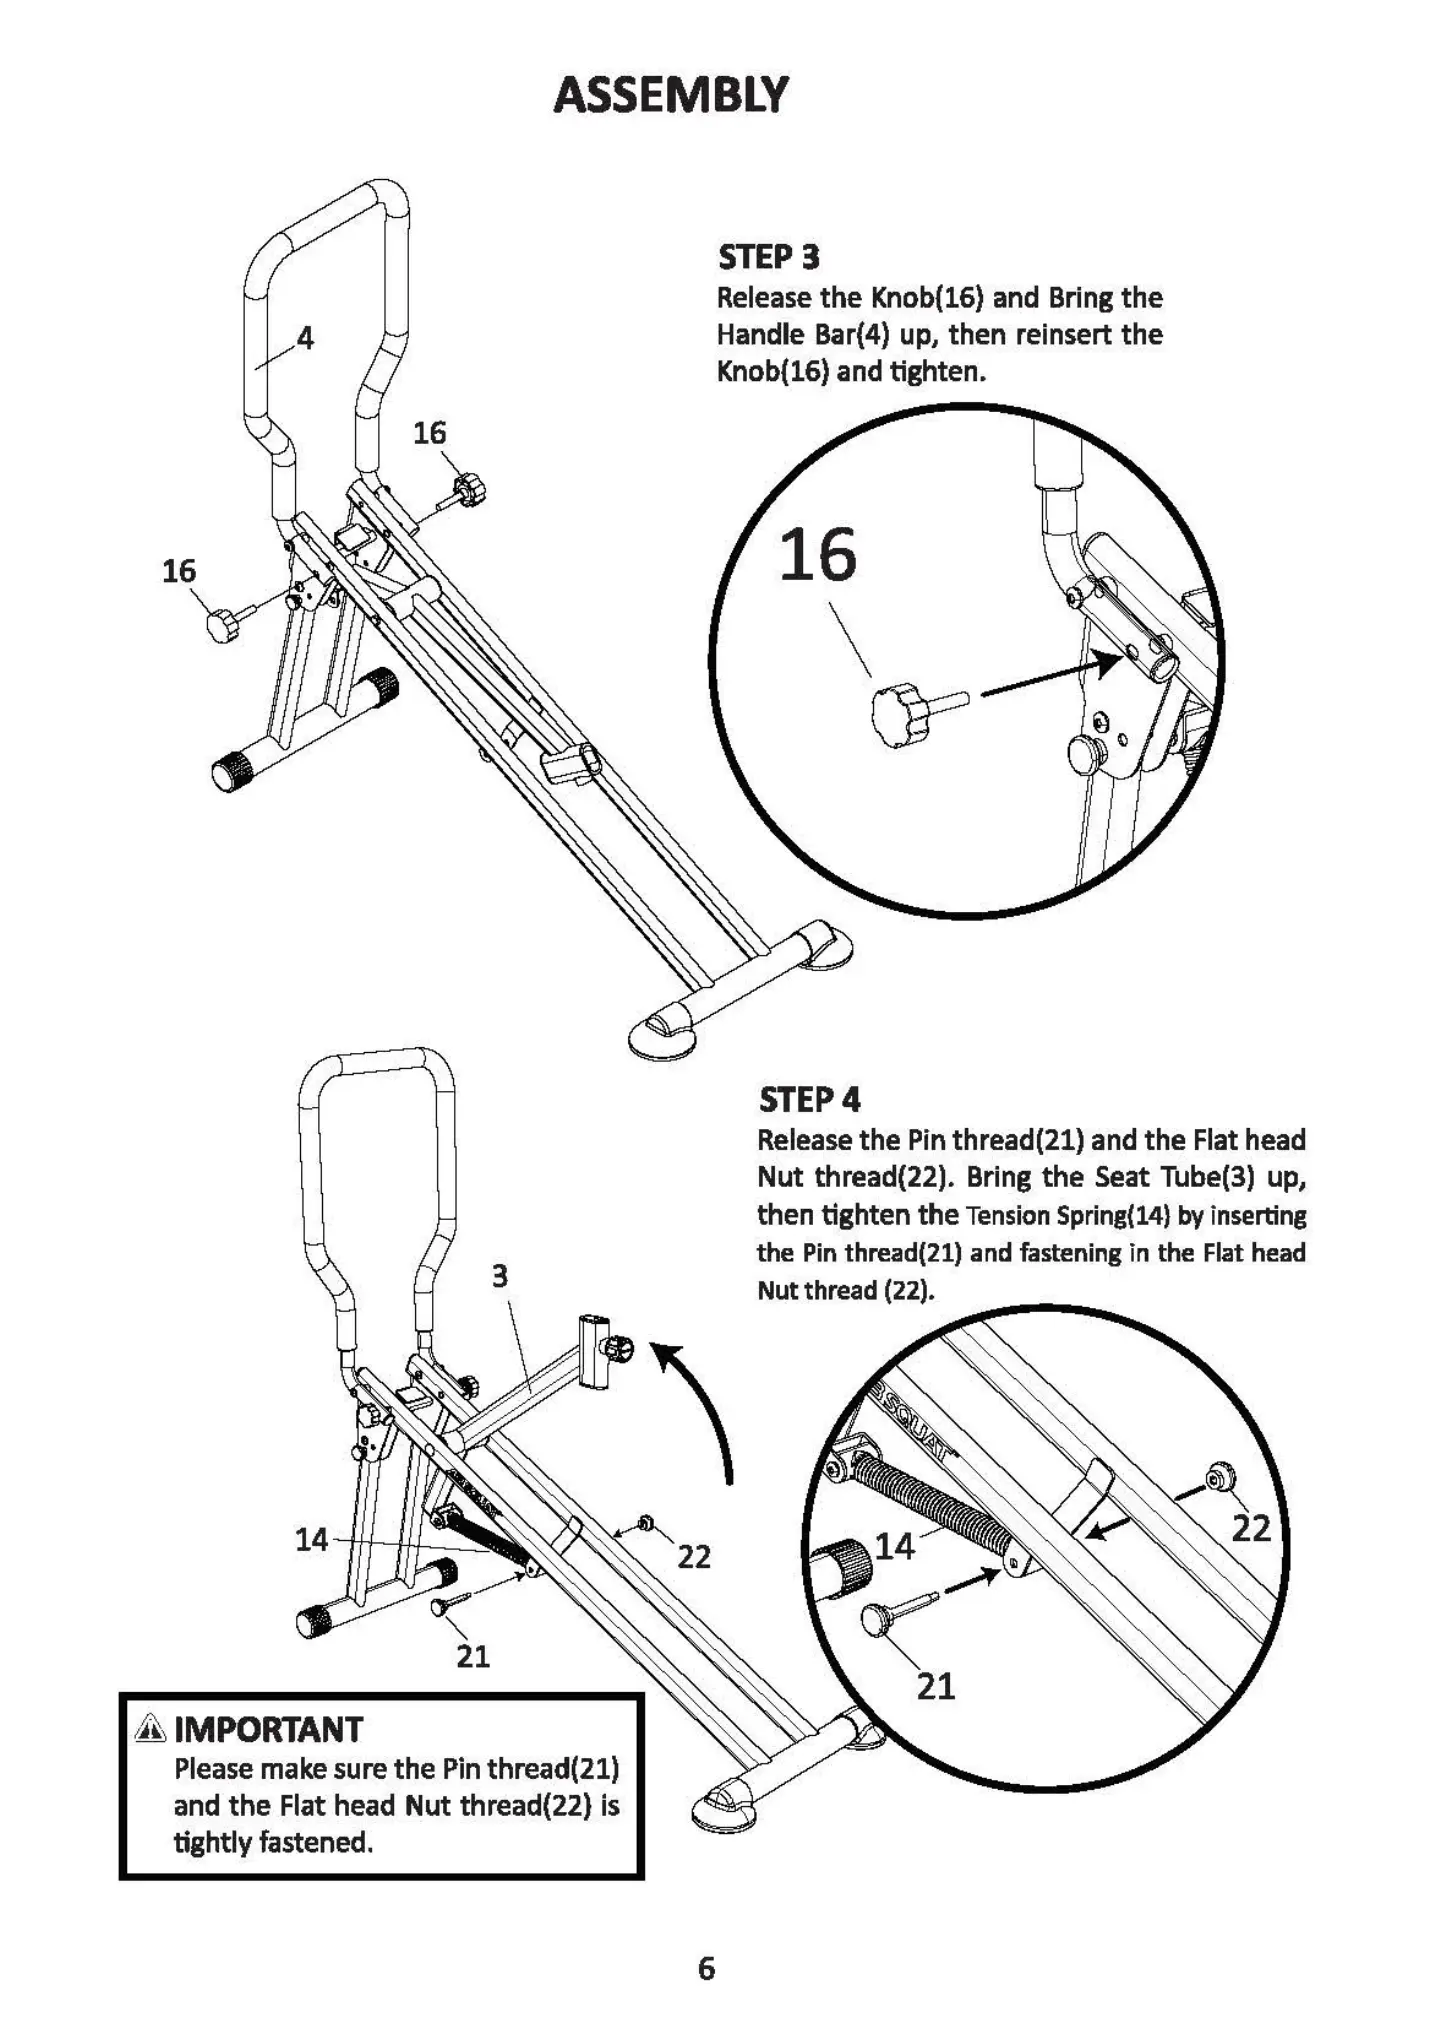
ASSEMBLY
STEP 3
Releasethe Knob(16) and Bring the
Handle Bar(4) up, then reinsert the
Knob(16) and tighten.
16
STEP 4
23
ASSEMBLY
6
7
STEP 5
tighten the Cushion(23).
STEP 6
Connect the Upper computer
wire with Lower computer wire,
then Slide the Monitor(6) into
the machine.
3
14
21
IMPORTANT
Pleasemakesure the Pin thread(21)
and the Flat head Nut thread(22) is
tightly fastened.
Release the Pin thread(21) and the Flat head
Nut thread(22). Bring the Seat Tube(3) up,
then Mghten the TensionSpring(14)by inserting
the Pin thread(21) and fastening in the Flat head
Nut thread (22).
22
14
21
22
6