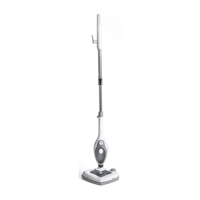
The SteamandGo Housekeeper Pro Series Multi-Function Steamer, model SAG806D, is a versatile cleaning appliance designed for household use. It functions primarily as a steam cleaner, capable of freshening carpets and cleaning various hard floor surfaces such as tiles, vinyl, and hardwood. The device is lightweight and offers a quick start-up time, making it convenient for everyday cleaning tasks. A transparent water tank allows users to easily monitor the water level during operation.
Important Technical Specifications:
- Model: SAG 806
- Rated Voltage: 120V
- Rated Frequency: 60Hz
- Output Power: 1550W
- Water Tank Capacity: 350ml
- Detergent Tank Capacity: 300ml
Usage Features:
The steamer can be used in two primary configurations: as a steam mop for floors and as a hand-held steamer for various surfaces and objects.
Assembly and Setup:
- Handle Attachment: The handle slides into an extension tube, which then slides into the steam mop body, locking into position. The handle can be removed for compact storage by pressing a button.
- Steam Head Attachment: The bottom end of the steam mop body slides onto the triangle mop head until it locks into place. A clip is then pushed into the handle to secure the two parts. It's crucial to attach the mop head using both hands to ensure it locks correctly and to avoid damage. The triangle steam head can be detached by pressing a button on its spindle.
- Microfibre Cloth Attachment: A microfibre cloth is positioned onto the triangle steam head and secured.
- Carpet Glider Attachment: For carpet cleaning, the microfibre cloth is placed on the triangle steam head, and then the carpet glider is positioned over and around the cloth. It can be removed by pushing it with a foot.
Operating the Steam Mop:
- Filling the Water Tank: Open the water tank cap and fill the tank with 350ml of water. It is recommended to use filtered or de-mineralized water to prolong the appliance's life.
- Power On: Plug the appliance into the mains power supply and switch it on. The indicator lights will illuminate green.
- Preheating: The appliance takes approximately 20 seconds to preheat before it's ready for use.
- Continuous Steam: Steam will run continuously until the unit is turned off or runs out of water. A full tank provides approximately 15 minutes of steam. If the tank empties, the pump will make a noise and shake, indicating the need to immediately turn off the switch and refill the tank.
- Detergent Release: The device includes a detergent tank. To use, fill the detergent tank with diluted detergent using a funnel and cup. Press the detergent spray button with your foot to release the detergent. If the spray nozzle becomes clogged, it can be removed with a flat screwdriver, cleaned under warm water, and reinserted.
Using as a Hand-held Steamer:
- Handle Removal: Press the handle tube button to detach the handle from the steam mop body.
- Accessory Adaptor: Install the accessory adaptor at the top of the steam mop body until it locks into position.
- Accessory Attachment: Choose the desired accessory and install it by aligning the arrow indicators and turning clockwise.
Included Accessories and Their Suggested Uses:
- Nylon Brush Tools: Suitable for ovens, hobs, showers, bathtubs, tiles, toys, refrigerators, etc. (Caution: be careful of metal brush scratching surfaces).
- Angled Nozzle: Ideal for stove tops, taps, sinks, and hard-to-reach areas.
- Brush Tool: Used for cleaning grout lines (sanded or non-sanded).
- Scraper Tool: Effective for scraping baked-on food, grime, and grease, as well as removing residues from surfaces like hobs and ovens.
- Steamer Jet: Useful for sinks, gas stoves, faucet grout, microwave ovens, range hoods, and other hard-to-reach areas.
- Squeegee Attachment: For cleaning shower screens, mirrors, and glass, and removing creases from sofas and tablecloths.
- Garment Attachment and Garment Cloth: For steaming sofas, tablecloths, and garments.
- Microfibre Cloth: For general cleaning of hard floors and carpets.
- Carpet Glider: Specifically for cleaning carpets.
- Measuring Cup: For filling the water tank.
Safety Instructions:
- Do not immerse the appliance in water.
- Do not leave the appliance unattended while connected to the mains power supply or when not in use.
- Never pull the power cord to disconnect; keep it away from heat sources and sharp edges.
- Do not use with wet hands.
- Do not pull or carry the appliance by the cord.
- Avoid directing steam at people, animals, electrical appliances, or outlets.
- Keep the appliance and cord out of reach of children; this appliance is not for use by children or individuals with reduced physical, sensory, or mental capabilities without supervision.
- Danger of scalding: The steam emitted is very hot.
- Do not use on leather, wax-polished furniture or floors, synthetic fabrics, velvet, or other delicate, steam-sensitive materials.
- Do not use on unsealed hard floor surfaces. Test an isolated area first, as heat and steam may affect the sheen of wax and some non-wax floors.
- Never add de-scaling, aromatic, alcoholic, or detergent products to the steam mop water tank, as this will cause damage and void the warranty.
- Always wear suitable shoes when using the appliance and changing accessories; avoid slippers or open-toed footwear.
- Ensure the microfiber cleaning pad is installed correctly.
- Do not leave the steam mop stationary on a floor for more than 15 seconds, as this may cause a pale residue build-up.
- When cleaning hobs and ovens, do not direct steam towards electrical connections. Ensure hobs and ovens are fully cooled.
- Do not force the steam unit onto the mop head.
- Do not use the appliance after a malfunction or if it has been dropped or damaged.
- If the supply cord or plug is damaged, it must be replaced by a qualified engineer.
Maintenance Features:
General Cleaning and Maintenance:
- Unplug and Cool: Always ensure the appliance is unplugged from the mains supply and has cooled sufficiently before cleaning.
- Drain Water: Drain any remaining water from the tank after every use.
- Clean Exterior: Clean the outer surface with a dry cloth.
- Clean Accessories: Wash accessories in warm, soapy water and allow them to dry.
- Clean Cleaning Pad: Remove the cleaning pad and wash it, ready for the next use.
Cleaning Microfibre Cloths:
- Microfibre cloths are machine washable on a warm setting using a mild detergent.
- Lay flat to dry for best results.
- Never use bleach or fabric softener when cleaning microfibre cloths.
Decalcifying the Water Tank Interior:
- To clean calcium deposits, add one or two tablespoons of white vinegar to a full tank of water and shake. Do not turn the steamer on during this process.
Removing Limescale:
Limescale can build up on metal parts, affecting performance and reducing steam output. It is recommended to remove limescale regularly, or after every 25-50 uses, depending on water hardness.
Using a Cleaning Solution for Limescale Removal:
- Prepare Solution: Prepare a solution of 1/3 white vinegar and 2/3 tap water and add it to the water tank.
- Position Unit: Secure and position the unit so that any released steam is directed away from floors, objects, and surfaces.
- Run Steam: Plug in and turn on the appliance, allowing it to produce steam until all the solution is used.
- Repeat and Rinse: Repeat the procedure as necessary. Then, fill the tank to the maximum level with fresh water and run steam through the system until the tank is empty to rinse.
- Warning: Do not leave the steamer unattended during limescale removal or use.
- Test: After limescale removal, perform a test on an isolated surface to ensure no debris remains in the unit.
- Frequency: In areas with hard water, decalcification may need to be performed more often.
Cleaning Blocked Accessories (Calcium Buildup):
If accessories produce less steam due to calcium buildup inside the nozzle:
- Vinegar Solution: Use the vinegar solution (as described for limescale removal) inside the affected accessory.
- Run Steam: Fill the water tank with water and run a continuous jet of steam through the affected accessory for several minutes to clear the pathway.
- Aim Safely: Aim the appliance at a neutral surface or cleaning cloth to ensure any emitted debris is contained.
Storage:
- After use, turn off the appliance and unplug it from the mains supply.
- Remove the water tank and empty any residual water.
- Clean the outer surface with a dry cloth.
- Remove and wash the cleaning pad.
- Store the appliance in a dry area, out of reach of children.
Troubleshooting:
- Reduced/No Steam:
- Possible Reason: Empty water tank. Solution: Fill the water tank.
- Possible Reason: Blocked steam nozzle. Solution: Clean the steam nozzle.
- Possible Reason: No power to the unit. Solution: Ensure the appliance is plugged in.
- Possible Reason: Steam button not pressed. Solution: Press the steam button.
- Possible Reason: Steam control knob set to min. Solution: Turn the steam control knob clockwise to Max.
- Unit Will Not Turn On:
- Possible Reason: Blown fuse or breaker. Solution: Replace the fuse or reset the breaker.
- Possible Reason: Power cord not plugged in. Solution: Plug the cord into a working circuit.
- Possible Reason: Internal fuse is blown. Solution: Contact customer services.
- Possible Reason: Handle not inserted correctly. Solution: Check that the handle is firmly connected to the steam mop body.