The Controls and Connectors
16 Operation Manual
NOTE
· The motorizing function of the fader is available only
when the AC power adaptor is connected to the
CC121.
· The touch sensitivity of the fader can be adjusted.
Refer to “Adjusting the touch sensitivity of the fader”
on page 21 for details.
2 PAN knob
Controls the PAN parameter.
3 [] (Mute) button
Turns the Mute on or off.
4 [] (Solo) button
Turns the Solo on or off.
5 [] (Read Automation) button
Turns the Read Automation on or off.
6 [] (Write Automation) button
Turns the Write Automation on or off.
7 [] (Monitoring) button
Turns the Monitoring on or off.
8 [] (Record Enable) button
Alternately enables and disables recording.
9 [] (Edit Channel settings) button
Opens/closes the settings window for the selected
channel.
) [] (Edit Instrument) button
Opens/closes the VST instrument settings window
for selected track.
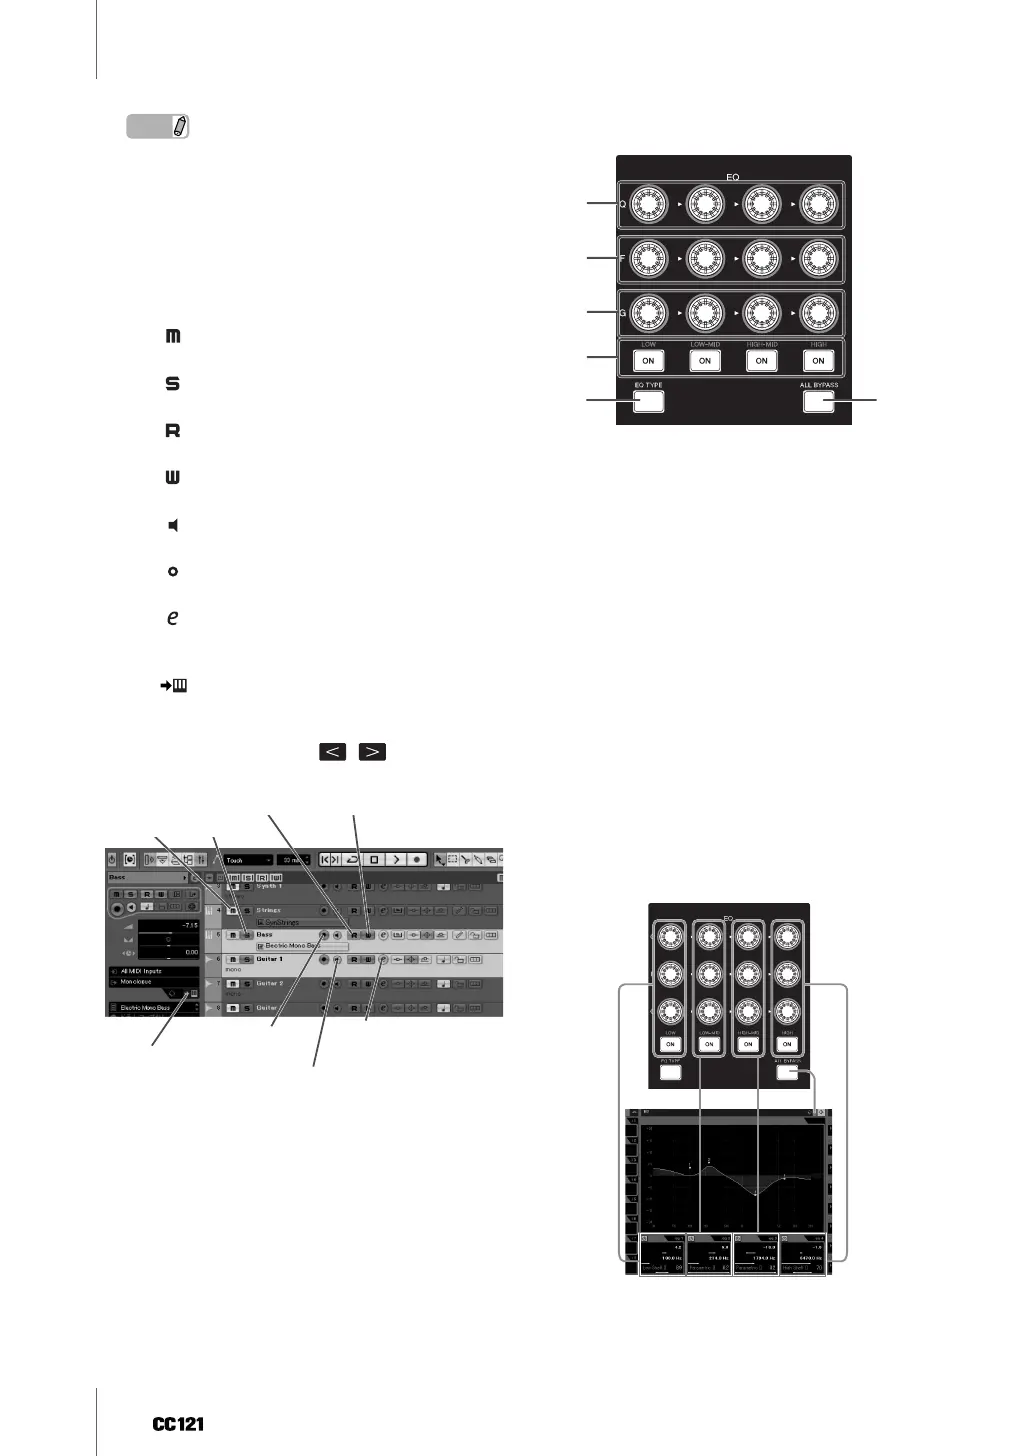
! CHANNEL SELECT [ ][ ] buttons
Selects the track you want to control.
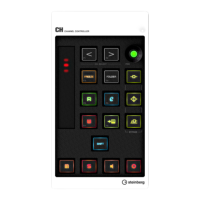
■ EQ sections
This section lets you adjust the parameters of the 4-
band EQ built into the Audio track or Instrument
track. All necessary EQ parameters such as Q/F/G of
each band, EQ type selection and Bypass on/ off
can be edited.
1 [Q] knobs
Adjusts the Q (bandwidth) of each EQ band.
2 [F] (Frequency) knobs
Adjusts the center frequency of each EQ band.
3 [G] (Gain) knobs
Adjusts the gain of each EQ band.
4 [ON] buttons
Turns each EQ band on or off.
5 [EQ TYPE] button
When this button is turned on, rotating any of the Q, F
and G knobs will select the type of the shape for the
corresponding band instead of adjusting the Q/F/G
parameter.
6 [ALL BYPASS] button
Switches EQ bypass on/off.
Mute
Solo
Read Automation
Edit the channel settings
Monitoring
Record Enable
Edit Instruments
Write Automation
1
2
3
4
56