- 18 - - 19 -
Other functions of GluePRO400LCD
Other functions of GluePRO400LCD
LOC function
To avoid altering the chosen settings unin-
tentionally, the GluePRO400LCD comes
with the Lockable Override Control function
(LOC). To find out how to set the LOC
function, contact our Service Department
on +44/1733/366-700.
Idle mode
After any selectable period, idle mode au-
tomatically reduces the temperature in the
heating element to a temperature you can
select. This depends on when the button
was last pressed. Idle state is indicated by
the blue flashing LED / blue flashing dis-
play. On leaving the factory, this function
is deactivated. To find out how to set idle
mode, contact our Service Department on
+44/1733/366-700.
1. Hold the tool with heat-protective
gloves.
2. Unscrew nozzle
13
.
At this point, never pull the
trigger!
3. Screw the replacement nozzle on
hand-tight.
Operation/Function
Getting started
L Plug the tool in.
L Switch the tool ON by pressing the
ON/OFF button for two seconds.
The tool immediately heats up to the
selected temperature.
L While it is heating up, the LED flashes
red / the display lights up blue.
L Once the LED shows red / the display
lights up green, the temperature set-
ting range has been reached and the
hot-melt glue applicator is ready for
use.
L If the temperature range is too high,
the LED / display lights up red.
L Insert the hot-melt glue stick into the
opening at the rear of the tool.
L Switch the tool OFF by briefly pressing
the ON/OFF button.
Temperature setting
GluePRO400 LCD
L The temperature can be selected to
an accuracy of one degree from 40 to
230 degrees Celsius. On leaving the
factory, the tool is set to 190 degrees
Celsius.
L Press the SET button
6
. Keeping
the SET button pressed, select the
chosen temperature via the
7
+
8
UP and DOWN buttons. The tem-
perature you select is shown on the
display.
L Releasing the
6
SET button shows
you the temperature now reached in
the heating chamber.
L Keep the SET button pressed. Pressing
the UP or DOWN button automatically
increases or reduces temperature in
steps of 1 degree. Keeping the UP or
DOWN button pressed for at least
3seconds increases or reduces tem-
perature by 5degrees.
L
Do not select any temperature
higher than is needed for apply-
ing the hot-melt adhesive!
Stroke adjustment
L Glue feed can be adjusted to suit any
particular application, giving you pre-
cision in selecting an exact quantity of
glue per stroke and letting you set the
feed trigger
12
for ease of use.
L The slide control for adjusting glue
feed
3
adjusts the trigger
12
to re-
duce or increase the quantity of glue
delivered.
L Pull the trigger and move the glue feed
slide control
3
towards the nozzle
until the tool delivers the chosen
quantity of glue per trigger pull or
gives you the delivery rate you find
easy to work with.
L Adjust the slide control in the opposite
direction to restore the initial position.
Changing nozzles
Customised nozzles are available for spe-
cific applications. To change the nozzle,
the tool must be warm and unplugged.
For this, heat up the GluePRO300 for no
more than 45seconds
Heat the GluePRO400 LCD to no more
than 100 degrees Celsius.
Switch the tool OFF once it has reached
temperature.
Technical specifications
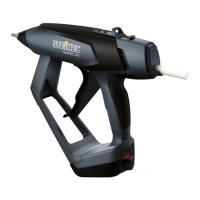
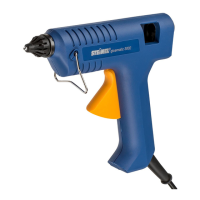
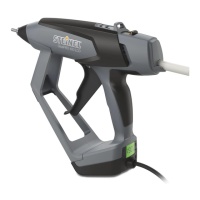
GluePRO300 GluePRO400 LCD
Warm-up time < 3min to 190°C < 2 min to 190°C
Melt temperature 190°C 40°C - 230°C
Maximum delivery rate* 1.2 kg/h 1.5kg/h
Dimensions 290 × 230 × 70 mm 290 × 230 × 70 mm
Supply voltage 220 - 230 V / 50/60 Hz 220 - 230 V / 50/60 Hz
Output (idle phase) 30 W 40 W
Maximum power consumption 300 W 400 W
Rated input power** 90 W 110 W
Weight Approx. 580 g Approx. 600 g
Glue sticks Genuine STEINEL 11 mm glue sticks
*Depending on temperature and glue viscosity
**For 30 s of gluing / 60 s pause
GB
 Loading...