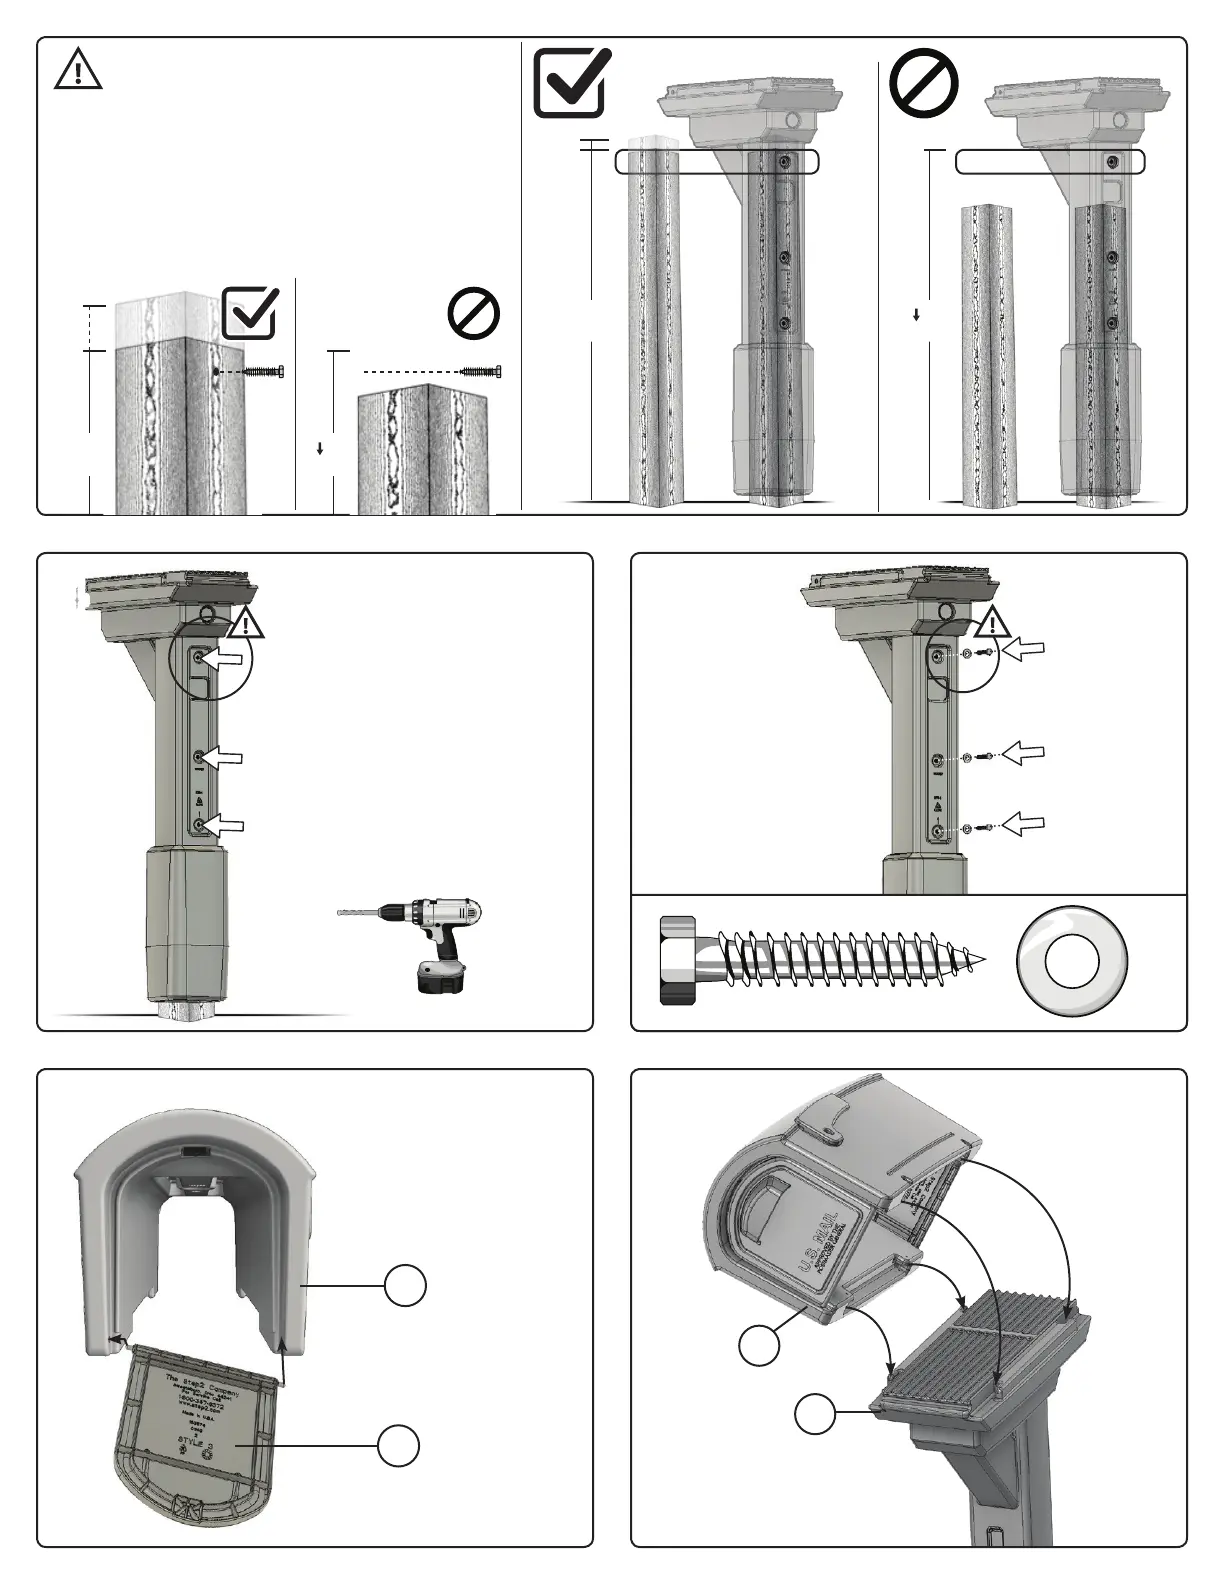
3
Drill holes in pictured
locations on mailbox to allow
for mailbox to be bolted to
post (in next step).
Percez des trous aux endroits
indiqués sur la boîte aux lettres
an de permettre de la visser sur
le poteau (étape suivante).
Taladre oricios en la ubicación
mostrada en la foto en el buzón
para permitir que el buzón
sea atornillado al poste (en el
siguiente paso).
4 5
1/4” drill bit
Foret de 6,35 mm
broca de 6,35 mm
x2-3
x2-3 | 2” (5,08 cm)
A
B
76
Repeat to other side
Répétez de l’autre côté
Repita al otro lado
D
A
STEPS 45 / ÉTAPES 45 / PASOS 45
• ONLY USE TOP BOLT IF POST IS 34” 36”
86,36 91,44CM ABOVE GROUND LEVEL.
• N’UTILISEZ LE BOULON SUPÉRIEUR QUE SI LE
POTEAU EST À 86,36 91,44 CM 3436 PO DU SOL.
• SOLO USE EL PERNO SUPERIOR SI LA ENTRADA ES DE
34 “36” 86,36 91,44 CM SOBRE EL NIVEL DEL SUELO.
34”-36”
(86,36 - 91,44cm)
34”
(86,36cm)
34”
(86,36cm)
34”-36”
(86,36 - 91,44cm)
34”
34”
36”
36”
 Loading...