Reminder to grease the bike
When the odometer exceeds 300 km, the symbol
Simultaneously press the buttons and MODE to delete
Reminder of maintenance
When the counter exceeds 500 km, the symbol
Simultaneously press the buttons and MODE to delete
it.
Chronometer
To use the stopwatch, with the monitor in Odometer
mode, press the SET button until the Sw symbol appears
on the display; press to activate or to stop it. Press
the SET button to reset the stopwatch. Press the MODE
button to exit.
Speed Indicators
The symbols indicate that the current speed (SDP) is
higher or lower than the average speed (AVS).
1. Press and hold the SET button until the degree symbol
starts flashing (This indicates that the device is in edit
mode).
2. Press to select the measuring unit in degrees: ° C
(centigrade) or ° F (Fahrenheit); press SET to confirm.
3. Press to choose the 12 or 24 hour time format;
press SET to confirm.
4. Press to edit the time; press SET. Edit the minutes
with and press SET. Edit the seconds; press SET.
5. Then press to select the circumference of the rim,
press SET to confirm each digit.
6. Press if you want to change the distance measuring
unit: Km (kilometers) or Mile (miles); press SET to
confirm. After this setting is made, the startup configura-
tion is complete.
7. Wait approximately 10 seconds without pressing any
button to exit the edit mode.
Delete data
Press for 3 seconds to erase all data on the screen
(except time).
Sleep Mode
If the monitor does not receive any signal after about 5
minutes, it will enter energy saving and only the time will
be displayed.
MODE
MAX
AVS
SPD
KM / H
Sw
AM
Th
PM
RAT
TM
TM UP
TTM DN
DST
TRIP UP
ODO DN
Km Mile
CIR / CM
Instruction manual
Bicycle Speedometer
and odometer
V0.0BIKE-030
1017A
• For safety, you must drive with caution and pay close
attention to the environment during the bike ride. Avoid
distraction with the meter.
• Be sure to properly attach the parts to the bicycle. The
company is not responsible for misuse or poor
installation of the product.
• This appliance is not intended for use by persons
(including children) whose physical, sensory or mental
capabilities are different or reduced, or lack experience
or knowledge.
• Children should be supervised to ensure that they do
not use the appliance as a toy.
• Do not expose the equipment to extreme temperatu-
res.
• Avoid using in rain or wet conditions.
Alert from
maintenance
Grease the
bicycle
Displacement
Change mode
Selector (SET)
Comparator
Display
Magnet to spokes
Button battery
CR2032 (x2)
Sensor
Cinchos (x6)
Screws (x4)
Handlebar base
Time setting
Circumference of
tire
Distance unit
Comparator
Sensor
Display
Magnet
60 cm
Battery low
indicator
CAUTIONS
Cautions
General description
Content
Placing or Replacing batteries
Installation Bicycle installation Bicycle installation
How to use
Start settings
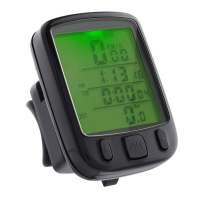
Principal
screen
Screen mode
TM/TRIP
Odometer mode
display (ODO)
General data
Data of time and distance
traveled by pedaling (UP)
and without pedaling (DN)
Measurement data from
distance
Configuration Sequence Additional Functions Additional Functions Appendix Appendix Specifications
Installation Diagram
Display
Sensor
The information shown in this manual is for reference
only on the product. Due to updates there may be
differences. Please refer to our website
www.steren.com for the latest version of the manual.
Use a coin or flat object to open the battery compartment
on both the monitor and the sensor.
Insert the batteries as shown in the picture. Be sure to
place them with the correct polarity.
Place the screws in the base, and insert a pair of
straps, as shown in the picture.
Slide the monitor onto the base until you hear a
click. If you want to remove it, press down on the
lower latch (from the base) and slide the monitor
up.
Use a pair of straps to attach the sensor to the
bicycle scissor, as shown in image.
Remove the screw from the magnetic part, and
place it on a spokes of the tire, as shown in the
image. Replace the screw firmly.
The distance between the sensor
and the monitor should not exceed
60 cm
There must be no more than
10 mm of distance between
the sensor and the magnetic
part
Attach base and button to handle. Secure the
base with the straps.
Read this instruction manual to learn how to use the
product properly. Please check the latest version on
our website www.steren.com
MODE
MAX
AVS
SPD
KM / H
Sw
AM
Th
PM
RAT
TM
TM UP
TTM DN
DST
TRIP UP
ODO DN
Km Mile
CIR / CM
MODE
MAX
AVS
SPD
KM / H
Sw
AM
Th
PM
RAT
TM
TM UP
TTM DN
DST
TRIP UP
ODO DN
Km Mile
CIR / CM
MODE
MAX
AVS
SPD
KM / H
Sw
AM
Th
PM
RAT
TM
TM UP
TTM DN
DST
TRIP UP
ODO DN
Km Mile
CIR / CM
1
2
3
1
2
SENSOR
60 cm
10 mm
+
Once the battery is inserted, the monitor will automatically
turn on and the main screen will be displayed.
The device has three display modes in which the route
data is displayed.
Press the MODE button on the monitor or the handle
button to change the display mode. After a few seconds
you will return to the main screen.
Reset
To restart the computer, remove the battery from the
monitor and replace it after approximately 10 s.
Illumination
Press and hold the MODE button until the display lights
up.
Tire circumference
According to the size of the bicycle tires, refer to the
following tables for the circumference. This data must be
entered in the computer's startup configuration.
The size is usually shown on the side of the tire covers.
Size
27” x 1 – 1/4”
27” x 1 – 1/8”
26” x 2.3”
26” x 2.25”
26” x 2.1”
26” x 2.0”
26” x 1.9”
26” x 1.75”
26” x 1.5”
26” x 1.25”
26” x 1.0”
24” x 1.9”
20” x 1 – 1/4”
1.6” x 2.0”
1.6” x 1.95”
1.6” x 1.5”
Circumference
216.1
215.5
213.5
211.5
209.5
207.4
205.5
203.5
198.5
195.3
191.3
191.6
161.8
125.3
125.7
120.6
Monitor input: 3 V - - - (1 x CR2032)
Sensor input: 3 V - - - (1 x CR2032)
Before starting the configuration, it is important that you
know the circumference of the bicycle tires. Refer to the
"Appendix" at the end of this manual for references about
standard measurements.
SPD
ODO
DST
MXS
AVS
TTM
TM
RAT
Th
Sw
TM UP
TM DN
TRIP UP
TRIP DN
Current speed
Odometer (accumulated distance)
Distance traveled
Maximum speed
Average speed
Total travel time
Travel time
Cumulative travel time
Actual temperature
Chronometer
Working time
Rest time
Distance covered in work
Distance walked at rest
+
+
Unit of
temperature
Time format
Size
700 C x 38 mm
700 C x 38 mm
700 C x 35 mm
700 C x 32 mm
700 C x 30 mm
700 C x 28 mm
700 C x 25 mm
700 C x 23 mm
700 C x 20 mm
700 C x tubular
650 C x 23 mm
650 C x 20 mm
Circumference
218.0
216.8
215.5
211.5
214.5
213.6
212.4
210.5
207.4
213.0
199.0
194.5