Inserting the Dust Bag
NOTE: This unit can be used with the shake-out bag alone, however it must be
cleaned after every use if there is no dust bag installed.
IMPORTANT: It is recommended that a disposable dust bag is used for optimal
operation.
1. Unplug the hose connecting power cord and remove the exible hose.
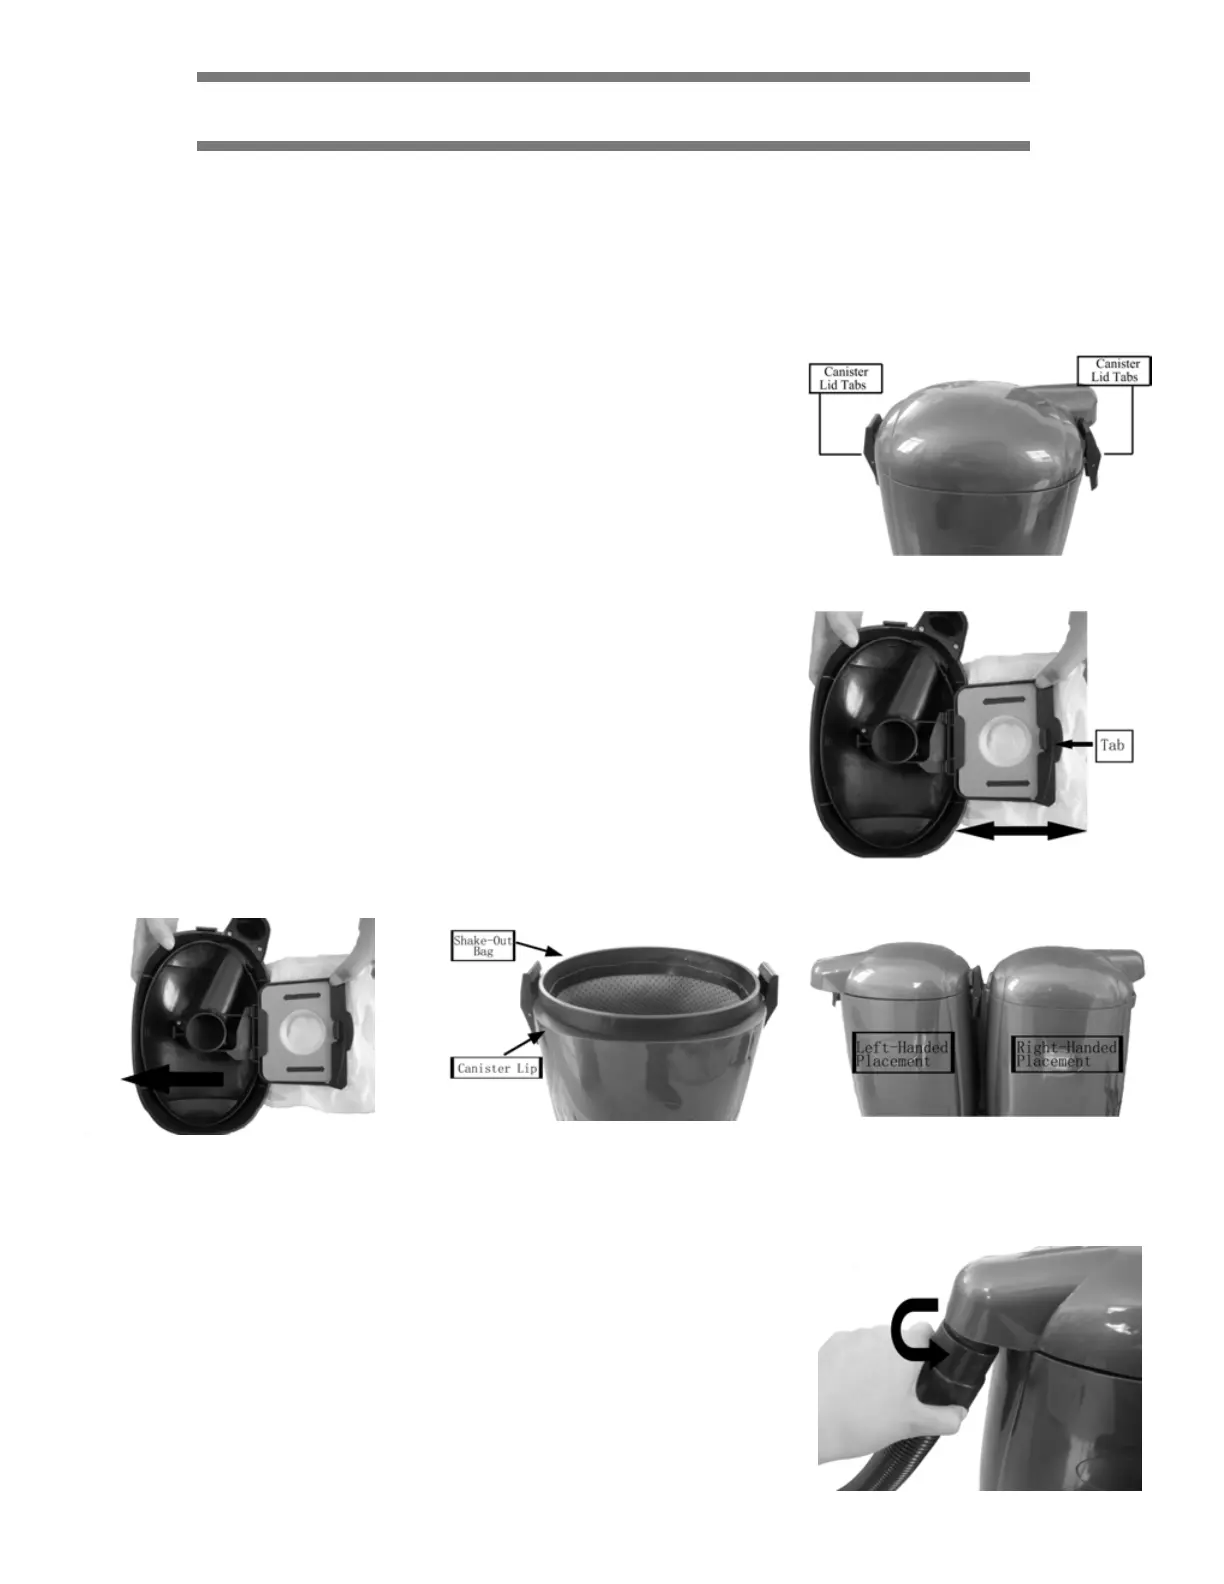
2. To open the canister lid, press on the canister lid tabs on each side of the unit and
lift canister lid. (Fig. 1)
3. Pull the tab on the dust bag holder out slightly and ip upwards. (Fig. 2)
4. Holding the dust bag in your hand, slice it rmly between the slots in the bag
holder. (Fig. 2)
5. The cardboard face of the new bag should rest securely in the dust bag cover
guides. (Fig. 3)
6. Ensure that the shake-out bag is in place. (Fig. 4)
7. Flip the dust bag hold over pressing the tab on the bag holder until it clicks, then
replace the canister lid.
8. The canister lid can be replaced on the unit with the hose opening on the right or
left, as per your preference. (Fig. 5)
Assembly Instructions
WARNING: To reduce the risk of electric shock, the power cord must be disconnected before removing the dust bag, shake-
out bag, changing the lters or performing maintenance or trouble-shooting checks.
NOTE: Always remove the power plug from the wall outlet before assembling or removing accessories.
Fig. 1
Fig. 2
Attaching the Flexible Hose to the Vacuum
The Flexible hose should be connected to the vacuum before strapping the unit to
your back.
1. To connect the exible hose into the hose inlet, insert the threaded end of the
exible hose into the hose inlet and turn counter-clockwise until it locks into
place. (Fig. 6)
2. Plug the power cord into the electrical outlet.
3. To remove the exible hose, unplug the power cord and then turn the hose clock-
wise and pull the exible hose out.
Fig. 3 Fig. 4
Fig. 5
Fig. 6