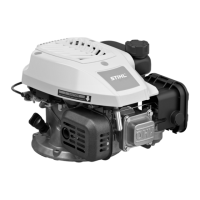
STIHL TS 460 27
5.4 Crankcase5.3 Piston Rings
Top:
Ring grooves in piston
Bottom: Mounting the
piston rings
Top:
Socket 0812 542 2104
Bottom:
Tightening the cylinder base screws
Top:
Flywheel
Bottom:
Piston fitted on wooden assembly block
- Remove the clamping strap
and wooden assembly block.
Carefully line up the cylinder
and the cylinder gasket. Fit
cylinder base screws and
tighten them alternately to
10Nm in a diagonal pattern.
The parts are assembled
in reverse order.
- Remove piston, see 5.2.1.
- Remove piston rings from piston.
- Scrape off carbon buildup in
grooves using an old piece
of piston ring.
- Fit new piston rings in ring
grooves so that the chamfers
on the ends face the piston
head.
- Mount piston, see 5.2.2.
- Remove clutch, see 4.1.
- Remove cylinder, see 5.2.1.
- Remove expansion tank, see
10.9.
- Remove flywheel from crankshaft
stub, see 6.1.5.
- Remove piston, see 5.2.1.
.
.
ran
s
a
emova
 Loading...