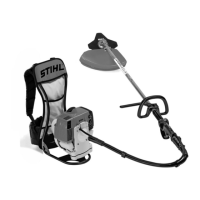
► Fit clamp (4) in the loop handle (3).
► Place the loop handle (3) with clamp (4) on the
shaft (5).
► Fit the washers (2) on the screws (1).
► Press the clamp (6) against the shaft (5).
► Insert the screws (1) through holes in the loop
handle (3) and clamps (4 and 6).
► Fit the nuts (7).
► Slide the loop handle (3) until the distance (a)
is no more than 20 cm.
► Firmly tighten the nuts (7).
6.4 Mounting the Loop Handle with
Barrier Bar
► Shut off the engine.
► Insert the nuts (2) in the barrier bar (1) so that
the holes line up.
► Fit the clamp (5) in the loop handle (3).
► Place the loop handle (3) with clamp (5) and
barrier bar (4) on the shaft (6).
► Press the clamp (7) against the shaft (6).
► Insert the screws (8).
► Slide the loop handle (3) until the distance (a)
is no more than 20 cm.
► Tighten the screws (8) firmly.
6.5 Mounting and Removing the
Deflector
6.5.1 Mounting the Deflector
► Shut off the engine.
► Push the deflector (1) into the guides on the
gear housing up to the limit stop.
► Insert and tighten the screws (2).
6.5.2 Removing the Deflector
► Shut off the engine.
► Take out screws.
► Remove guard.
6.6 Fitting and Removing the Skirt
6.6.1 Fitting the Skirt
► Shut off the engine.
► Slide the guide slot in the skirt (2) onto the
deflector (1) – it must snap into position.
► Push the line limiting blade (3) into the slot in
the skirt (2).
► Insert and tighten down the screw (4) firmly.
6.6.2 Removing the Skirt
► Shut off the engine.
► Insert stop pin (2) into the hole in the skirt (1).
► Use the stop pin (2) to slide the skirt (1) off the
deflector.
The line limiting blade (1) can be left on the skirt.
English 6 Assembling the Trimmer
12 0458-840-0101-A

 Loading...