Do you have a question about the STRIKEWORTH TriSport and is the answer not in the manual?
Attach fan #P44 to air hockey playfield #P2 using P53 screws, ensuring correct airflow direction.
Attach side apron #P6 to triangular end apron P4, routing the fan cable.
Align and secure the air hockey playfield #P2 to side apron #P6 with P41 screws.
Attach side apron #P8 to the air hockey playfield #P2, ensuring it is flush with apron P4.
Attach playfield support braces, checking orientation for football pitch grooves.
Attach side apron P7 to the structure after support braces are in place.
Secure one football end rail P16 in place with P40 screws before inserting the pitch.
Loosen screws on panel P7 to support braces if needed for easier football pitch insertion.
Insert the second goal end panel P16 and attach to P7 and P8 using P40 screws.
Attach triangle end apron P5 to the structure, noting its orientation.
Attach hockey goal box P11 and football goal box P12 to both ends of the table.
Attach P34 metal plates using P33 screws to triangle end aprons P4 and P5.
Confirm the air hockey power lead and plug are correctly passed through the exit hole.
Screw levelling feet into the P13 metal leg structure by hand.
Insert P15 lock through the P13 leg structure's central hole and secure with nut P49.
Place washer P50 on the thread and insert leg structure into apron P4/P5.
Secure spacer P15 with nut 46 and wing nut P46 inside the table.
Bolt leg support panels P10 to the legs using P30 bolts and P45 washers.
Position the table body onto its legs, allowing them to swing down, and loosely insert locking nut P14.
Insert pool table playfield P1 evenly, ensuring it doesn't catch nets and side aprons are flush.
Secure pool table playfield flush with edges using 18 P41 screws.
Insert rubber pocket liners into pockets, securing with P42 screws.
Rotate table to air hockey side, lock, and prepare for scoring sliders.
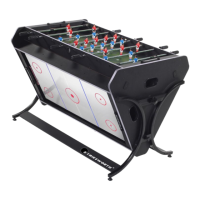
| Games | Air Hockey, Foosball, Table Tennis |
|---|---|
| Sports Included | Air Hockey, Foosball, Table Tennis |
| Controls | Manual |
| Accessories | Paddles, balls, pushers |
| Number of Players | 2-4 |
| Power Supply | Not applicable |