NNoottee -- See High Suction Visual and Audible Indicators for important condition, indication, and action information.
TTaabbllee 2277 –– HHiigghh SSuuccttiioonn VViissuuaall aanndd AAuuddiibbllee IInnddiiccaattoorrss
CCOONNDDIITTIIOONN IINNDDIICCAATTIIOONN AACCTTIIOONN
HIGH suction limit RANGE – The
suction limit range selected is equal to
or greater than 120 mm-Hg.
Two declining tones; orange HIGH
suction banner appears on the main
control panel display; suction range
indicator illuminates orange.
Determine whether a high suction
range is desired.
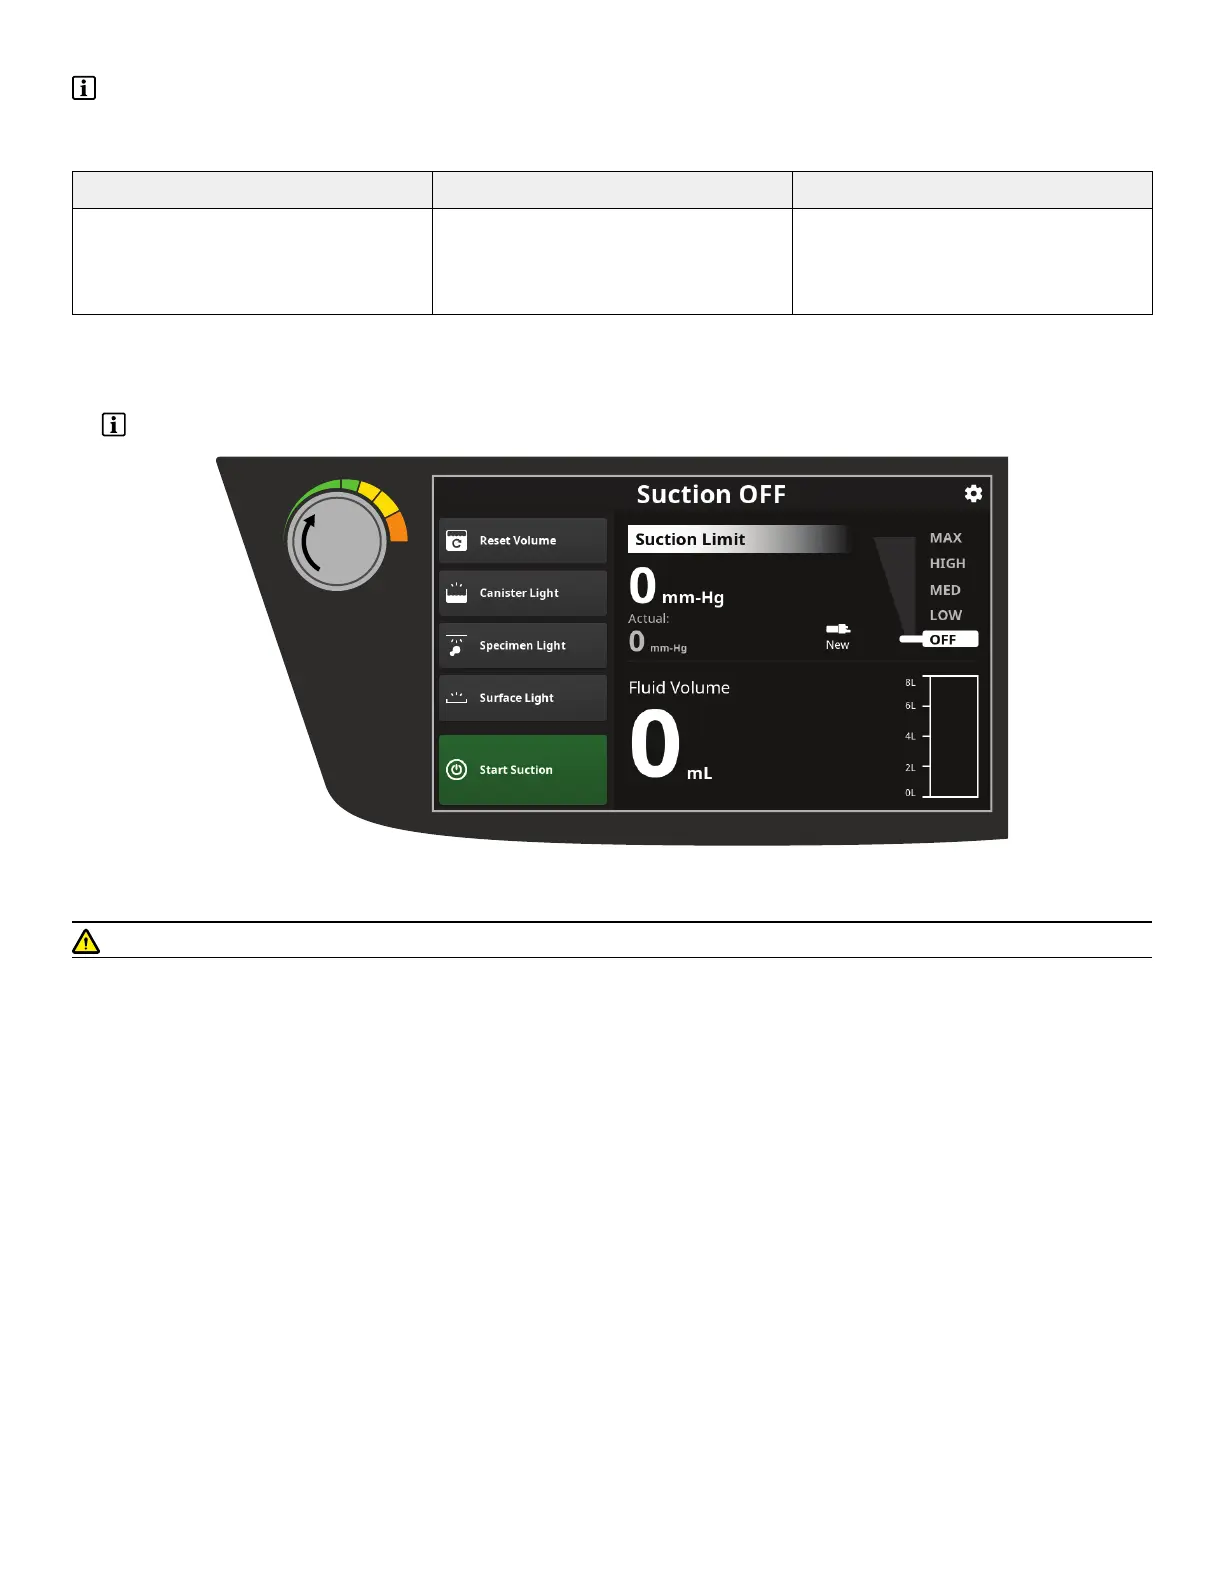
1. While viewing the main control panel display, turn the suction control dial to the level of suction required (Figure 25).
2. Touch the START SUCTION button to start fluid suction.
NNoottee -- After suction has started, the STOP SUCTION button may be touched to stop fluid suction.
FFiigguurree 2255 –– TToo SSttaarrtt aanndd AAddjjuusstt SSuuccttiioonn
WWAARRNNIINNGG -- Always use the minimum suction limit required to achieve the desired clinical outcome.
3. Turn the suction control dial to adjust the suction limit during the procedure as required.
4. Adjust the location of the suction end effector at the surgical site as required.
5. Suction the fluid from the surgical site at various suction limit values or intervals as required.
6. If the specimen collection manifold is install for use during the surgical procedure, see
To Collect a Specimen
(page 43).
700000969828 Rev-AA 41 EN
 Loading...