!
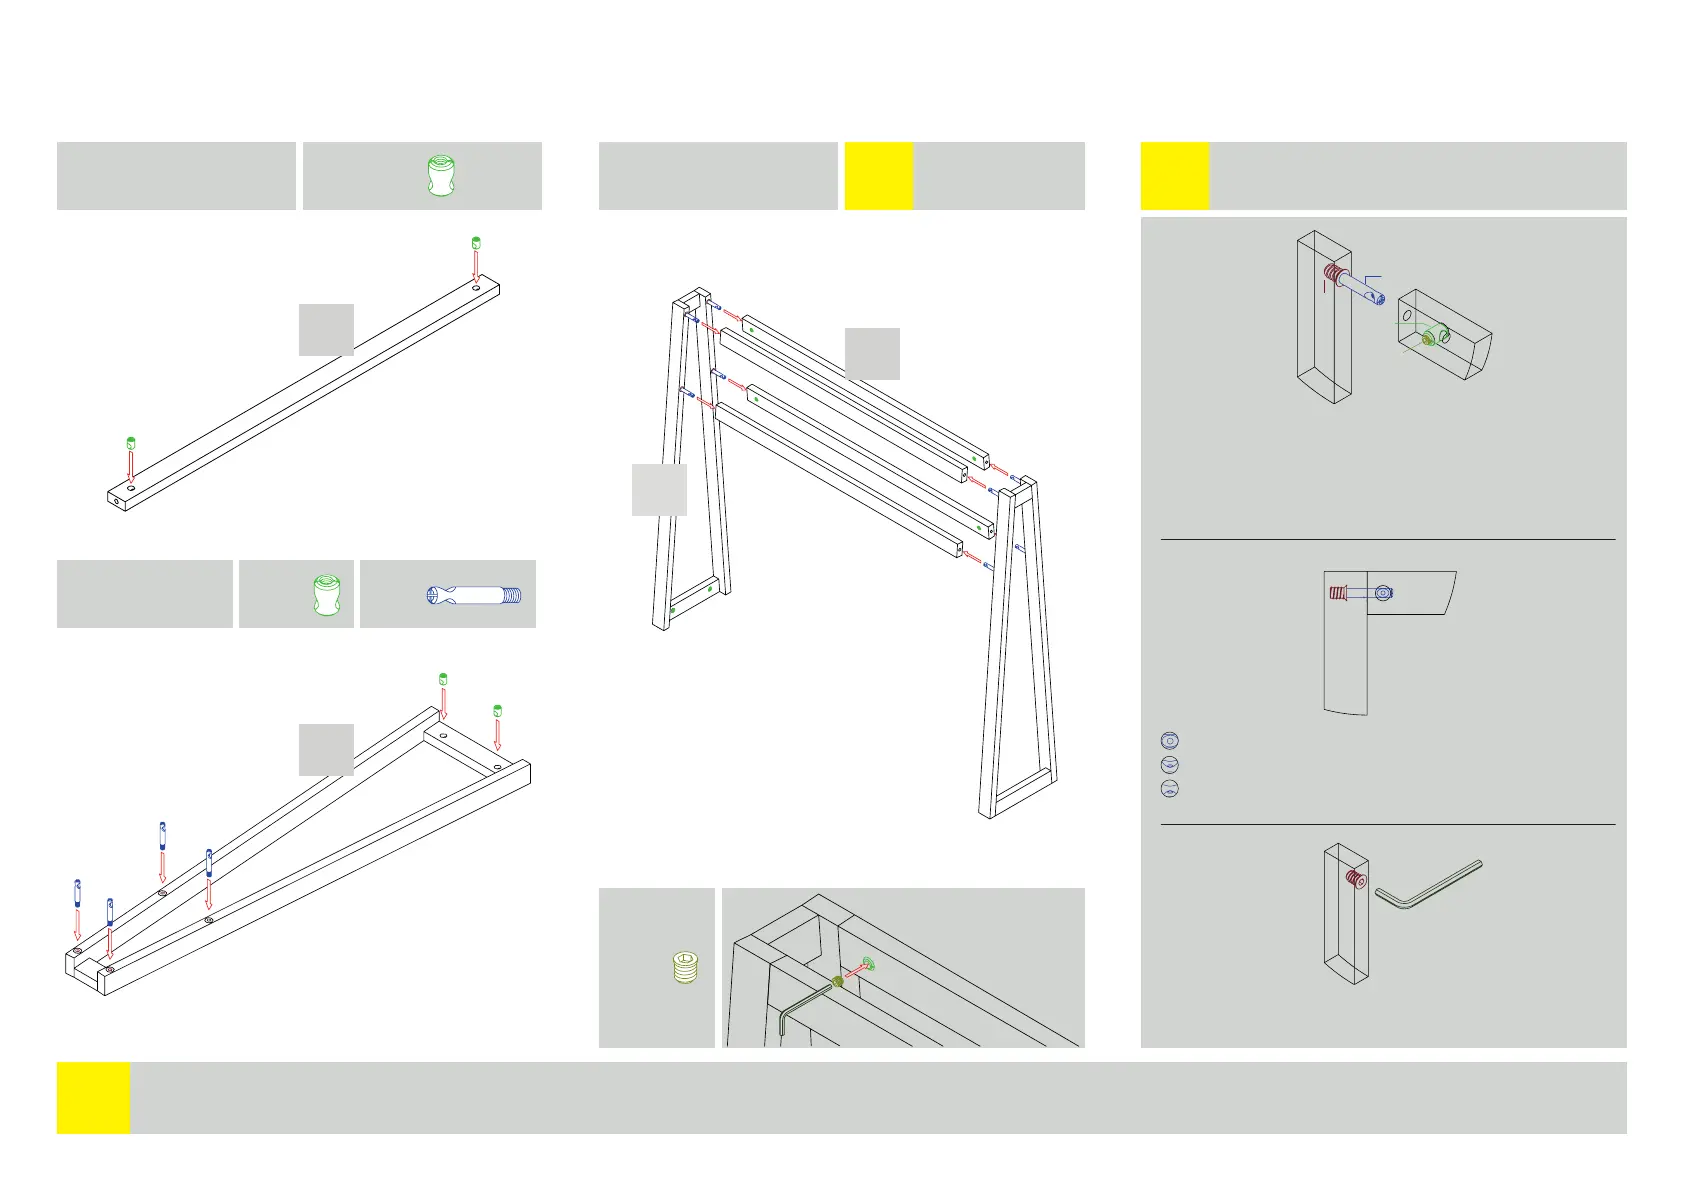
To prevent damage, assemble the object on a soft surface.
Quick Connector tips
8x G1 4x G2
2x B Side frames
8x G2
4x A Cross struts
8x G3
A + B
See Quick
Connector tips
* *
G2
Optimum positioning of the steel dowel (G1).
Incorrect positioning. Loosen steel dowel (G1) until the holes are
aligned. The steel dowel (G1) does not have to be tightly screwed into
the preassembled steel socket (H), it can be loosened by up to a half
rotation.
A
B
B
A
Assembly of support handle
2 Trolley | Assembly instructions
Screw the steel dowel (G1) into the preassembled steel socket (H) as far as it will
go.
Push the housing (G2) into the hole in the wood. Make sure that the housing
(G2) is positioned in such a way that the hole in the housing (G2) is correctly
aligned and the two workpieces (G1 + G2) can be plugged together.
Screw the grub screw (G3) into the housing (G2).
If for any reason the positioning of the steel dowel (G1) is still incorrect or
too loose, the preassembled steel socket (H) can be loosened or tightened
accordingly.
G2 + G3
G1 + G2
G1 + G2
G1 + G2
G1 + G2
G2
G1
G1
G1
G1
G2
G2
H
G1
G3
G2
I
 Loading...