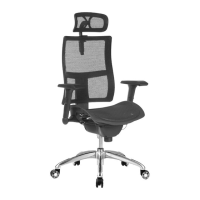
» ASSEMBLY INSTRUCTIONS
NSW VIC QLD HONG KONG CHINA
» USE this product only for seating one person at a time.
» DO NOT use this chair as a step stool/ladder.
» DO NOT sit on any part of the chair except the seat.
» DO NOT use chair on uneven oor surfaces.
» DO NOT use chair unless all bolts, screws are tight.
At least every 6 months check all bolts, screws to be
sure they are tight.
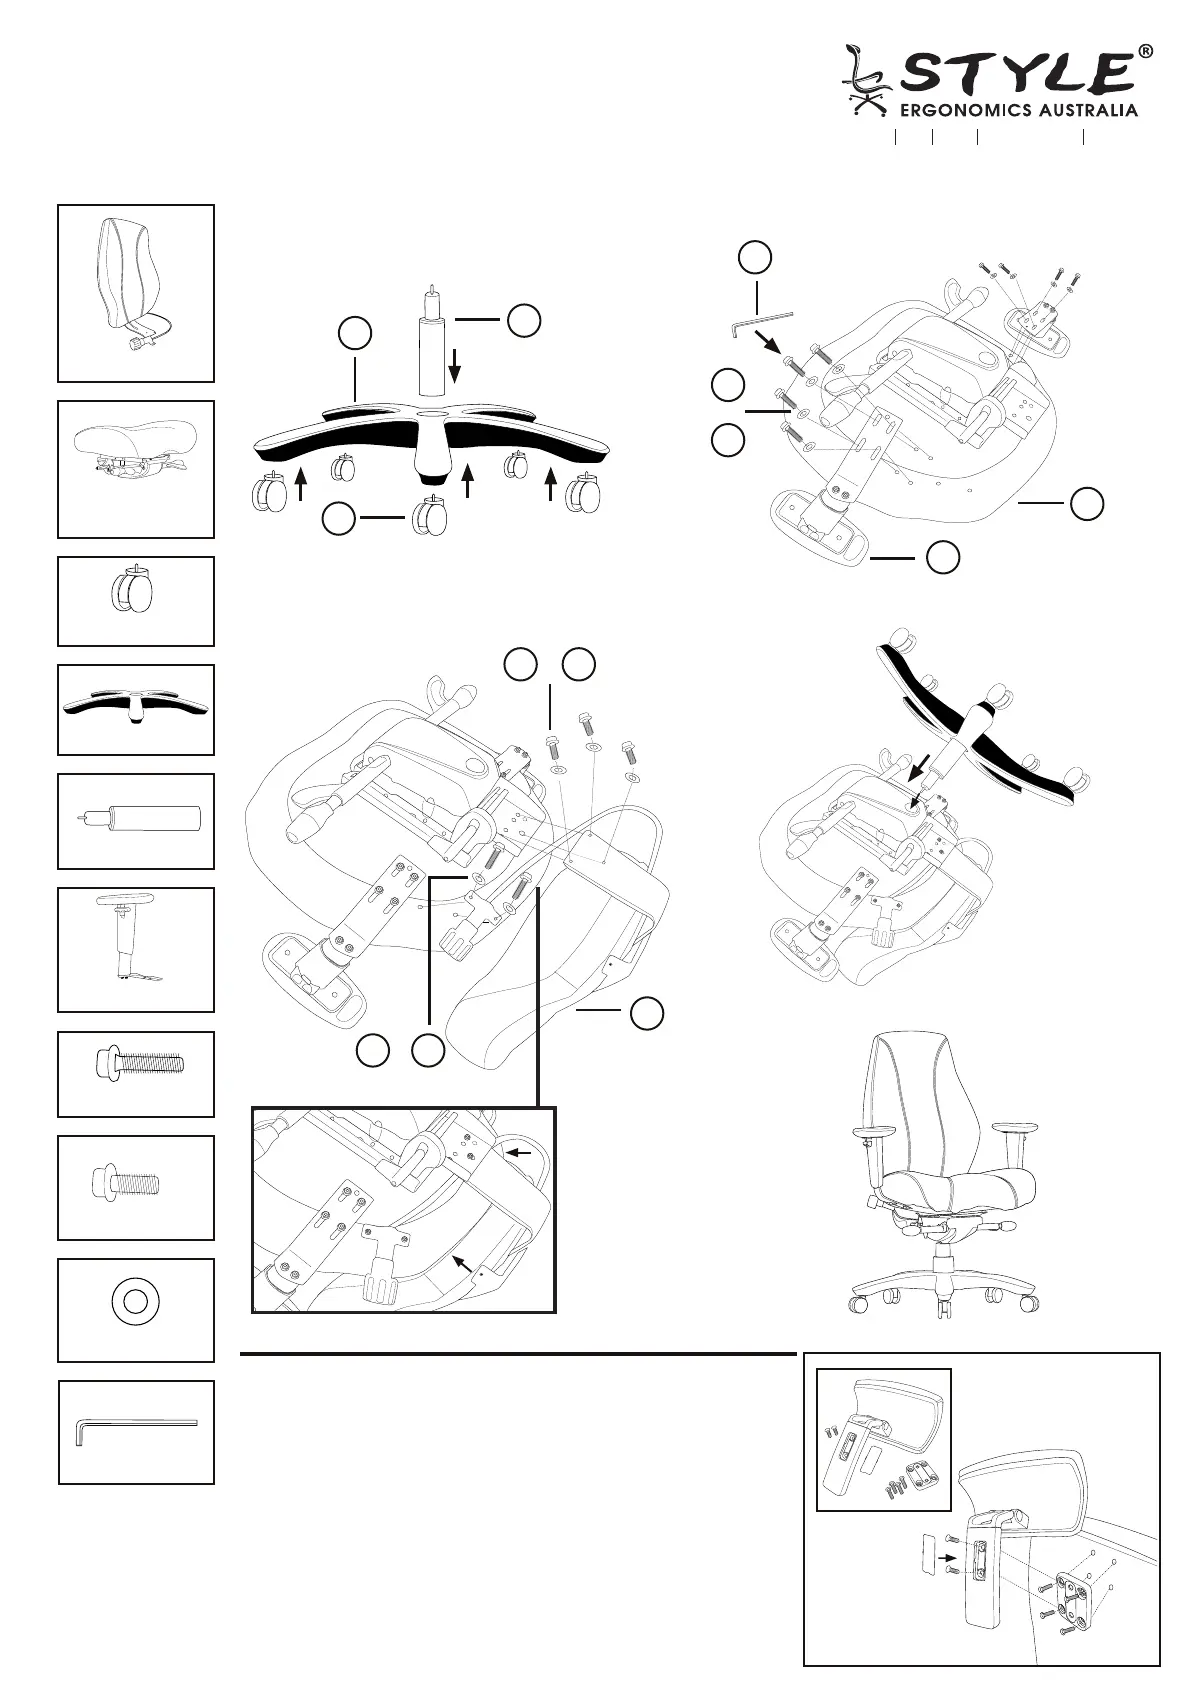
» PARTS
» STEPS
» STEP 2 » STEP 1
» FINISH
» STEP 3 » STEP 4
IF ANY PARTS ARE MISSING, BROKEN, DEMAGED OR WORN, STOP USE OF THE
PRODUCT UNTIL REPAIRS ARE MADE USING FACTORY AUTHORIZED PARTS.
FAILURE TO FOLLOW THESE WARNINGS COULD RESULT IN SERIOUS INJURY.
PREVENTIVE MAINTENANCE AND WARNING
RAPTOR
A
BACK X 1
D
BASE X 1
G
BOLTS X 10
E
GAS X 1
H
BACK BOLTS X 3
F
ARM X 2
I
WASHER X 13
B
SEAT WITH
MECHANISM X 1
J
ALLEN KEY X 1
i.
C
CASTOR X 5
E
D
B
F
I
I
I
A
G
G
+
+
+
J
H
*INSTALL HEADREST
AFTER STEP 4
(if applicate)
*The hole on the
back may need
to be pitched
before installation
*The cable of the lumbar
goes under the bar of
mechanism and back
^ There should be no
gaps between the back
and seat, make sure
both side are even.
C
^
*
 Loading...