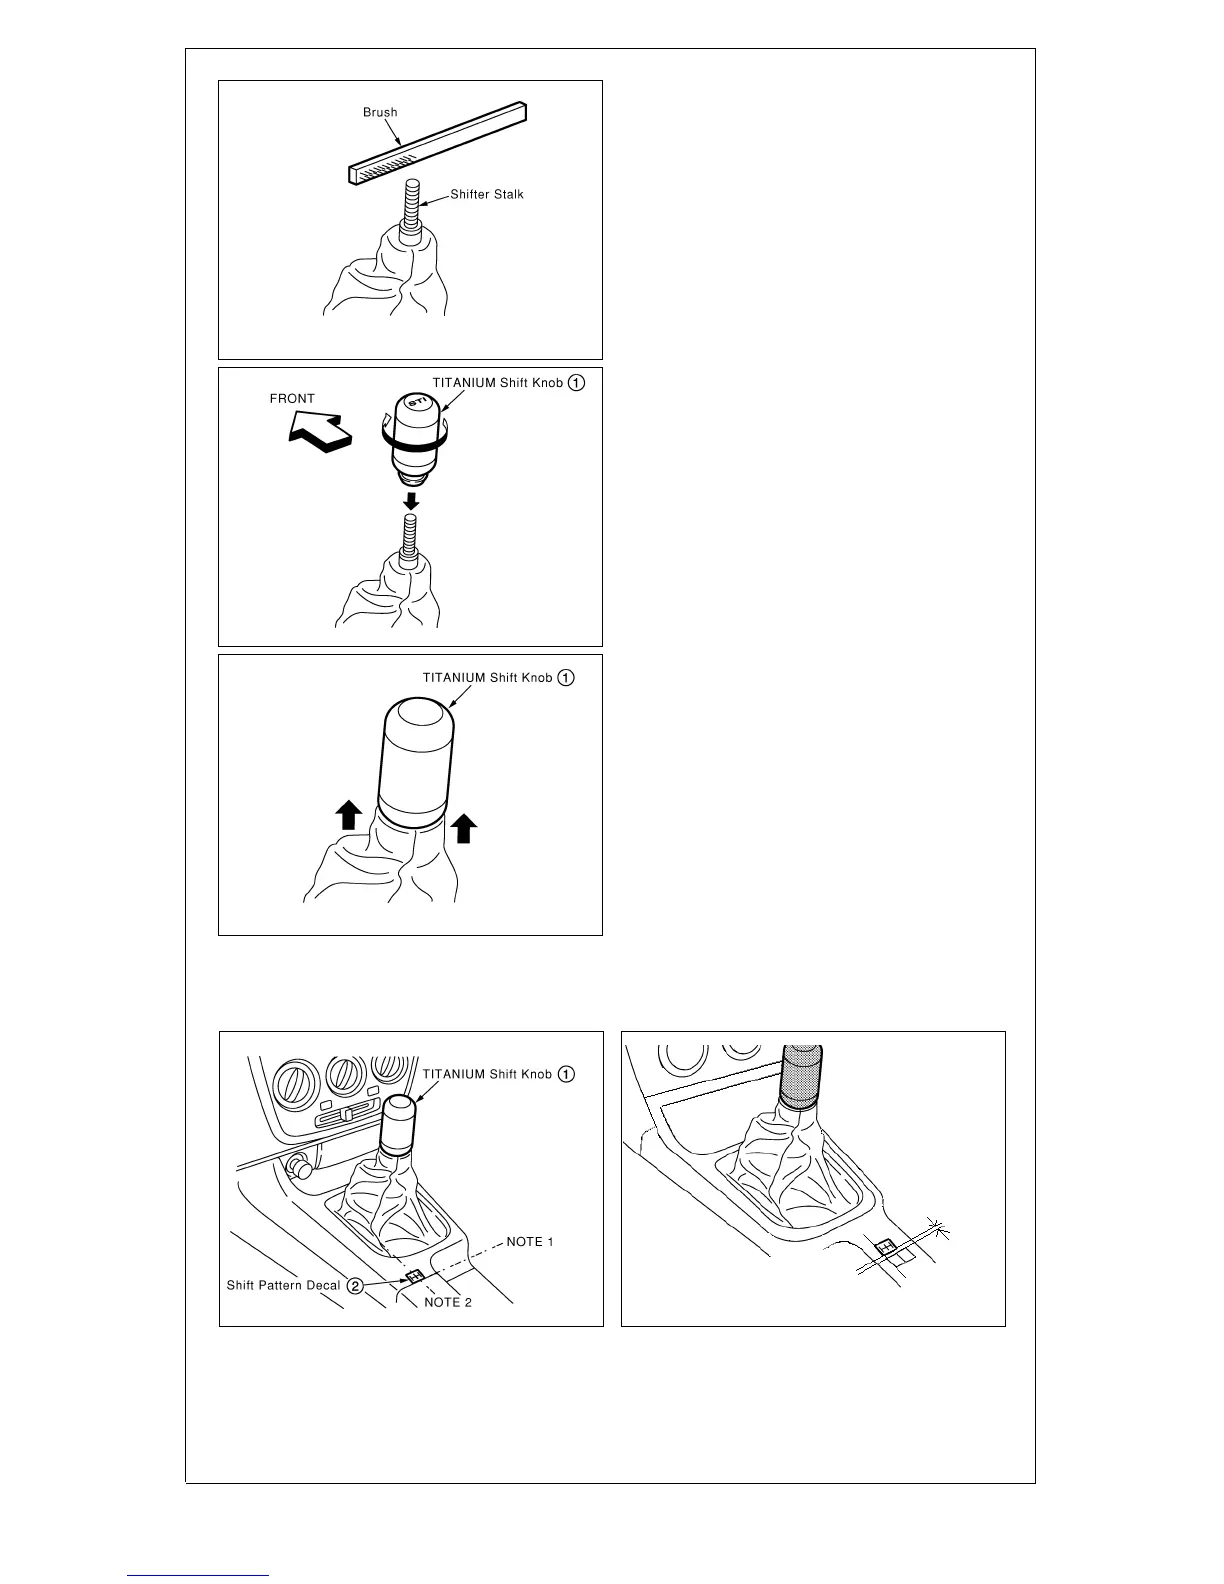
(3) R emobe any debris with a clean brus h.
Y 0137
(4) S crew the TITANIUM S hift knob onto the
stalk until tight.
NOT E : That “S TI” should not be crooked, but
horizontal to the instrument panel.
Y 0138
(5) R e-ins tall shifter boot onto the new shift knob.
Y 0139
Y 0140-1
(6) C lean area where the S hift P attern Decal is to be installed with Isopropyl Alcohol,
allow to dry before applying decal.
(7) R emove backing paper and apply S hift P attern Decal on console as shown.
Y 0140-2
1.0mm
NOTE 3
NOTE 4
05MY+
-04MY
NOT E 1: B ottom edge of S hift P attern Decal should alogn with (but not overlap) rear edge of console panel.
NOT E 2: S hift P attern Decal is applied at center of console panel rear extens ion area.
NOT E 3: B ottom of S hift P attern Decal should be parallel to the forward edge of the control switches or
s witch cover with approximately 1 mm gap separation.
NOT E 4: S hift P attern Decal is aligned with the left (driver's side) edge of the control switches .