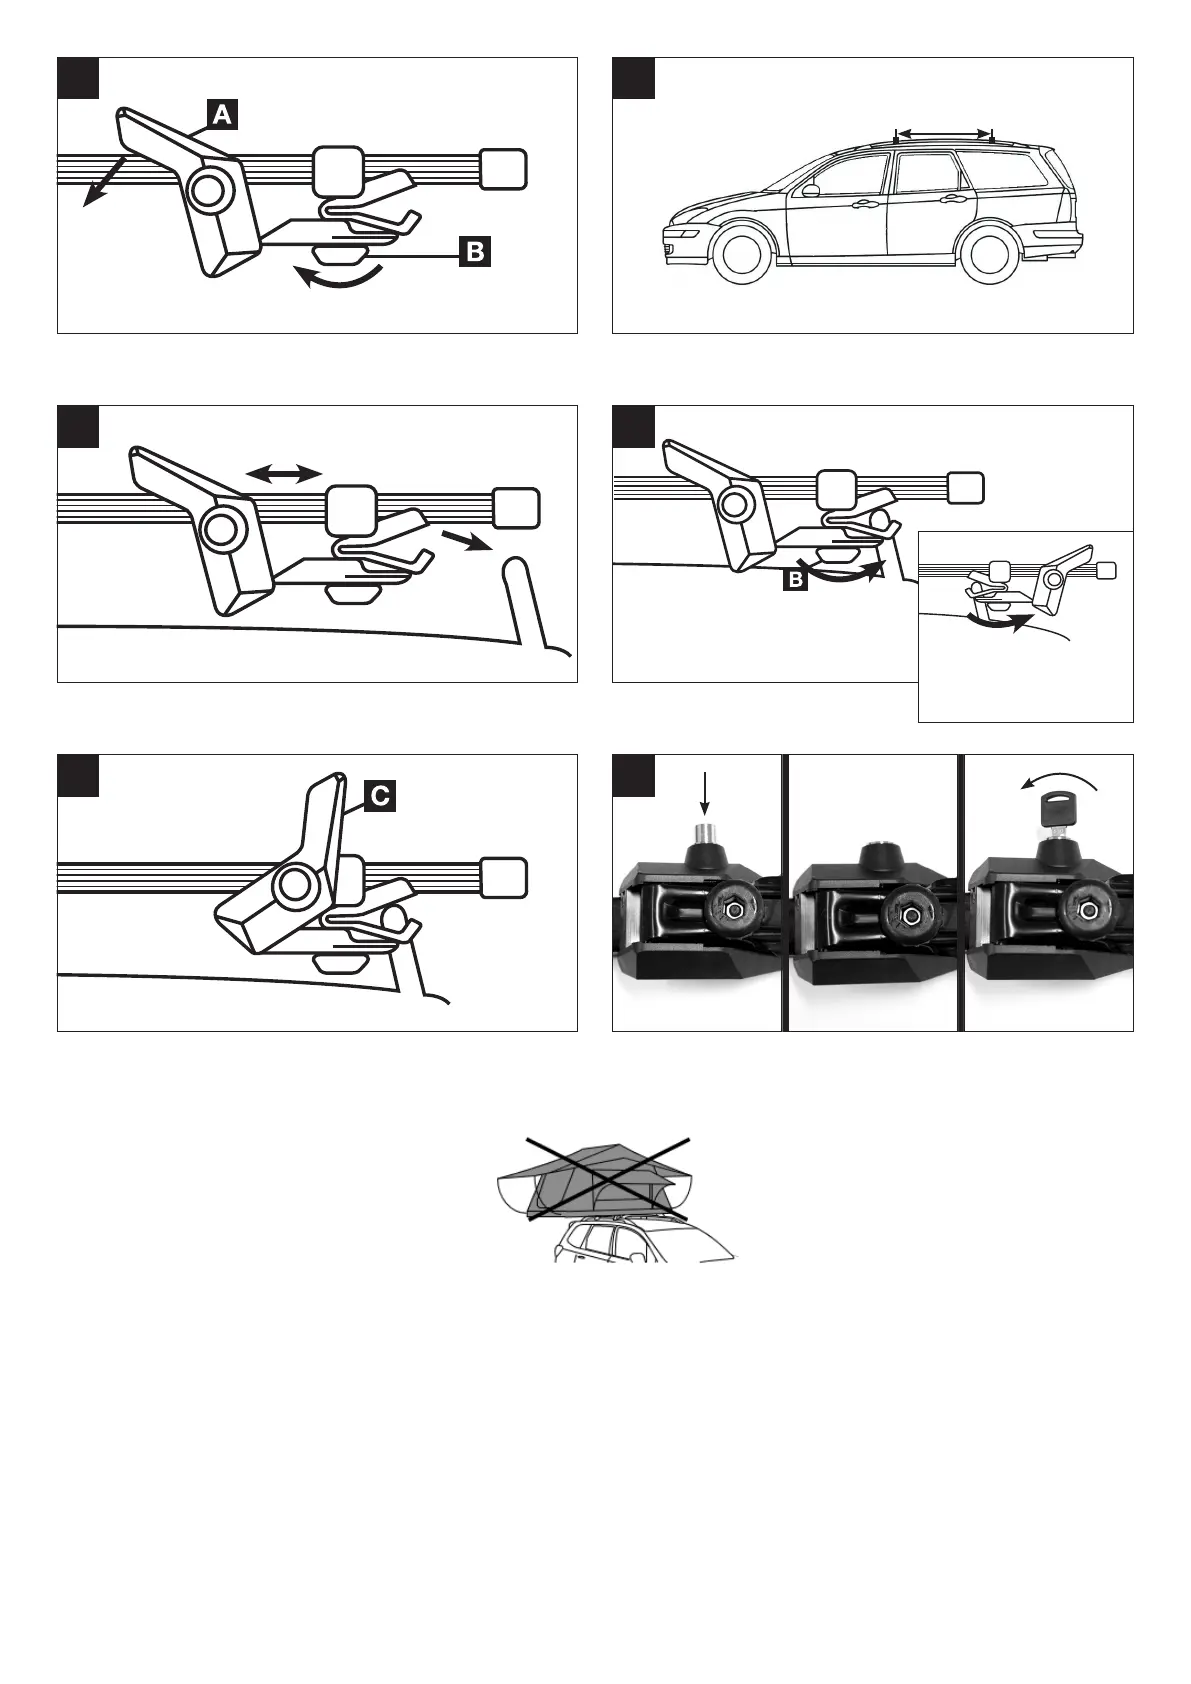
PUSH IN
TO LOCK
LOCKED
TURN
KEY TO
UNLOCK
1
3
5
2
4
6
1. Open clamp lever A and loosen adjustment knob B.
3. Slide clamp over roof rails.
5. Close clamp C; the lever should be flush with the top of the load bar when closed. check
roof bar tightness by firmly pushing/pulling on the end of the roof bar. It should NOT slip.
If necessary repeat step 4 in order to achieve sufficient tightness.
2. Position bars on the roof as illustrated
700mm - 27.5”
4. Tighten adjustment knob B securely onto roof rail
For vehicles with low roof rails or
curved roofs fit the levers on the
outside of the roof rails
6. Follow steps above to lock & unlock
IMPORTANT INFORMATION:
CAUTION
• After an initial short journey IT IS ESSENTIAL that a check MUST be made to ensure that all the fittings are tightened and secured. The roof bars should then be inspected at regular
intervals to ensure load safety at all times
• When roof bars are in use, the vehicle’s stability may be affected. Special care MUST be taken when driving in strong winds and when approaching bends or other road hazards. Also,
please refrain from accelerating and braking sharply
ALWAYS REMOVE THE ROOF BARS IF YOU INTEND TO DRIVE THROUGH A CAR WASH!
WARNING: MAXIMUM LOAD FOR THE ROOF BARS COMBINED IS 60KG, DO NOT EXCEED THIS LIMIT! It is ESSENTIAL that this weight is distributed evenly over both bars. Please
refer to the vehicle operation manual for any special requirements for using roof bars. Use an adequate number of quality tie down straps to secure your load (elasticated ropes should be
avoided). In case of long loads secure the ends of the load with non-elastic rope to the vehicle bumpers, do not exceed 55mph.
PLEASE LOOK AFTER YOUR TWO KEYS AS SPARE KEYS ARE NOT AVAILABLE. Always take extra care when fitting to a vehicle with a glass sunroof!
We do not recommend the use of roof top tents
or awnings with these roof bars
 Loading...