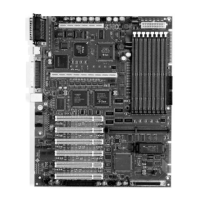
SPARCengine Ultra AXi
5
p/n
850-6617-02Rev. 50
This creates a directory with the patch in it. Read the README file there for instructions on
installing the patch.
Installation Procedures
There are two types of Solaris 2.6 and 440 MHz installation procedures:
● installing the 440 MHz module on systems that are currently
running Solaris 2.6
● installing Solaris 2.6 on a new system that contains the 440 MHz
module
Installing the 440 MHz Module on Systems Already Running Solaris 2.6
Prior to module installation, customers must install the required patch(es) on their systems (see
Table 2). After the patch(es) is successfully installed, bring the system down and install the 440
MHz CPU module.
Note – See the AXi CPU Upgrade Fan Install Guide (P/N 806-0941-xx) or the SPARCengine Ultra AXi
OEM Technical Reference Manual (805-3158-03 or higher) for installation instructions.
Installation of Solaris 2.6 on a New System with the 440 MHz Module
Follow these instructions accordingly.
1. Bring the system to the ok prompt level.
The following key strokes or combinations can be used to bring the system to an OK
prompt.
● Stop/A on a Sun keyboard
● Control/Break on a PS/2 keyboard
● ~# on a tip connection
● Break key on a dumb terminal
2. Type in the following commands:
ok also hidden
ok d# 404 at-speed
ok
3. Boot from the installation device (net, CDROM...) and install Solaris 2.6 on the system as
described in the Solaris documentation.
CAUTION: If a power failure occurs, or if you must power off the system at any
time before the complete patch installation, step 2 must be repeated.
4. Install the related patch(es), listed in Table 2, once your newly installed OS is running.
5. Halt your system, and power cycle it to operate in 440 MHz mode.

 Loading...