www.suncolighting.com
(844) 334-9938
CUSTOMER SERVICE
info@suncolighting.com
SALES
sales@suncolighting.com
163 W Cochran St,
Simi Valley, CA 93065
Still having trouble? Contact us!
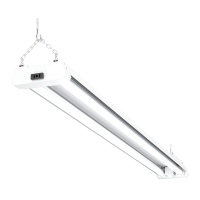
MOTION SHOP LIGHT
Install Guide and Manual
COMPONENTS
Turn off circuit breaker that provides power to the light
switch for the recessed lights.
Mounting surface must be able to support the weight of
the fixture.
•Plaster board thickness should be 3/8 inch
Depending on your lighting plan, space the anchors
accordingly.
•Link up to 4
Plug in power cord to electrical outlet.
Install 4 plastic anchors 46.5 inches apart and
3.189 inches apart, screw in an eye hook into each
anchor. Gap between the ceiling and the cap nut
should be 0.75 inch
•Recommended screw dimensions: ST4X30
Turn on circuit breaker and test light
1.
2.
4.
6.
Lift fixture up to screws and slide to one side to
secure into place. Fixture should be firmly fixed
against screws.
5.
3.
7.
STYLE 1 AND STYLE 2 OF INFRARED INDUCTION RANGE
Turn Power OFF
Link up
4 shoplights
together
Connect to
additional
shoplight
Connect to
Power Outlet
Turn Power ON
Chain Link “S” Hook Screw Eye Hook Plastic Anchor Screw
X4X6X2X4X2
Required Tools: Drill, Ladder, Hammer,
Pliers, Tape Measure, Pencil
46.5” apart
0.33”
3.189”
0.14”
Human infrared
sensor
The recomended installation
height is OC 2.8~3.5m
Movement in this direction
sensing distance OA/OB<2m
Movement in this direction
sensing distance OB<5m
STYLE 1
Human infrared
sensor
The recomended installation
height is OC 2.8~3.5m
Movement in this direction
sensing distance OA/OB<2m
Movement in this direction sensing distance OB<5m
STYLE 2
 Loading...