8045/8045BK/8045BL 2 Rev 7/3/14
Do not fully tighten fasteners
until prompted.
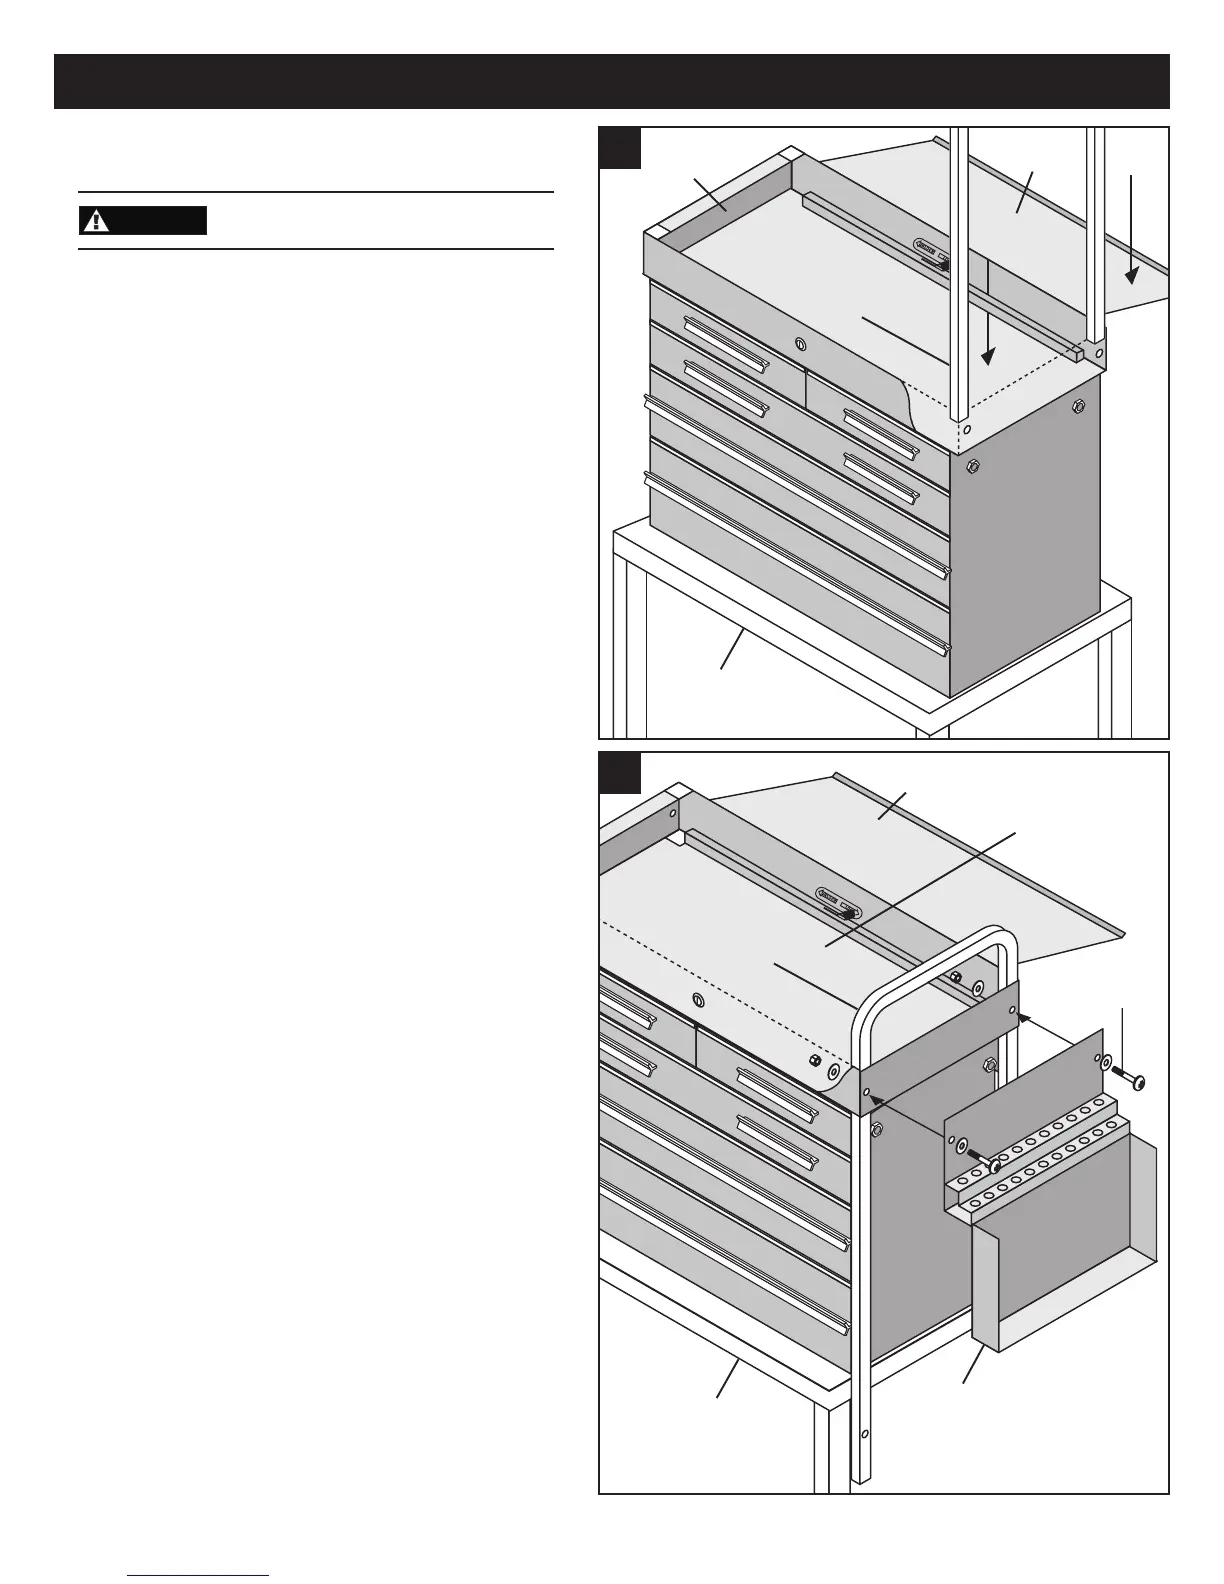
Step 1: Assembly preparation.
Clear table top and set Locking Drawer Assembly on
table top, with lid facing up. Position the Locking Drawer
Assembly so that one end hangs off of the table enough
to allow the chrome legs to go through the square holes.
Insert one set of chrome legs through the overhanging
holes as shown in Figure 1. Do not bolt legs to top.
Step 2: Connecting legs and side
accessory to drawer assembly
Choose one of the side accessories (Pry Bar Holder or
Side Work Bench - Figure 2 shows Pry Bar Holder) for
attachment to the overhanging end of the service cart.
Align the outermost bolt holes in the accessory with the
bolt holes in the end of the cart and with the uppermost
holes in the chrome legs. Position a washer and insert
an M6x40 bolt through the washer, bolt holes, and legs
as shown. Secure bolts with a flat washer, lock washer,
and nut on inside of Locking Drawer Assembly. Tighten
bolts until parts fit together firmly.
Repeat steps 1 and 2 for other end of cart, using
remaining side accessory.
3.2
Locking
Drawer Assy.
Chrome
Legs
Table or
Workbench
M6x40
Bolt
Table or
Workbench
Pry Bar
Holder
Chrome
Legs
Locking
Drawer Assy.
1.
2.
2.
Lockin
Top
Locking Top
ASSEMBLY INSTRUCTIONS
NOTE