FIGURE 15
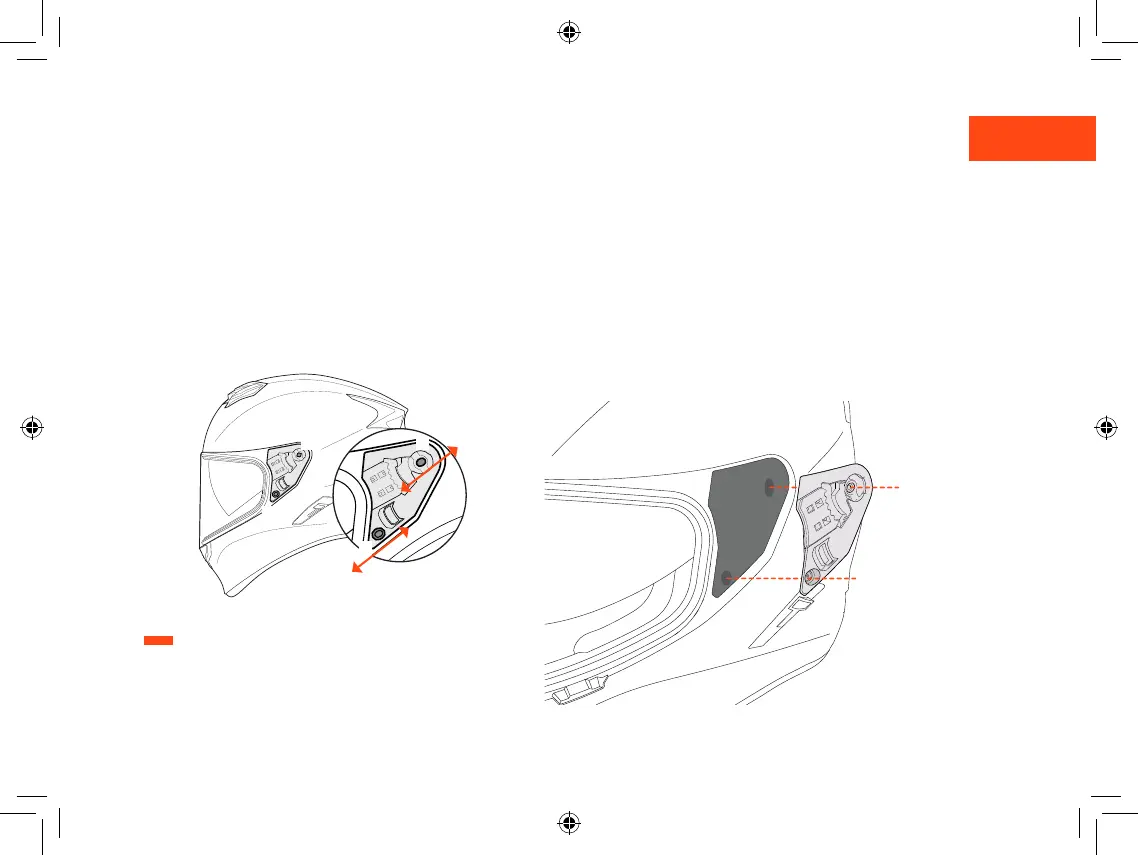
VISOR MECHANISM– Figure 16
Replacement
Removing
After removing the visor as indicated in the paragraphs above,
loosen and remove the screws (T - U); then remove the mechanism
from the shell.
adjust the mechanisms of the visor.
Lift the visor until it is completely open.
Remove the visor, as specied in the previous paragraph.
Loosen the two screw (T - U) without removing them and without
disassembling the mechanism.
Shift horizontally the whole mechanism and tighten the screws
again. Repeat the operations on the opposite side by shifting the
mechanism on the same direction of the previous one.
Once nished, check if the visor can be easily closed and if it adheres
to the gasket.
FIGURE 16
Fitting
The mechanisms are not interchangeable. Before proceeding it is
necessary to identify the correct assembly side. Put the mechanism
on the shell, insert the screws tightening them.
After tting the parts verify that the mechanisms are positioned
correctly and tightly xed to the shell. Then t the visor and adjust it
as specied in the above paragraphs.
After tting the mechanism verify that the visor is tightly xed to
the helmet, that it rotates freely and that it locks correctly into the
locking positions.
If this doesn’t happen and the rotation mechanism of the visor
doesn’t work correctly, do not use the helmet and contact authorized
Suomy personnel only.
25
T T
T
U
U
U