OPERATING INSTRUCTIONS
(CONTINUED)
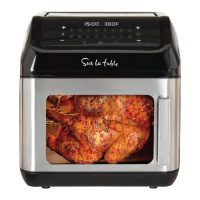
LET’S START COOKING
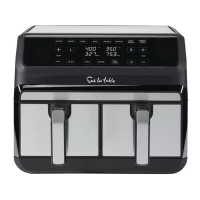
SINGLE BASKET MANUAL OPERATION
8 MENU SELECTIONS CHART
FOR PRE-PROGRAMMED COOKING
2. Insert crisper tray(s). See “Before Using for the First Time” for a detailed description.
3. Place food into either of both fryer baskets. Do not overfill. To ensure proper cooking
and air circulation, NEVER fill any fryer basket more than 2/3 full. When air frying fresh
vegetables, we do not recommend adding more than 2 to 3 cups of food to the
fryer basket.
Note: Up to 6 cups of ingredients may be dehydrated as food will shrink to a fraction
of its original volume. Place a single layer of ingredients into the empty air fryer basket.
Create a second layer by placing the crisper tray into the basket over the ingredients.
Add food on top of the crisper tray.
4. Insert the assembled fryer basket(s) into the front of the Dual Basket Air Fryer.
Always make sure fryer basket(s) are in their proper LEFT/RIGHT position and they
are fully closed.
MENU
DEFAULT
TEMP
DEFAULT
TIME
DUAL
COOK
TIME
TEMP
RANGE
(°F)
TIME
RANGE
SHAKE
FOOD
Air Fryer 400°F 20 mins 23 mins 170~400 1-60 mins 2/3 time/ 1x
Roast 400°F 35 mins 37 mins 350~400 1-60 mins 2/3 time/ 1x
Broil 400°F 10 mins 13 mins 400 1-30 mins
Not recommended
Bake 350°F 16 mins 19 mins 170~400 1-60 mins 2/3 time/ 1x
Reheat 250°F 6 mins 9 mins 170~400 1-60 mins
Not recommended
Keep Warm 170°F 60 mins 60 mins 150~200 1-60 mins
Not recommended
French Fries 400°F 18 mins 21 mins 170~400 1-60 mins 2/3 time/ 1x
Dehydrate 130°F 8 hours 8 hours 90~170 1 hr-24 hrs
Not recommended
1. Plug cord in the wall outlet. An audible tone will sound, the control panel will illuminate.
The button will light up white.
2. When the is pressed, a tone will sound and the control panel will illuminate (Figure
2).
3. Select , , or . Press the desired MENU button. A tone will sound. The LEFT
or RIGHT basket control and both the default TEMP (in large numerals) and default
TIME (smaller numerals) will flash on the display and alternate between time and
temperature. (Figures 3 A, 3 B, and 3 C)
1. For single basket cooking, press the
MENU button then press to START
the cooking process. (Figure 4)
2. For dual basket cooking, press the
other basket control. (Figure 5) MENU
selections will appear.
3. Press the desired MENU button for
RIGHT basket cooking.
Figure 2
Figure 3 B
Figure 3 A
Figure 3 C
Figure 4
Figure 5
1514
 Loading...