© 2003 by SURECOM Technology Corporation. All rights reserved.
3A-1 Version: 01.15.00.01-1.0
From “Control Panel”, double-click the “Network” icon.
In the “Network” window, under the “Configuration”
tab, double-click the“TCP/IP” entry that is listed with
your network card.
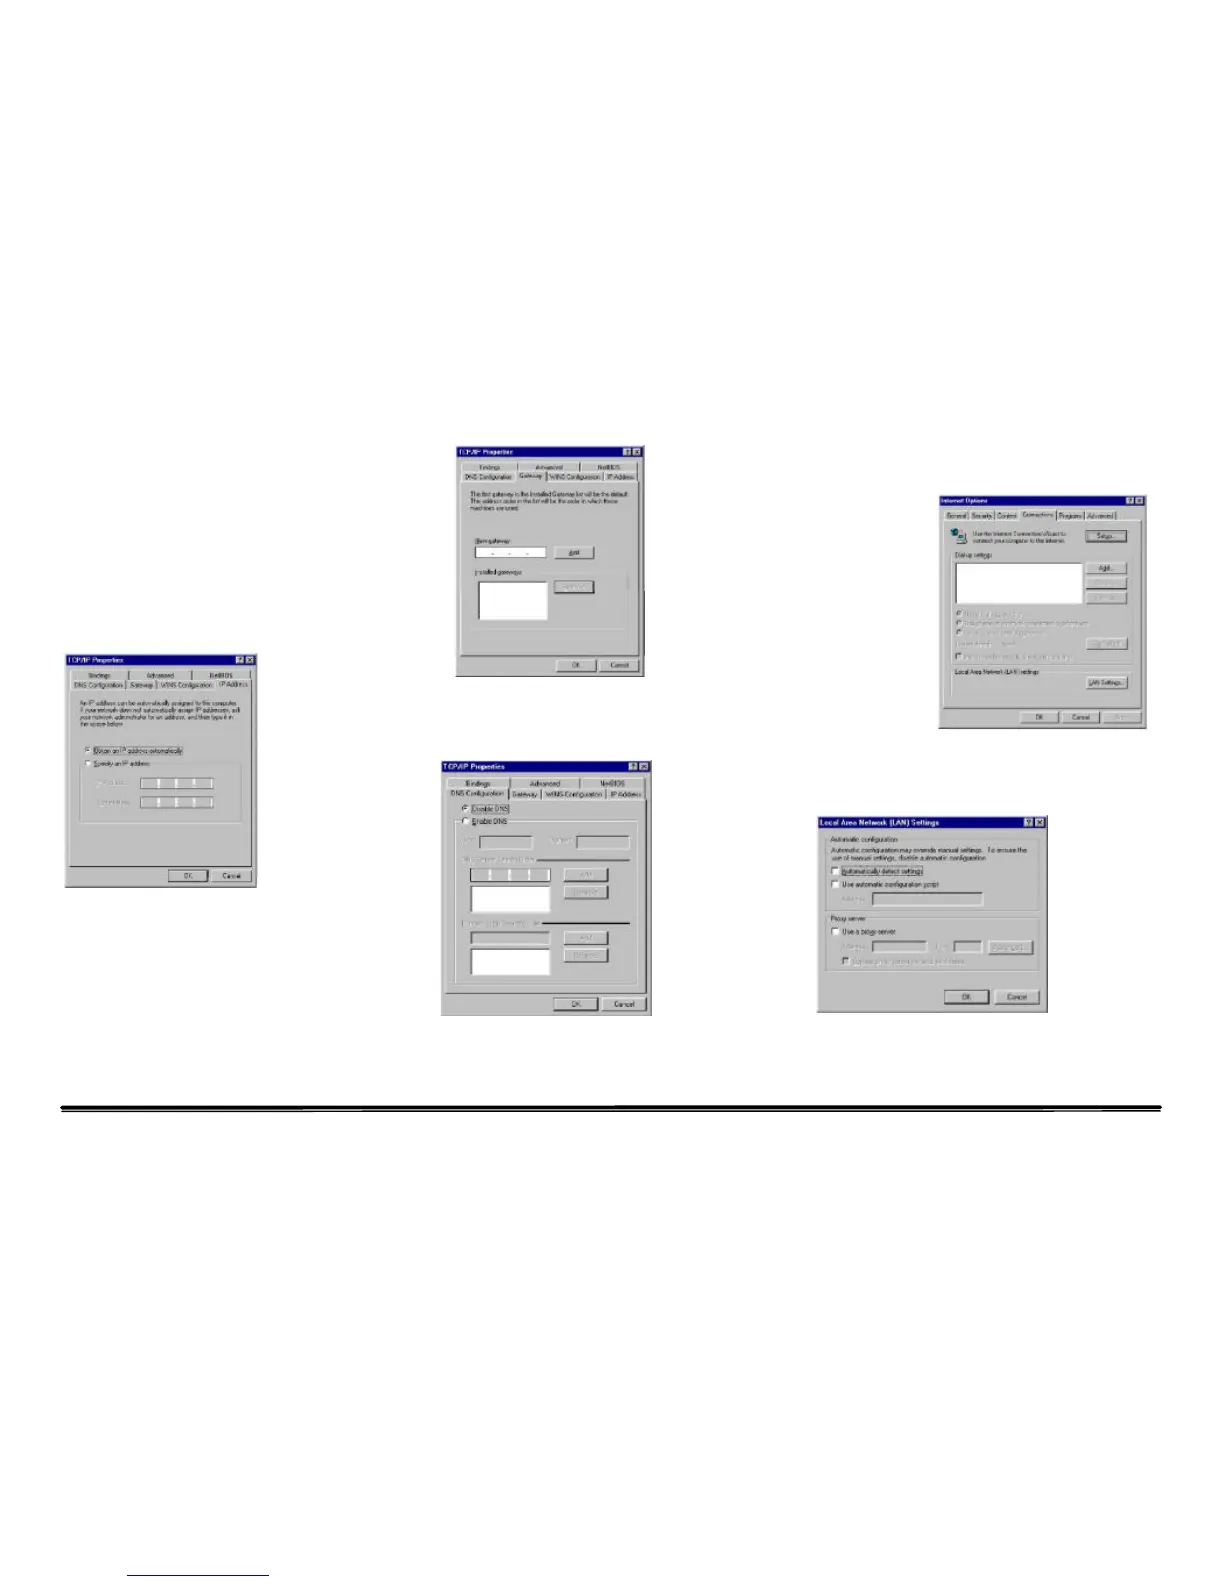
On the “Internet Protocol (TCP/IP) Properties” dialog box,
make sure “Obtain an IP address automatically” and
“Obtain DNS server address automatically” are \selected.
If not, select them and click “OK” and close window.
Locate your IP address and Subnet Mask.
Click the “Gateway” tab and record the numbers listed
under “Installed gateways.”
Click the “DNS Configuration” tab. Locate the DNS
servers listed under “DNS Server Search Order”. And
Click “OK”
System may need your Windows 95/98/ME CD to copy
some files. After it finishes copying, please restart your
system.
Step. 2 Disable HTTP Proxy
• Internet Explorer
Open Internet
Explorer and click
the stop button.
Click “Tools”
then “Internet
Options”
In the “Internet
Options” window
click the
“Connections” tab. Then click the “LAN Settings” button.
Clear all the checkboxes.
Click “OK,” and then click “OK” again to close the
“Internet Options” window.
• Netscape
 Loading...