User Manual
Projector
Important Safety Matters
To achieve the best effect, please use the projector in a darker room or draw
the curtains.
Be careful when use the projector. Any dropping or bump may lead to
damaged parts, blurred images or display improperly.
Installation
Be careful to the power cord to avoid excessive bending. Damaged power
cord may cause electric shock and fire.
Please unplug the power cord from the socket after use.
Power Source
Unplug the power first.
Clean the cabinet regularly with a damp cloth. Neutral detergent can be
used. Do not use strong detergents or solvents (such as alcohol and thinner).
The lens should be cleaned with glasses cloth or lens paper. Be careful not
to scratch the lens.
Use a soft brush to clean the vents and speaker of the projector regularly, or
the vents will be blocked by dust and cause the machine breakdown due to
overheat.
Cleaning
Do not disassemble the projector casually since there may be a risk of
electric shock, which affects normal maintenance.
Liquid or heavy objects should not allowed on the machine.
High Temperature Attention
Know Your Projector
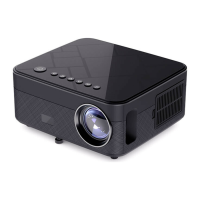
Projector Accessories Description
1.Adjustable tripod. 2. Remote control signal receiver. 3. Projector lens.
4. Power socket. 5. Remote control signal receiver. 6. Audio output connector.
7. HDMI 1 HD connector. 8. USB connector. 9. AV connector. 10. HDMI 2 HD
connector. 11. Horn. 12. Heat dissipation window. 13. Focusing dial.
14. Detachable dust-proof net switch, move right to disassemble the
dust-proof net. 15. Removable dust-proof net.
Installation methods
Depending on the environment and requirements, this projector can be
suspended from the ceiling using a professional projection stand, or placed
on a smooth tabletop. Or choose another mounting option according to the
following illustrations.
Attention Matters
1. When using the hanging method, the projector should not be higher than the
top edge of the screen, or it will affect the screen imaging effect and keystone
correction.
2. The projector should be installed on the left and right axis of symmetry of the
screen to avoid left and right keystone distortion of the image.
3. The space around the projector should be well ventilated after installation
and there should not be any objects blocking the way of the vents.
4. Please do not connect the power source during installation to avoid electric
shock or projector circuit failure.
5. Projector just installed may be blurred and trapezoidal distorted, please refer
to the section on graphic calibration for correction.
Bracket lifting positive projection
Bracket lifting back projection
Tabletop placement positive projection
Tabletop placement back projection
Projector On/Off
Image correction
Connect the projector to the power supply, the projector enters standby mode
and the power light is red.
Power on: Press the power button on the projector, or the power button on
the remote control, the power indicator turns to blue from red and enters the
working status.
Power off: In the working state, press the power button on projector or
remote control, the power indicator changes to red from blue and the
projector is turned off.
Dial clockwise to the end (below), then dial counterclockwise while watching
the particle spots on the image, stopping at the sharpest point, which is the
best position for focusing.
Switch on/off operation
Focusing dial
Dial Wheel
Multimedia play formats
Simple Troubleshooting
The operation of this machine is very simple, just like an ordinary TV set,
usually you won’t encounter any problems, but there may be some false
faults due to the adjacent equipment or voltage, please handle the problem
on your own before sending it for repair, if it still does not work properly after
troubleshooting, please contact the relevant staff.
Trouble phenomena Possible causes of troubles
The power indicator does
not light up when the
power is switched on
Make sure if the power supply plugged int
Pressing the power
button on the remote
control and still can’t
switch on
1. Make sure if the switch at the back of the projector turned on
2. Make sure if the remote control battery powered off
3. Make sure if the projector receiving port illuminated by direct
light
No image on the screen
when the projector is
turned on
1. Make sure if the signal selection channel of the projector
correct
2. Make sure if the signal source channel turned on
3. Make sure if signal cable plugged in properly
The machine turns off
automatically after a short
time working
1. Make sure if the air inlet and outlet of the projector blocked
2. Make sure if the voltage too low, or voltage fluctuations too
high
File format
JPG, JPEG, GIF, BMP, PNG
File type
Images
Video
Audio
MP4,MOV,3GP,AV,FLV,ISO,M2TS,MKV,MPG,RMVB,TP,TRP,TS,WMV,VOB,DAT,ASF
MP3,WMA,MP2,MP3、OGG,AAC,M4A,MA4,FLAC,3GP,WAV、M3U,RM,WMV,
Refer to the data below and place the projector at the appropriate distance
from the screen according to required size of the screen . Please place the
projector on a smooth and solid table top, or suspend it from the ceiling. The
area around the projector should be well ventilated to avoid blocking the
vents. There should be no other objects within 30cm around the vents.
Standard Setting
To avoid distortion of the projected image after projection, place the projection
as close to the axis of symmetry as possible.
Attention
These figures may vary due to differences in optics. Suggestion: Please
physically adapt the distance and screen size before installation.
Note: The above data is for reference only, please refer to the actual measurement data.
Image scale
(Inch)Image size
55
80
100
120
4:3
projecting distance
2
2.85
3.53
4.2
The projector is right
handed, the left side is
bigger and the right side is
smaller.
The installation position and
angle are correct, the
image is square.
The projector is left sided,
the left is small and the
right is large.
Screen
Screen symmetry axis
Projector
Main screen, system settings, projection settings, keystone correction, switch
between four-point mode and manual keystone correction;
Adjust the four corners of the projection screen via direction keys until the
screen is normal.
4.How to set up electronic keystone correction?
Select Settings and click on "Bluetooth Settings"; Then search for Bluetooth
devices and find the one you need to pair with.
5.how to use Bluetooth
1) Miracast Device side : Main interface to Miracast
2) mobile side, find the screen projection function in the settings, and
connect the device name to Android Screen Together
To connect Android Mobile/Ped with Projector Based on
WiFi-Display Technology
6.How to use Android Screen Projection
1) Connect your phone and projector to the same wifi, if you don't have wifi,
set up a hotspot with your iPhone and connect to it with your projector.
2) Device side: enter iOS Cast in the main interface
3) Mobile side: open the Apple mirroring function and connect the device to
the same screen
7.How to use the Apple projector
1) Download the system upgrade file (file name suffix .bin) and place it to the
root directory of the USB stick (the format of the USB stick must be fat32)
2) Insert the flash drive with the upgrade file into the USB port of the projector
3) Enter the projector interface, System Settings - System Update - U disk
upgrade
4) Click to Confirm
5) Wait for the progress bar to finish, then turn on the projector.
8.System upgrade
Instructions for Interface operation
After entering the main interface, press the signal source button " " on
the power button, select the required signal source channel in the pop-up
interface, such as "HDMI1, HDMI2, AV", etc., and press the OK button on the
remote control to enter the corresponding signal source status.
1.How to choose the signal source
Enter the main interface, System Settings, Network Settings - WiFi Settings;
find the network you want to connect to and press Confirm.
Enter the password via the virtual keyboard and confirm the connection.
Password:
Show password:
2.How to connect wife
Insert a USB disk stored with multimedia files into the USB port and select
Movie, Music, Photo, Office suite in the main interface.
3.How to play U disk
ConnectCancel
Function for Remote Control Buttons
1.Power button
2.Back button
3.Confirm button
4.Up button
5.Down button
6.Left button
7.Right button
1. Indicator light.
2. Power button.
3. Signal source button.
4. Direction button.
5. Menu button.
6. Home button.
7. Volume +.
8. Volume -.
9. Mute button.
10. Screen switch Button.
11. Confirm button.
12. Back button.
13. Last song.
14. Next song.
SW10
The projector can input HDMI high-definition video signals, and supports stereo
audio signal input and output. Connect the projector and other equipment
according to the following picture.
1.Press the button (Figure 1). 2. Bottom sticker. 3. Hanger fixing hole, can be
used after removing the foot pad. 4. Height adjustment machine feet.
取扱説明書
プロジェクター
安全上の注意事項
最良の結果を得るために、暗い部屋の中あるいはカーテンを閉めて本機器を使
用してください。
落下や衝撃しないように大切に取り扱ってください。部品の破損、画像がぼやけ
る、表示異常の原因となります
設置
電源コードを無理に曲げらないでください。損傷により感電や火災が発生する
恐れがあります。
使用完了後、電源コードをコンセントから抜いてください。
電源
まず、電源コードをコンセントから抜いてください。
よく絞られた布に中性洗剤をつけてケースを定期的に拭いてください。刺激的な
洗剤や溶剤(アルコールやシンナーなど)は使用してはいけない。
レンズ専用クロスまたはレンズ専用ペーパーでレンズを拭いてください。レンズ
に傷を付けないように十分に注意を払ってください。
ほこりが通気口に堆積することで機器が過熱になり、故障が発生するおそれがあ
ります。定期的に柔らかいブラシで本体の通気口とスピーカーを定期的に清掃し
てください。
お手入れ
ご自分で勝手に本体を外してはいけない。感電の恐れがあります。お手入れも影
響 があります。
液体や重量物を本体に載せないでください。
高温注意
各部のなまえ
プロジェクター部品の説明
1.チ ルト フット 。 2.リモコン受信機。3.プロジェクターレンズ 。4.電 源 ソ ケット 。
5. リモコン受信機。6.音声出力インターフェース。7. HDMI1高解像度インターフェ
イス。8.USBポ ート。9.AVインターフェース。10. HDMI2高解像度インターフェー
ス。11.スピーカー。12.放 熱 ウィンド ウ。13.フォーカスダイヤル。14.防塵カバーロッ
ク(脱着可)。右にスライドして防塵カバーを外せます。15.防塵カバー(脱着可)。
設置方法
利用環境やニーズに応じて、天吊りまたは床置きの方式でプロジェクターを設置
してください(下図の通り)。なお、下図に従って他の設置方法で設置してもいい
です。
注意事項:
1.天吊りの場合、プロジェクターをスクリーンの上端より高く設置してはいけませ
ん。スクリーンのイメージング効果と台形補正に影響を与えます。
2.投写画面の横方向の台形歪みを引き起こさないように、プロジェクターをスクリ
ーン画面の左右対称軸に設置してください。
3.プロジェクターを風通しの良い所に設置します。通気口には一切の物も置かな
いでください。
4.設置を行う場合、電源を入れてはいけない。感電または回路故障が発生する恐
れ があります。
5.プロジェクターを設置したばかりの時、画像がぼやけて台形になる場合がありま
す。図形修正の章を参照した上で校正してください。
天吊り フロント投 影
天吊り リア投影
床置き フロント投影
床置き リア投影
プロジェクターの電源を入れる/切る
画像の校正
プロ ジェクターの電源コードをコン セントに 差し 込 むと、プ ロジェクター がスタン
バイ状態になり、電源インジケーターランプが赤点灯します。
電源オン:プロジェクターの電源ボタンまたはリモコンの電源ボタンを押すと、電
源インジケーターランプが赤から青に変わり、作動状態になります。
電源オフ:作動状態で、プロジェクターの電源ボタンまたはリモコンの電源ボタ
ンを押すと、電源インジケーターランプが青から赤に変わり、プロジェクターの電
源がオフになります。
時計回りにダイヤルを最後まで回してから(下図のように)、反時計回りに回すと
同時に、画像上の粒子を見ながら最もきれいに見えるところで止めます。これが
最適なフォーカス位置になります。
電源オン/オ フ:
フォーカス 調 整
ダイヤル
マルチメディア再生可能のファイル
故障かな?と思ったら
本製品の使い方は、通常のテレビと同じように非常に簡単です。通常、異常は発
生しませんが、近くに設置された機器や電圧などの影響を受け、誤動作の可能性
が発生することがあります。修理を依頼される前に、本書をよくお読みのうえ、以
下の点を確認ください。それでも解決できないなら、弊社のアフターサービスに
お問い合わせください。
症状 考えられる原因
1.電源を入れた後、電源イ
ンジケーターランプが点
灯しな い
電源プラグがコンセントに確実に差し込んでいますか
2.リモコンの電源ボタンを
押しても電源が入らない
1.プロジェクター背面のスイッチはオンになっていますか
2.リモコンの電池が切れていないですか
3.プロジェクターの受信ポートが強い光で照らされていますか
3.プロジェクター の 電 源を
入れた後、スクリーンに画
像が表示されない
1.プロジェクターのソースは正しく選択されていますか
2.ソースチャンネルがオンになっていますか
3.ソースケーブルが正しく接続されていますか
4.電源を起動してから一定
期間使用するたびに、自動
的にシャットダウンされる
1.プロジェクターの通気口が塞がれていますか
2.電圧不足なのか、または電圧が不安定なのか
対 応 ファイル
JPG, JPEG, GIF, BMP, PNG
ファイルの種類
画 像 ファイ ル
動画コーデック
音声コーデック
MP4,MOV,3GP,AV,FLV,ISO,M2TS,MKV,MPG,RMVB,TP,TRP,TS,WMV,VOB,DAT,ASF
MP3,WMA,MP2,MP3、OGG,AAC,M4A,MA4,FLAC,3GP,WAV、M3U,RM,WMV,
下記のデータを参考として、画面サイズに合わせて、適切な距離をおいてプロ
ジェクターを設置してください。プロジェクターを平らなテーブルまたは天井に
設置してください。通気口をふさがないように、風通しの良い所に設置してくださ
い。なお、通気口から30cm以内に邪魔物がないことを確保してくだい。
標準設定
为了投影后,投影出的图像不会出现失真,请将投影尽量安放在对称轴上
投影した後、投影された画像が歪んで見えないように、できるだけプロジェク
ターを対称軸と同じ水平位置に設置してください
ご注意
光学器部品の違いにより、これらのデータは異なる場合があります。アドバイス:プ
ロジェクターを設置するには、スクリーンのサイズに合わせて距離を確認したうえ
に設置してください。
注:上記のデータはご参考まで。実際とは異なる場合があります。
アスペクト比
画面サイズ(インチ)
55
80
100
120
4:3
投影距離(m)
2
2.85
3.53
4.2
プロ ジェクタ ー を対 称 軸 より
右にずれたら、左側が大き
い、右側が小さい。
正しく位置と角度に設置され
るなら、投影画面は正方形で
す。
プロジェクターは対称軸より
左にずれたら、左側は小さ
い、右側は大きい。
Screen
Screen symmetry axis
Projector
メイン画面、システム設定、投影設定、台形補正、4点切替モード、手動台形補正。
4方向選択キーを使って、画面が正常に表示されるようになるまで投影画面の四
つの角を調整します。
4.台形補正を設定するには
メニューで設定を選択し、「Bluetooth設定」をクリックします。その画面に入った
後、Bluetoothデバイスを検 索し、 ペアリングした い Bluetoothデバイスを選択し
て接続してください。
5.Bluetoothを接続するには
1) デバイス側:メイン画面でMiracastに 入ります
2) スマホ側:設定に入り、画面投影を選択すると、Androidデバイスと接続し、
スクリーン投影がします
WiFiを介してAndroidスマ ートフォン /Pedをプロ ジェクターに 接 続して
内容を表示します
6.ス ク リ ー ン 投 影( androidデバイスの場合)
1) スマ ートフォンとプ ロジェクターを同じwifiに接続します。wifiがない場合は、
iPhoneをホットスポットをオンにして、プロジェクターをこのホットスポットに接
続します。
2) デバイス側:メイン画面でiOSCastに入ります。
3) スマホ側:Appleデバイスのミラーリング機能をオンにして、デバイスを接続
して同じスクリーンに投影します。
7.ス ク リ ー ン 投 影( IOSデバイスの場合)
1) システム更新ファイル(ファイル名のサフィックス:.bin)をダウンロードし、
USBメモリのルートディレクトリに保 存します(USBメ モ リ:fat32)
2) 更新ファイルを含むUSBメモリをプロ ジェクターのUSBポートに挿入します
3) プロジェクター画面に入り、システム設定→システム更新→USBメモリ更新を
します。
4) クリックして 実 行します。
5) プログレスバーが終了してから、電源を起動してください
8.システム更新
メニュー操作説明
メイン画面に入った後、電源ボタン下方のSOURCEボタン「」を押し、表示さ
れた画面に「HDMI1、HDMI2、AV」などを選択します。そして、選択したいソース
に合わせてリモコンのOKボタンを押すと、そのソースが選択されます。
1.SOURCEを選択するには
メイン画面、システム設定、ネットワーク設定-WiFi設定に入り、接続するネットワ
ークを見つけて、確認を押してください。
バーチャルキーボードを通じてパスワードを入力すると、接続が完了します。
2.WiFiを接続するには
マル チメディアファイル を含むUSBメモリをUSBポートに挿入し、メイン画面に
てMovie、Music、Photo、Office suiteのどちらかをを選択すると再生します。
3.USBメモリを再生するには
Function for Remote Control Buttons
1.電源ボタン
2.戻るボタン
3.確認ボタン
4.上ボタン
5.下ボタン
6.左ボタン
7.右ボタン
1.インジケーターランプ。
2.電源ボタン。
3.SOURCEボタン
4.方向選択ボタン。
5.メニューボタン。
6.ホームボタン。
7.ボリューム+。
8.ボリューム-。
9.ミュートボ タン。
10.画面切替ボタン。
11.決定ボタン。
12.戻るボタン。
13.前へ。
14.次へ。
SW10
このプロジェクターはHDMI高解像度ビデオの入力、ステレオオー音声の入出
力を対応します。実際に応じて、下図の通りにプロジェクターと他の機器を接
続を行ってください。
1.ボ タ ン( 図 1)。2.底部ラベル。3.フックスタンドの 固定 穴。フットパッドを取り外
してから使用できます。4.高さ調節フット。
Benutzerhandbuch
Projektor
Wichtige Sicherheitsangelegenheiten
Um den besten Effekt zu erzielen, verwenden Sie den Projektor bitte in einem
dunkleren Raum oder ziehen Sie die Vorhänge zu.
Seien Sie vorsichtig, wenn Sie den Projektor verwenden. Jedes Herunterfallen oder
Stoß kann zu beschädigten Teilen, verschwommenen Bildern oder unsachgemäßer
Anzeige führen.
Installation
Achten Sie auf das Netzkabel, um übermäßiges Biegen zu vermeiden. Ein
beschädigtes Netzkabel kann zu Stromschlägen und Bränden führen.
Bitte ziehen Sie das Netzkabel nach Gebrauch aus der Steckdose.
Energiequelle
Trennen Sie zuerst den Strom.
Reinigen Sie das Gehäuse regelmäßig mit einem feuchten Tuch. Es können neutrale
Reinigungsmittel verwendet werden. Verwenden Sie keine scharfen Reinigungs- oder
Lösungsmittel (wie Alkohol und Verdünner).
Die Linse sollte mit Brillentuch oder Linsenpapier gereinigt werden. Achten Sie darauf,
die Linse nicht zu zerkratzen.
Reinigen Sie die Lüftungsschlitze und den Lautsprecher des Projektors regelmäßig mit
einer weichen Bürste, da sonst die Lüftungsschlitze durch Staub blockiert werden und
das Gerät aufgrund von Überhitzung ausfallen kann.
Reinigung
Zerlegen Sie den Projektor nicht beiläufig, da die Gefahr eines Stromschlags bestehen
kann, der die normale Wartung beeinträchtigt.
Flüssige oder schwere Gegenstände dürfen nicht auf der Maschine sein.
Achtung bei hohen Temperaturen
Kennen Sie Ihren Projektor
Beschreibung des Projektorzubehörs
1.Verstellbares Stativ. 2. Signalempfänger der Fernbedienung.
3. Projektorobjektiv. 4. Steckdose. 5. Signalempfänger der Fernbedienung.
6. Audioausgangsanschluss. 7. HDMI 1 HD-Anschluss. 8. USB-Anschluss.
9. AV-Anschluss. 10. HDMI 2 HD-Anschluss. 11. Horn. 12. Wärmeableitungsfenster.
13. Fokussierrad. 14. Abnehmbarer staubdichter Netzschalter, nach rechts bewegen,
um das staubdichte Netz zu demontieren. 15. Abnehmbares staubdichtes Netz.
Métodos de instalação
Dependendo do ambiente e dos requisitos, este projetor pode ser suspenso
no teto usando um suporte de projeção profissional ou colocado em uma
mesa lisa. Ou escolha outra opção de montagem de acordo com as
ilustrações a seguir.
Atenção é importante:
1. Ao usar o método de suspensão, o projetor não deve ficar mais alto do que a
borda superior da tela, ou isso afetará o efeito de imagem da tela e a correção
da distorção trapezoidal.
2. O projetor deve ser instalado nos eixos esquerdo e direito de simetria da tela
para evitar distorção trapezoidal esquerda e direita da imagem.
3. O espaço ao redor do projetor deve ser bem ventilado após a instalação e não
deve haver nenhum objeto bloqueando o caminho das aberturas.
4. Não conecte a fonte de alimentação durante a instalação para evitar choque
elétrico ou falha do circuito do projetor.
5. O projetor recém-instalado pode estar borrado e distorcido trapezoidal,
consulte a seção sobre calibração gráfica para correção.
Suporte levantando a projeção positiva
Suporte levantando projeção para trás
Projeção positiva de colocação de mesa
Projeção traseira do posicionamento da mesa
Projetor ligado / desligado
Correção de imagem
Conecte o projetor à fonte de alimentação, o projetor entra no modo de
espera e a luz de energia fica vermelha.
Ligar: Pressione o botão liga / desliga no projetor ou o botão liga / desliga no
controle remoto, o indicador de energia muda para azul de vermelho e entra
no status de funcionamento.
Desligado: No estado de funcionamento, pressione o botão liga / desliga no
projetor ou no controle remoto, o indicador de energia muda para vermelho
de azul e o projetor é desligado.
Gire no sentido horário até o fim (abaixo) e, em seguida, gire no sentido
anti-horário enquanto observa os pontos das partículas na imagem, parando
no ponto mais nítido, que é a melhor posição para focar.
Ligar / desligar operação
Roda de discagem
Multimedia-Wiedergabeformate
Einfache Fehlerbehebung
Die Bedienung dieses Geräts ist sehr einfach, genau wie bei einem gewöhnlichen
Fernsehgerät, normalerweise werden Sie keine Probleme haben, aber es kann zu
falschen Fehlern aufgrund der angrenzenden Geräte oder der Spannung kommen.
Bitte lösen Sie das Problem selbst, bevor Sie es senden zur Reparatur, sollte es nach
der Fehlersuche immer noch nicht richtig funktionieren, wenden Sie sich bitte an das
zuständige Personal.
Störungsphänomene Mögliche Ursachen für Störungen
Die Netzanzeige leuchtet
nicht, wenn das Gerät
eingeschaltet ist
Stellen Sie sicher, dass das Netzteil eingesteckt ist
Drücken Sie die
Power-Taste auf der
Fernbedienung und
lassen sich immer noch
nicht einschalten
1. Vergewissern Sie sich, dass der Schalter an der Rückseite des
Projektors eingeschaltet ist
2. Vergewissern Sie sich, dass die Batterie der Fernbedienung
ausgeschaltet ist
3. Stellen Sie sicher, dass der Empfangsanschluss des Projektors durch
direktes Licht beleuchtet wird
Kein Bild auf dem
Bildschirm, wenn der
Projektor eingeschaltet ist
1. Stellen Sie sicher, dass der Signalauswahlkanal des Projektors korrekt
ist
2. Stellen Sie sicher, dass der Signalquellenkanal eingeschaltet ist
3. Stellen Sie sicher, dass das Signalkabel richtig eingesteckt ist
Die Maschine schaltet
sich nach kurzer Zeit
automatisch aus
1. Stellen Sie sicher, dass der Lufteinlass und -auslass des Projektors
blockiert ist
2. Stellen Sie sicher, dass die Spannung zu niedrig oder die
Spannungsschwankungen zu hoch sind
Unterstützungsformat
JPG, JPEG, GIF, BMP, PNG
Dateityp
Bild
Video
Stimme
MP4,MOV,3GP,AV,FLV,ISO,M2TS,MKV,MPG,RMVB,TP,TRP,TS,WMV,VOB,DAT,ASF
MP3,WMA,MP2,MP3、OGG,AAC,M4A,MA4,FLAC,3GP,WAV、M3U,RM,WMV,
Consulte os dados abaixo e coloque o projetor a uma distância apropriada
da tela de acordo com o tamanho necessário da tela. Coloque o projetor
sobre uma mesa lisa e sólida ou suspenda-o no teto. A área ao redor do
projetor deve ser bem ventilada para evitar o bloqueio das aberturas. Não
deve haver nenhum outro objeto dentro de 30 cm ao redor das aberturas.
Configuração padrão
Para evitar distorção da imagem projetada após a projeção, coloque a projeção
o mais próximo possível do eixo de simetria.
Atenção
Esses números podem variar devido a diferenças ópticas. Sugestão: adapte
fisicamente a distância e o tamanho da tela antes da instalação.
Nota: Os dados acima são apenas para referência, consulte os dados de medição reais.
Escala de imagem
Tamanho da imagem
(polegadas )
55
80
100
120
4:3
distância de projeção (m)
2
2.85
3.53
4.2
O projetor é destro, o lado
esquerdo é maior e o lado
direito é menor
A posição e o ângulo de
instalação estão corretos, a
imagem é quadrada
O projetor está do lado
esquerdo, o esquerdo é
pequeno e o direito é
grande
Screen
Screen symmetry axis
Projector
Tela principal, configurações do sistema, configurações de projeção,
correção trapezoidal, alternar entre o modo de quatro pontos e correção
trapezoidal manual;
Ajuste os quatro cantos da tela de projeção por meio das teclas de direção
até que a tela fique normal.
4.Como configurar a correção trapezoidal eletrônica?
Selecione Configurações e clique em "Configurações de Bluetooth"; Em
seguida, pesquise os dispositivos Bluetooth e encontre aquele com o qual
deseja emparelhar.
5.Como usar bluetooth
1) Lado do dispositivo Miracast : Interface principal para o Miracast
2) Lado móvel, encontre a função de projeção de tela nas configurações e
conecte o nome do dispositivo ao Android Screen Together
Para conectar Android Mobile / Ped com projetor baseado em
Tecnologia de exibição de WiFi
6.Como usar a projeção de tela do Android
1) Verbinden Sie Ihr Telefon und Ihren Projektor mit demselben WLAN. Wenn Sie kein
WLAN haben, richten Sie einen Hotspot mit Ihrem iPhone ein und verbinden Sie ihn
mit Ihrem Projektor.
2) Geräteseite: Geben Sie iOS Cast in die Hauptoberfläche ein.
3) Mobile Seite: Öffnen Sie die Apple Mirroring-Funktion und verbinden Sie das Gerät
mit demselben Bildschirm.
7.So verwenden Sie den Apple-Projektor
1) Laden Sie die System-Upgrade-Datei (Dateinamensuffix .bin) herunter und legen Sie
sie in das Stammverzeichnis des USB-Sticks (das Format des USB-Sticks muss fat32
sein).
2) Stecken Sie das Flash-Laufwerk mit der Upgrade-Datei in den USB-Anschluss des
Projektors ein.
3) Geben Sie die Projektoroberfläche ein, Systemeinstellungen - Systemaktualisierung -
U-Disk-Upgrade.
4) Klicken Sie zum Bestätigen.
5) Warten Sie, bis der Fortschrittsbalken beendet ist, und schalten Sie dann den
Projektor ein.
8.System Verbesserung
Instruções para operação da interface
Depois de entrar na interface principal, pressione o botão de fonte de sinal
" " no botão liga / desliga, selecione o canal de fonte de sinal necessário
na interface pop-up, como "HDMI1, HDMI2, AV", etc., e pressione o botão
OK em o controle remoto para inserir o status da fonte de sinal
correspondente.
1.Como escolher a fonte do sinal
Entre na interface principal, Configurações do sistema, Configurações de
rede - Configurações de WiFi; encontre a rede à qual deseja se conectar e
pressione Confirmar.
Digite a senha por meio do teclado virtual e confirme a conexão.
Password:
Show password:
2.Como conectar wi-fi
Insira um disco USB armazenado com arquivos multimídia na porta USB e
selecione Filme, Música, Foto, Pacote Office na interface principal.
3.Como jogar o disco U
ConnectCancel
Controle remoto infravermelho
1.Botão de energia
2.Botão "voltar
3.Botão de confirmação
4.Botão para cima
5.Botão para baixo
6.Botão esquerdo
7.Botão direito
SW10
Der Projektor kann HDMI-High-Definition-Videosignale eingeben und unterstützt die Ein-
und Ausgabe von Stereo-Audiosignalen. Schließen Sie den Projektor und andere Geräte
gemäß der folgenden Abbildung an.
WARNING
Follow the warning information provided below to prevent incidents such as fire or
explosion .
Do not turn on or use the device when the battery compartment is exposed.
The phone should be at least 15 cm away from any medical implant or rhythm adjuster
and never put the device in your coat pocket.
Do not expose the device and other batteries together with the high temperatures or
heat-generating equipment such as sunlight, heaters, microwave ovens, ovens or water
heaters. Overheating of the battery can cause an explosion.
When charging is complete or not charging, disconnect the charger from the device and
unplug the charger from the power outlet.
If the device is equipped with a non-removable battery, do not replace the battery yourself
to avoid damaging the battery or device.
Use of an unapproved or incompatible power source, charger or battery may cause fire,
explosion or other hazards.
Do not disassemble or reset the battery, insert other objects, immerse in water or other
liquids to avoid battery leakage, overheating, fire or explosion.
Do not drop, crush, scratch or puncture the battery to avoid subjecting the battery to
excessive external pressure, resulting in internal short-circuit and overheating of the
battery.
Possibly Keep the device away from the belly of pregnant women and the lower abdomen
of adolescents.
For Children and young people, please make sensible use of the device, for example by
avoiding night-time communication and limiting the frequency and duration of calls.
The company does not bear the responsibility for accidents caused by non-standard
related charging equipment.
To prevent possible hearing damage when using a headset, do not
listen to sound at high volume U for long periods.
This marking on the product, accessories or literature indicates that the
product and its electronic accessories (e.g. charger, headset, USB cable)
should not be disposed of with other household waste.
SAR
www.sar-tick.com
BT: 8.31dBm EIRP ; 2.4G Wi-Fi: 17.23dBm EIRP ; 5G Wi-Fi: 17.14dBm EIRP.
Any Changes or modifications not expressly approved by the party responsible for
compliance could void the user's authority to operate the equipment.
This device complies with part 15 of the FCC Rules. Operation is subject to the following
two conditions: (1) This device may not cause harmful interference,
and (2) this device must accept any interference received, including interference that
may cause undesired operation.
IMPORTANT NOTE:
Note: This equipment has been tested and found to comply with the limits for a Class B
digital device, pursuant to part 15 of the FCC Rules. These
limits are designed to provide reasonable protection against harmful interference in a
residential installation.
This equipment generates, uses and can radiate radio frequency energy and, if not
installed and used in accordance with the instructions, may cause
harmful interference to radio communications. However, there is no guarantee that
interference will not occur in a particular installation.
If this equipment does cause harmful interference to radio or television reception, which
can be determined by turning the equipment off and on,
the user is encouraged to try to correct the interference by one or more of the following
measures:
—Reorient or relocate the receiving antenna.
—Increase the separation between the equipment and receiver.
—Connect the equipment into an outlet on a circuit different from that to which the
receiver is connected.
—Consult the dealer or an experienced radio/TV technician for help.
FCC Radiation Exposure Statement:
This equipment complies with FCC radiation exposure limits set forth for an uncontrolled
environment .This equipment should be installed and
operated with minimum distance 20cm between the radiator& your body.
According to EN IEC 62311, be used to evaluate the environmental
impact of human exposure to radio-frequency (RF) radiation as
specified table 2 of Council Recommendation 1999/519/EC.
The RF Exposure is compliant.
英语封面
日语
德语
葡萄牙
警告
火災や爆発などの事故を防ぐために、以下の警告情報に従ってください
バッテリーコンパートメントが露出しているときは、デバイスの電源を入
れたり使用したりしないでください。
電話機は、医療用インプラントまたはリズムアジャスターから少なくとも
15cm離しておく必要があり、デバイスをコートのポケットに入れないでく
ださい。
デバイスやその他のバッテリーを、高温または太陽光、ヒーター、電子レ
ンジ、オーブン、給湯器などの発熱機器と一緒にさらさないでください。
バッテリーの過熱は爆発を引き起こす可能性があります。
充電が完了したとき、または充電されていないときは、充電器をデバイス
から外し、充電器を電源コンセントから抜きます。
デバイスに取り外し不可能なバッテリーが装備されている場合は、バッテ
リーまたはデバイスの損傷を防ぐために、バッテリーを自分で交換しない
でください。
未承認または互換性のない電源、充電器、またはバッテリーを使用する
と、火災、爆発、またはその他の危険を引き起こす可能性があります。
バッテリーの漏れ、過熱、火災、爆発を防ぐために、バッテリーを分解ま
たはリセットしたり、他の物体を挿入したり、水や他の液体に浸したりし
ないでください。
バッテリーを落としたり、押しつぶしたり、引っかいたり、穴を開けたり
しないでください。バッテリーに過度の外圧がかかり、内部が短絡して
バッテリーが過熱するのを防ぐことができます。
妊娠中の女性の腹や青年の下腹部にデバイスを近づけないでください。
子供や若者の場合は、夜間の通信を避け、通話の頻度と期間を制限するな
ど、デバイスを適切に使用してください。
規格外の充電器による事故については、当社は一切責任を負いません。
ヘッドセットを使用しているときに起こりうる聴覚障害を防ぐた
めに、大音量のUで長時間音を聞かないでください。
製品、アクセサリ、または資料のこのマーキングは、製品と
その電子アクセサリ(充電器、ヘッドセット、USBケーブル
など)を他の家庭廃棄物と一緒に廃棄してはならないことを
示しています。
SAR
www.sar-tick.com
BT: 8.31dBm EIRP ; 2.4G Wi-Fi: 17.23dBm EIRP ; 5G Wi-Fi: 17.14dBm
EIRP.
指令2014/53 / EUによると、バンドとパワーは次のとおりです。
ENIEC62311によると、理事会勧告1999/519/ECの表2に指
定されているように、無線周波(RF)放射線への人間の曝露
による環境への影響を評価するために使用できます。
RF曝露は準拠しています。
WARNUNG
Befolgen Sie die unten angegebenen Warnhinweise, um Vorfälle wie Feuer
oder Explosion zu vermeiden
Schalten Sie das Gerät nicht ein und verwenden Sie es nicht, wenn das
Batteriefach frei liegt.
Das Telefon sollte mindestens 15 cm von medizinischen Implantaten oder
Rhythmus-Einstellern entfernt sein und das Gerät niemals in die Manteltasche
stecken.
Setzen Sie das Gerät und andere Batterien nicht zusammen mit hohen
Temperaturen oder wärmeerzeugenden Geräten wie Sonnenlicht, Heizungen,
Mikrowellenherden, Öfen oder Warmwasserbereitern aus. Überhitzung der
Batterie kann zu einer Explosion führen.
Wenn der Ladevorgang abgeschlossen ist oder nicht, trennen Sie das
Ladegerät vom Gerät und ziehen Sie den Netzstecker aus der Steckdose.
Wenn das Gerät mit einem nicht austauschbaren Akku ausgestattet ist,
ersetzen Sie den Akku nicht selbst, um eine Beschädigung des Akkus oder
des Geräts zu vermeiden.
Die Verwendung einer nicht zugelassenen oder nicht kompatiblen
Stromquelle, eines Ladegeräts oder einer Batterie kann zu Bränden,
Explosionen oder anderen Gefahren führen.
Zerlegen oder setzen Sie die Batterie nicht zurück, setzen Sie keine anderen
Gegenstände ein, tauchen Sie nicht in Wasser oder andere Flüssigkeiten ein,
um ein Auslaufen der Batterie, Überhitzung, Feuer oder Explosion zu
vermeiden.
Lassen Sie die Batterie nicht fallen, quetschen, zerkratzen oder durchstechen
Sie sie nicht, um zu vermeiden, dass die Batterie einem übermäßigen
Außendruck ausgesetzt wird, der zu einem internen Kurzschluss und einer
Überhitzung der Batterie führt.
Halten Sie das Gerät möglicherweise vom Bauch schwangerer Frauen und
dem Unterbauch von Jugendlichen fern.
Bitte nutzen Sie das Gerät für Kinder und Jugendliche sinnvoll, indem Sie
beispielsweise die nächtliche Kommunikation vermeiden und die Häufigkeit
und Dauer von Anrufen begrenzen.
Das Unternehmen trägt keine Verantwortung für Unfälle, die durch nicht
standardmäßige Ladegeräte verursacht werden.
Um mögliche Hörschäden bei Verwendung eines Headsets zu
vermeiden, hören Sie längere Zeit keinen Ton mit hoher
Lautstärke U.
Das Elektro- und Elektronikgerätegesetz (ElektroG) enthält eine Vielzahl von
Anforderungen an den Umgang mit Elektro- und
Elektronikgeräten. Die wichtigsten sind hier zusammengestellt.
1. Getrennte Erfassung von Altgeräten
Elektro- und Elektronikgeräte, die zu Abfall geworden sind, werden als Altgeräte
bezeichnet. Besitzer von Altgeräten haben diese einer
vom unsortierten Siedlungsabfall getrennten Erfassung zuzuführen. Altgeräte gehören
insbesondere nicht in den Hausmüll, sondern in
spezielle Sammel- und Rückgabesysteme.
2. Batterien und Akkus sowie Lampen
Besitzer von Altgeräten haben Altbatterien und Altakkumulatoren, die nicht vom Altgerät
umschlossen sind, sowie Lampen, die
zerstörungsfrei aus dem Altgerät entnommen werden können, im Regelfall vor der
Abgabe an einer Erfassungsstelle vom Altgerät zu
trennen. Dies gilt nicht, soweit Altgeräte einer Vorbereitung zur Wiederverwendung unter
Beteiligung eines öffentlich-rechtlichen
Entsorgungsträgers zugeführt werden.
4. Datenschutz-Hinweis
Altgeräte enthalten häufig sensible personenbezogene Daten. Dies gilt insbesondere für
Geräte der Informations- und
Telekommunikationstechnik wie Computer und Smartphones. Bitte beachten Sie in
Ihrem eigenen Interesse, dass für die Löschung der
Daten auf den zu entsorgenden Altgeräten jeder Endnutzer selbst verantwortlich ist.
5. Bedeutung des Symbols „durchgestrichene Mülltonne“
Das auf Elektro- und Elektronikgeräten regelmäßig abgebildete Symbol
einer durchgestrichenen Mülltonne weist darauf
hin, dass das jeweilige Gerät am Ende seiner Lebensdauer getrennt
vom unsortierten Siedlungsabfall zu erfassen ist.
3. Möglichkeiten der Rückgabe von Altgeräten
Besitzer von Altgeräten aus privaten Haushalten können diese bei den Sammelstellen
der öffentlich-rechtlichen Entsorgungsträger
oder bei den von Herstellern oder Vertreibern im Sinne des ElektroG eingerichteten
Rücknahmestellen unentgeltlich abgeben.
Rücknahmepflichtig sind Geschäfte mit einer Verkaufsfläche von mindestens 400 m² für
Elektro- und Elektronikgeräte sowie
diejenigen Lebensmittelgeschäfte mit einer Gesamtverkaufsfläche von mindestens 800
m², die mehrmals pro Jahr oder dauerhaft
Elektro- und Elektronikgeräte anbieten und auf dem Markt bereitstellen. Dies gilt auch
bei Vertrieb unter Verwendung von
Fernkommunikationsmitteln, wenn die Lager- und Versandflächen für Elektro- und
Elektronikgeräte mindestens 400 m² betragen
oder die gesamten Lager- und Versandflächen mindestens 800 m² betragen. Vertreiber
haben die Rücknahme grundsätzlich durch
geeignete Rückgabemöglichkeiten in zumutbarer Entfernung zum jeweiligen Endnutzer
zu gewährleisten.
Die Möglichkeit der unentgeltlichen Rückgabe eines Altgerätes besteht bei
rücknahmepflichtigen Vertreibern unter anderem dann,
wenn ein neues gleichartiges Gerät, das im Wesentlichen die gleichen Funktionen
erfüllt, an einen Endnutzer abgegeben wird.
Wenn ein neues Gerät an einen privaten Haushalt ausgeliefert wird, kann das
gleichartige Altgerät auch dort zur unentgeltlichen
Abholung übergeben werden; dies gilt bei einem Vertrieb unter Verwendung von
Fernkommunikationsmitteln für Geräte der
Kategorien 1, 2 oder 4 gemäß § 2 Abs. 1 ElektroG, nämlich „Wärmeüberträger“,
„Bildschirmgeräte“ oder „Großgeräte“ (letztere mit
mindestens einer äußeren Abmessung über 50 Zentimeter). Zu einer entsprechenden
Rückgabe-Absicht werden Endnutzer beim
Abschluss eines Kaufvertrages befragt. Außerdem besteht die Möglichkeit der
unentgeltlichen Rückgabe bei Sammelstellen der
Vertreiber unabhängig vom Kauf eines neuen Gerätes für solche Altgeräte, die in keiner
äußeren Abmessung größer als 25
Zentimeter sind, und zwar beschränkt auf drei Altgeräte pro Geräteart.
SAR
www.sar-tick.com
BT: 8.31dBm EIRP ; 2.4G Wi-Fi: 17.23dBm EIRP ; 5G Wi-Fi: 17.14dBm EIRP.
Gemäß der Richtlinie 2014/53 / EU sind die Bänder und
Befugnisse wie folgt:
Gemäß EN IEC 62311 kann es verwendet werden, um die
Umweltauswirkungen der Exposition des Menschen durch
Hochfrequenzstrahlung (HF) gemäß Tabelle 2 der Empfehlung
des Rates 1999/519/EG zu bewerten.
Die HF-Exposition ist konform.
Disco de foco
projetor
Manual do usuário do
Questões Importantes de Segurança
Para obter o melhor efeito, use o projetor em uma sala mais escura ou feche
as cortinas.
Tenha cuidado ao usar o projetor. Qualquer queda ou impacto pode causar
peças danificadas, imagens borradas ou exibição inadequada.
Instalação
Tenha cuidado com o cabo de alimentação para evitar dobras excessivas. O
cabo de alimentação danificado pode causar choque elétrico e incêndio.
Desligue o cabo de alimentação da tomada após o uso.
Fonte de energia
Desconecte a alimentação primeiro.
Limpe o gabinete regularmente com um pano úmido. Detergente neutro pode
ser usado. Não use detergentes ou solventes fortes (como álcool e diluente).
A lente deve ser limpa com um pano para óculos ou papel para lentes. Tenha
cuidado para não arranhar a lente.
Use uma escova macia para limpar as aberturas e alto-falante do projetor
regularmente, ou as aberturas serão bloqueadas pela poeira e causar a
quebra da máquina devido ao superaquecimento.
Limpeza
Não desmonte o projetor casualmente, pois pode haver risco de choque
elétrico, que afeta a manutenção normal.
Objetos líquidos ou pesados não devem ser permitidos na máquina.
Atenção de alta temperatura
Conheça o seu projetor
Descrição dos acessórios do projetor
1.Tripé ajustável. 2. Receptor de sinal de controle remoto. 3. Lente do
projetor. 4. Tomada de alimentação. 5. Receptor de sinal de controle remoto.
6. Conector de saída de áudio. 7. Conector HDMI 1 HD. 8. Conector USB.
9. Conector AV. 10. Conector HDMI 2 HD. 11. Horn. 12. Janela de dissipação
de calor. 13. Disco de focalização. 14. Interruptor de rede à prova de poeira
destacável, mova para a direita para desmontar a rede à prova de poeira.
15. Rede removível à prova de poeira.
Installationsmethoden
Je nach Umgebung und Anforderungen kann dieser Projektor mit einem
professionellen Projektionsständer von der Decke abgehängt oder auf eine glatte
Tischplatte gestellt werden. Oder wählen Sie eine andere Befestigungsmöglichkeit
gemäß den folgenden Abbildungen.
Aufmerksamkeit ist wichtig:
1. Bei der hängenden Methode sollte der Projektor nicht höher als die Oberkante der
Leinwand sein, da dies den Bildeffekt der Leinwand und die Trapezkorrektur beeinträchtigt.
2. Der Projektor sollte auf der linken und rechten Symmetrieachse der Leinwand installiert
werden, um eine Verzerrung des linken und rechten Trapezfehlers des Bildes zu
vermeiden.
3. Der Raum um den Projektor sollte nach der Installation gut belüftet sein und es dürfen
keine Gegenstände die Lüftungsschlitze blockieren.
4. Bitte schließen Sie die Stromquelle während der Installation nicht an, um einen
Stromschlag oder einen Ausfall des Projektorschaltkreises zu vermeiden.
5. Der gerade installierte Projektor kann unscharf und trapezförmig verzerrt sein, bitte lesen
Sie zur Korrektur den Abschnitt über die Grafikkalibrierung.
Positive Projektion der Halterung anheben
Halterung anhebende Rückprojektion
Positive Projektion auf der Tischplatte
Rückprojektion auf der Tischplatte
Projektor Ein/Aus
Bildkorrektur
Schließen Sie den Projektor an die Stromversorgung an, der Projektor wechselt in den
Standby-Modus und die Betriebsanzeige leuchtet rot
Einschalten: Drücken Sie den Netzschalter am Projektor oder den Netzschalter auf der
Fernbedienung, die Netzanzeige wechselt von Rot zu Blau und wechselt in den
Arbeitsstatus.
Ausschalten: Drücken Sie im Arbeitszustand die Netztaste am Projektor oder auf der
Fernbedienung, die Netzanzeige wechselt von blau zu rot und der Projektor wird
ausgeschaltet.
Drehen Sie im Uhrzeigersinn bis zum Ende (unten), dann drehen Sie gegen den
Uhrzeigersinn, während Sie die Partikelflecken auf dem Bild beobachten, und stoppen
Sie am schärfsten Punkt, der die beste Position zum Fokussieren ist.
Ein-/Ausschalten des Betriebs
Wählrad
Formatos de reprodução multimídia
Solução de problemas simples
A operação desta máquina é muito simples, como um aparelho de TV
comum, geralmente você não encontrará nenhum problema, mas pode
haver algumas falhas falsas devido ao equipamento adjacente ou tensão,
por favor, trate o problema por conta própria antes de enviá-lo para reparos,
se ainda não funcionar corretamente após a solução de problemas, entre em
contato com a equipe responsável.
Fenômenos problemáticos Mögliche Ursachen für Störungen
O indicador de energia
não acende quando a
energia é ligada
Certifique-se de que a fonte de alimentação esteja conectada
Pressionando o botão
liga / desliga no controle
remoto e ainda não
consigo ligar
1. Certifique-se de que o interruptor na parte traseira do projetor esteja
ligado
2. Certifique-se de que a bateria do controle remoto está desligada
3. Certifique-se de que a porta de recepção do projetor seja iluminada
por luz direta
Nenhuma imagem na tela
quando o projetor é
ligado
1. Certifique-se de que o canal de seleção de sinal do projetor está
correto
2. Certifique-se de que o canal de origem do sinal esteja ligado
3. Certifique-se de que o cabo de sinal esteja conectado corretamente
A máquina desliga
automaticamente após um
curto período de trabalho
1. Certifique-se de que a entrada e saída de ar do projetor estejam
bloqueadas
2. Certifique-se de que a tensão é muito baixa ou as flutuações de tensão
são muito altas
formato de suporte
JPG, JPEG, GIF, BMP, PNG
Tipo de arquivo
Imagem
Vídeo
Voz
MP4,MOV,3GP,AV,FLV,ISO,M2TS,MKV,MPG,RMVB,TP,TRP,TS,WMV,VOB,DAT,ASF
MP3,WMA,MP2,MP3、OGG,AAC,M4A,MA4,FLAC,3GP,WAV、M3U,RM,WMV,
Beachten Sie die nachstehenden Daten und stellen Sie den Projektor entsprechend
der erforderlichen Bildschirmgröße in einem angemessenen Abstand zur Leinwand
auf. Bitte stellen Sie den Projektor auf eine glatte und feste Tischplatte oder hängen
Sie ihn an der Decke auf. Der Bereich um den Projektor sollte gut belüftet sein, um ein
Blockieren der Lüftungsschlitze zu vermeiden. Im Umkreis von 30 cm um die
Lüftungsöffnungen sollten sich keine anderen Gegenstände befinden.
Standardeinstellung
Um Verzerrungen des projizierten Bildes nach der Projektion zu vermeiden, platzieren Sie
die Projektion so nah wie möglich an der Symmetrieachse.
Beachtung
Diese Zahlen können aufgrund optischer Unterschiede abweichen. Vorschlag: Bitte
passen Sie den Abstand und die Bildschirmgröße vor der Installation physisch an.
Hinweis: Die obigen Daten dienen nur als Referenz, bitte beziehen Sie sich auf die
tatsächlichen Messdaten.
Abbildungsmaßstab
(Bildgröße (Zoll )
55
80
100
120
4:3
Projektionsabstand (m)
2
2.85
3.53
4.2
Der Projektor ist
rechtshändig, die linke Seite
ist größer und die rechte
Seite ist kleiner
Die Einbauposition und der
Winkel sind korrekt, das
Bild ist quadratisch.
Der Projektor ist links, links
klein und rechts groß.
Screen
Screen symmetry axis
Projector
Hauptbildschirm, Systemeinstellungen, Projektionseinstellungen, Trapezkorrektur,
Umschalten zwischen Vierpunktmodus und manueller Trapezkorrektur;
Passen Sie die vier Ecken der Projektionsfläche mit den Richtungstasten an, bis die
Projektionsfläche normal ist.
4.Wie richte ich die elektronische Trapezkorrektur ein?
Wählen Sie Einstellungen und klicken Sie auf "Bluetooth-Einstellungen"; Suchen Sie
dann nach Bluetooth-Geräten und finden Sie das Gerät, mit dem Sie koppeln müssen.
5.So verwenden Sie Bluetooth
1) Miracast- Geräteseite: Hauptschnittstelle zu Miracast.
2) mobile Seite, suchen Sie die Bildschirmprojektionsfunktion in den
Einstellungen und verbinden Sie den Gerätenamen mit Android Screen
Together.
So verbinden Sie Android Mobile/Ped mit Projector Based on
WiFi-Display-Technologie
6.So verwenden Sie die Android-Bildschirmprojektion
1) Conecte seu telefone e projetor ao mesmo wi-fi, se você não tem wi-fi,
configure um ponto de acesso com seu iPhone e conecte-o com seu
projetor.
2) Lado do dispositivo: insira iOS Cast na interface principal.
3) Lado móvel: abra a função de espelhamento da Apple e conecte o
dispositivo à mesma tela.
7.Como usar o projetor Apple
1) Baixe o arquivo de atualização do sistema (sufixo do nome do arquivo .bin)
e coloque-o no diretório raiz do stick USB (o formato do stick USB deve ser
fat32).
2) insira a unidade flash com o arquivo de atualização na porta USB do
projetor.
3) entre na interface do projetor, Configurações do sistema - Atualização do
sistema - atualização do disco U.
4) clique para confirmar.
5) aguarde a conclusão da barra de progresso e ligue o projetor.
8.Atualização do sistema
Anleitung zur Schnittstellenbedienung
1.So wählen Sie die Signalquelle aus
Rufen Sie die Hauptschnittstelle auf, Systemeinstellungen, Netzwerkeinstellungen -
WLAN-Einstellungen; Suchen Sie das Netzwerk, zu dem Sie eine Verbindung
herstellen möchten, und drücken Sie Bestätigen.
Geben Sie das Passwort über die virtuelle Tastatur ein und bestätigen Sie die
Verbindung.
Password:
Show password:
2.So verbinden Sie WLAN
Stecken Sie einen USB-Datenträger, auf dem Multimediadateien gespeichert sind, in
den USB-Anschluss und wählen Sie Film, Musik, Foto, Office-Suite in der
Hauptoberfläche.
3.Wie spielt man eine U-Disk ab?
ConnectCancel
Infrarot-Fernbedienung
1.Ein-/Aus-Taste
2.Zurück-Button
3.Bestätigungstaste
4.Aufwärts-Taste
5.Abwärtstaste
6.Linker Knopf
7.Rechter Knopf
1. Kontrollleuchte.
2. Netzschalter.
3. Signalquellentaste.
4. Richtungstaste.
5. Menütaste.
6. Home-Taste.
7. Lautstärke +.
8. Lautstärke -.
9. Stummschalttaste.
10. Schaltfläche Bildschirmwechsel.
11. Schaltfläche zum Bestätigen.
12. Zurück-Taste.
13. Letztes Lied.
14. Nächstes Lied.
SW10
O projetor pode receber sinais de vídeo HDMI de alta definição e oferece
suporte para entrada e saída de sinal de áudio estéreo. Conecte o projetor e
outro equipamento de acordo com a seguinte imagem.
1.Drücken Sie die Taste (Abbildung 1). 2. Unterer Aufkleber.
3. Befestigungsloch für Aufhänger, kann nach dem Entfernen des Fußpolsters verwendet
werden. 4. Maschinenfüße zur Höhenverstellung.
Fokussierrad
ATENÇÃO
Siga as informações de aviso fornecidas abaixo para evitar incidentes como
incêndio ou explosão
Não ligue ou use o dispositivo quando o compartimento da bateria estiver
exposto.
O telefone deve estar a pelo menos 15 cm de distância de qualquer implante
médico ou ajustador de ritmo e nunca coloque o dispositivo no bolso do
casaco.
Não exponha o dispositivo e outras baterias a altas temperaturas ou
equipamentos geradores de calor, como luz solar, aquecedores, fornos de
microondas, fornos ou aquecedores de água. O superaquecimento da bateria
pode causar uma explosão.
Quando o carregamento estiver concluído ou não estiver carregando,
desconecte o carregador do dispositivo e desconecte o carregador da tomada.
Se o dispositivo estiver equipado com uma bateria não removível, não
substitua a bateria sozinho para evitar danos à bateria ou ao dispositivo.
O uso de uma fonte de alimentação, carregador ou bateria incompatível ou não
aprovado pode causar incêndio, explosão ou outros perigos.
Não desmonte ou reinicie a bateria, insira outros objetos, mergulhe-a em água
ou outros líquidos para evitar vazamento, superaquecimento, incêndio ou
explosão da bateria.
Não deixe cair, esmague, risque ou perfure a bateria para evitar submetê-la a
pressão externa excessiva, resultando em curto-circuito interno e
superaquecimento da bateria.
Possivelmente mantenha o dispositivo longe da barriga de mulheres grávidas e
da parte inferior do abdômen de adolescentes.
Para crianças e jovens, faça um uso sensato do dispositivo, por exemplo,
evitando a comunicação noturna e limitando a frequência e a duração das
chamadas.
A empresa não se responsabiliza por acidentes causados por equipamentos de
carregamento não padronizados.
Para evitar possíveis danos à audição ao usar um fone de
ouvido, não ouça sons em alto volume U por longos períodos.
Esta marcação no produto, acessórios ou literatura indica que
o produto e seus acessórios eletrônicos (por exemplo,
carregador, fone de ouvido, cabo USB) não devem ser
descartados com o lixo doméstico.
SAR
www.sar-tick.com
BT: 8.31dBm EIRP ; 2.4G Wi-Fi: 17.23dBm EIRP ; 5G Wi-Fi: 17.14dBm EIRP.
De acordo com a Diretiva 2014/53 / UE, as bandas e o poder
são os seguintes:
De acordo com EN IEC 62311, pode ser usado para avaliar o
impacto ambiental da exposição humana à radiação de
radiofrequência (RF) conforme especificado na tabela 2 da
Recomendação do Conselho 1999/519 / EC.
A exposição RF é compatível.
1. Luz indicadora.
2. Botão liga / desliga.
3. Botão de fonte de sinal.
4. Botão de direção.
5. Botão Menu.
6. Botão Home.
7. Volume +.
8. Volume -.
9. Botão mudo.
10. Botão de troca de tela.
11. Botão de confirmação.
12. Botão Voltar.
13. Última música.
14. próxima música.
Password:
Show password:
ConnectCancel
Devido a problemas de copyright de patente Dolby, esta máquina não oferece suporte
para decodificação de áudio relacionada a Dolby.
Aufgrund von Urheberrechtsproblemen des Dolby-Patents unterstützt dieses Gerät keine
Dolby-bezogene Audiodecodierung.
ド ル ビ ー( Dolby)の特許と著作権の問題により、本製品はドルビー関連のオーディオデコード
をサポートしていません。
DuetoDolbypatentcopyrightissues,thismachinedoesnotsupportDolbyrelatedaudio
decoding.
1.Pressione o botão (Figura 1). 2. Adesivo inferior. 3. Orifício de fixação do
gancho, pode ser usado após a remoção da almofada do pé. 4. Pés da
máquina de ajuste de altura.
According to Directive 2014/53/EU,the Bands and power are as
follows:
Nachdem Sie die Hauptschnittstelle aufgerufen haben, drücken Sie die
Signalquellentaste " " auf der Einschalttaste, wählen Sie den gewünschten
Signalquellenkanal in der Popup-Oberfläche aus, z. B. "HDMI1, HDMI2, AV" usw. und
drücken Sie die OK-Taste auf die Fernbedienung, um den entsprechenden
Signalquellenstatus einzugeben.
versione italiana
versión en español
version française
Versão em portugues
Deutsche Version
日本 語 バージョン
Englishversion
54
Русская версия 63
45
36
27
18
09
01
01 02 03 04 05 06 07 08
09 10 11 12 13 14 15 16 17
18 19 20 21 22 23 24 25 26
27 28 29 30 31 32 33 34 35
36 37 38 39 40 41 42 43 44
45 46 47 48 49 50 51 52 53
54 55 56 57 58 59 60 61 62
63 64 65 66 67 68 69 70 71