Attach the pedal support rods to the piano
Attach the pedal support rods to the piano
bottom. Find the pre-drilled holes on either
side of the speaker. Use the remaining
VE ANY QUESTIONS OR PROBLEMS,
AVE ANY QUESTIONS OR PROBLEMS,A
DO NOT CALL OR RETURN PRODUCT TO THE STORE
OR CALL THIS TOLL FREE HELP LINE
STOP!
DO NOT ASSEMBLE YOUR PIANO
BEFORE READING THIS GUIDE!
Questions?
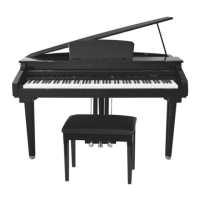
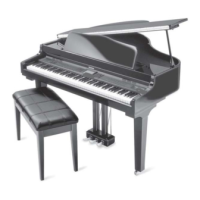
4. PEDAL ATTACHMENT 5. INSTALLING THE LEFT LEG 6. POSITIONING YOUR NEW GRAND PIANO
ENJOY YOUR NEW SUZUKI GRAND PIANO!
Use a pillow or make a thick pad by
folding a blanket or quilt in quarters.
Place it so the pedal assembly will land
on it. Using 2 or 3 persons, lift the piano
A. Adjust the Pedal Feet:A.
With your piano placed in its final position,
reach under the pedal box and adjust the
pedal feet down to firmly contact the floor by
turning the knob counter clockwise as shown.
on the bottom left of the piano.
Connect the male end to an appropriate
Please refer to the piano owner’s manual
With one person holding the piano in
With one person holding the piano in
position, go under the piano and install
position, go under the piano and install
the left and final leg as shown in steps A
the left and final leg as shown in steps A
& B in Section 3, “Attaching the Legs to
& B in Section 3, “Attaching the Legs to
the Piano.” Finally, using two people, lift
the Piano.” Finally, using two people, lift
the piano and remove the thick pad.
the piano and remove the thick pad.
WARNING:
When positioning the piano in your home
carry it to the final position. The solid brass
casters may be damaged by rough surfaces
and the casters may damage some flooring
surfaces like hardwood or tile.
WARNING: DO NOT PUSH PIANO!
Do not roll the piano on its caster wheels. The
legs and pedal assembly may catch on irregular
flooring surfaces like door thresholds and soft to
hard flooring surfaces. This may cause the legs
to break!
© 2005 Suzuki Corporation
6. POSITIONING YOUR NEW GRAND PIANO
Mini-Grande Digital Piano
GP-7