Clutch: 5C-8
• After setting the clutch hose union to the stopper,
tighten the union bolt to the specified torque.
CAUTION
!
The seal washers should be replaced with the
new ones to prevent fluid leakage.
Tightening torque
Clutch hose union bolt (b): 23 N·m (2.3 kgf-m,
16.5 lb-ft)
• Bleed air from the clutch system. Refer to “Air
Bleeding from Clutch Fluid Circuit (Page 5C-4)”.
Clutch Master Cylinder / Clutch Lever
Disassembly and Assembly
B718H15306009
Refer to “Clutch Master Cylinder Assembly Removal and
Installation (Page 5C-7)”.
Disassembly
1) Remove the clutch lever (1) and clutch lever position
switch (2).
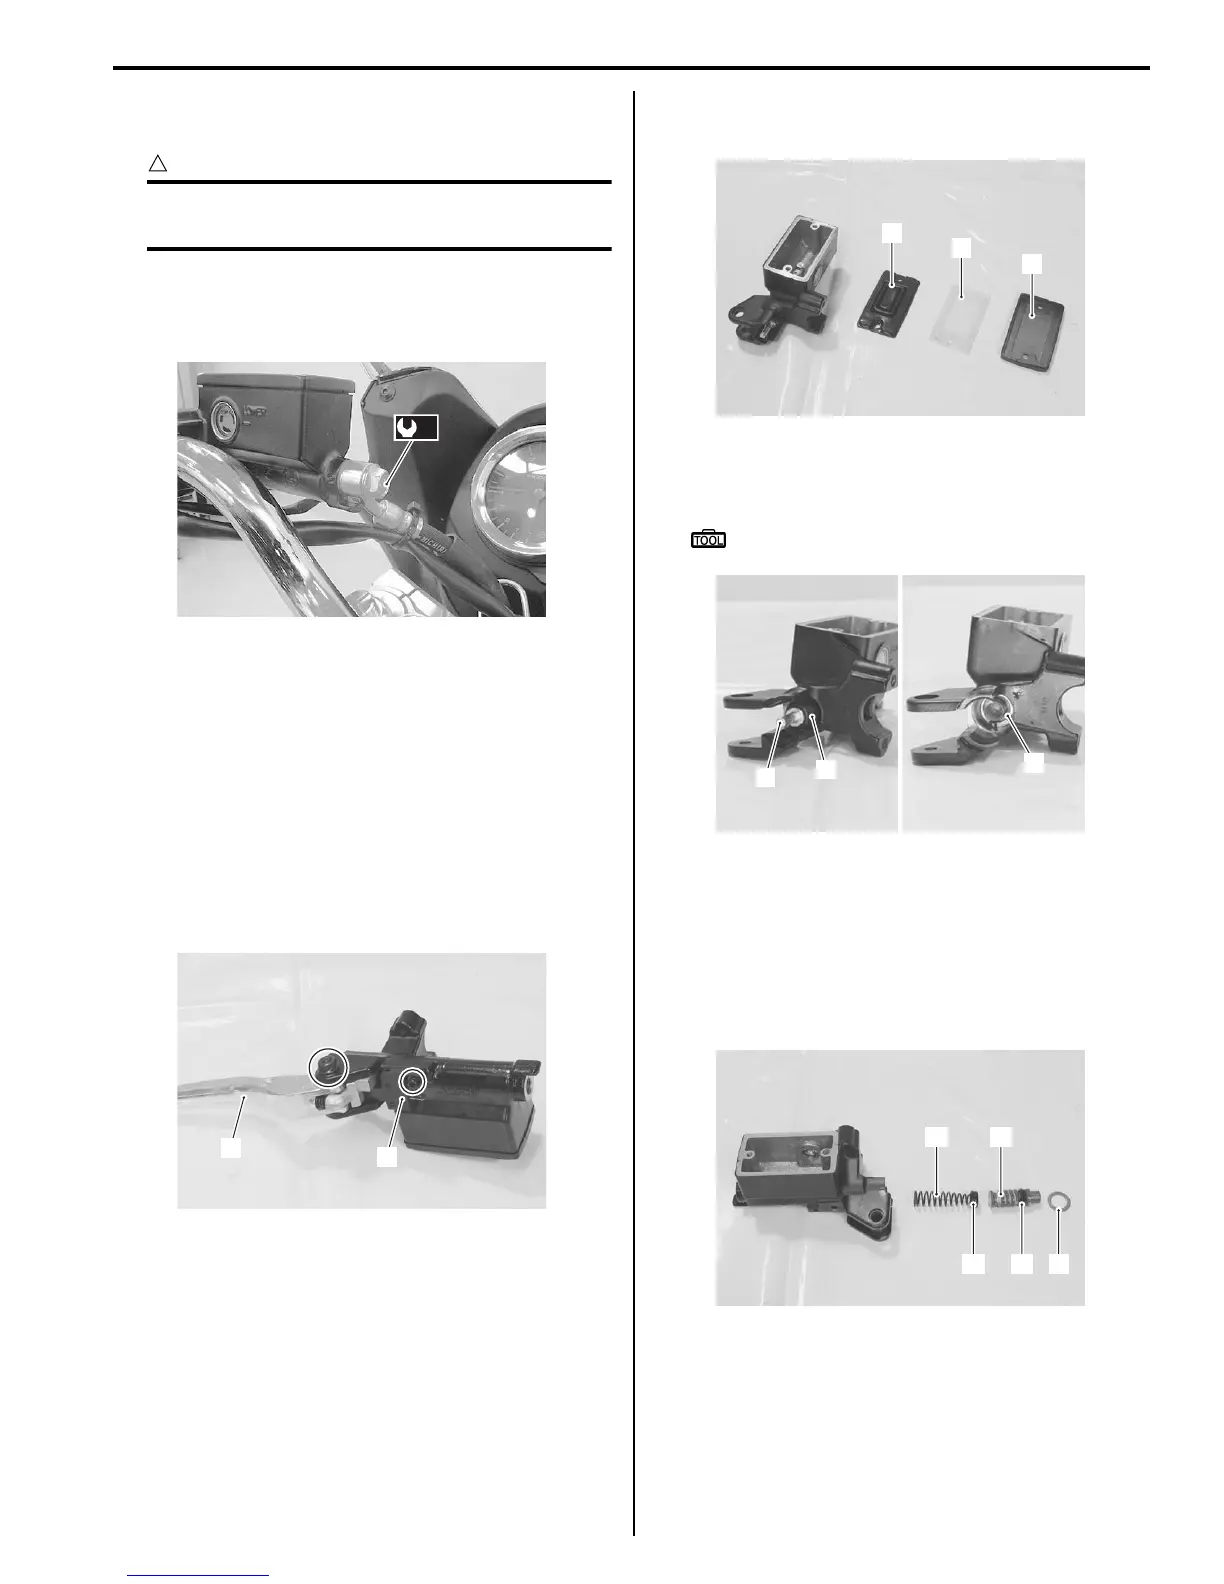
2) Remove the reservoir cap (3), plate (4) and
diaphragm (5).
3) Pull out the push rod (6) and dust boot (7).
4) Remove the snap ring (8).
Special tool
: 09900–06108 (Snap ring pliers)
5) Remove the following parts from the master cylinder.
• Washer (9)
• Secondary cup (10)
• Piston (11)
• Primary cup (12)
• Spring (13)
(b)
I718H1530021-01
1
2
I649G1530012-02
3
4
5
I649G1530013-02
6
7
8
I649G1530014-02
9
11
12
13
10
I649G1530015-02

 Loading...


