This remains true up to about the “2 o’clock” position. This position—a favorite for many users—brings out
both the low end fundamentals and crisp highs and, at the same time, adds a little lower midrange to help
cut through the band. However, if you go further clockwise and past the 2:00 position, selected mids will
start to drop off—specifically, a group of frequencies centered around 200 Hz. At this point and after, the
effect becomes much more pronounced. However, the curves involved here are gentle, as opposed to the
very extreme curves you can create by boosting or cutting the Active Tone Controls (EQ).
Most significantly for basses, the Aural Enhancer will help bring out the fundamentals of your lower regis-
ters without masking them with overtones, as is possible when using the Bass control only. At the same
time, it opens up the sibilance characteristics of all instruments without being harsh.
Obviously, numbers and curves and circuits all mean nothing compared to what you hear with your own
ears. Play a chord, a repeated lick, or a harmonic, and turn the Aural Enhancer control to various points on
the knob to hear the effect for yourself. As always, your ears are the best judge when it comes to settings
that affect the tone of your instrument.
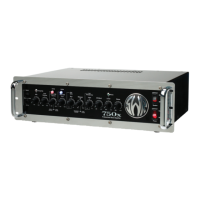
Overdrive Controls
Based on the extremely popular circuit from SWR’s groundbreaking Mo’ Bass Soundstation, the Tube
Overdrive onboard your 750x has been carefully calibrated to give you as much (or little) overdriven signal
as necessary, all the while keeping the low end (and ultra-high end) wholly intact through the use of low
and high-pass filters. That’s the technical description. In plain English, it’s just like a second channel on
the front end of your amp. And by using the “Drive” (think: pre) and Level (think: post) controls, you can
dial it in to get just a little bit of “edge” on the note… or, if you prefer, you can turn your tone into
a buzzsaw and cut down trees with it.
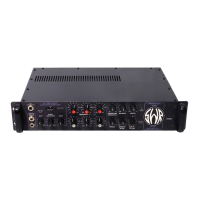
Overdrive Activator Switch
Located directly above the Overdrive controls, this is an illuminated push-button switch that activates
the Overdrive effect. When engaged, the switch cap will illuminate in red. Push once to engage, then
again to disengage. (The Overdrive effect can also be switched on and off via footswitch; please see the
heading titled “Effects Activator Footswitch Jacks” in the “Rear Panel Features” section later in this
manual.)
Overdrive “Drive” Control
Located on the outer portion of the dual concentric knob underneath the Overdrive Activator Switch, the
Drive Control adjusts the amount of distortion present in the signal. Some people refer to this element
of an overdriven signal as the “pre” or the “gain.” Rotating the control clockwise will increase the dis-
tortion present, while going counter-clockwise will decrease it. To hear what kind of effect this control
has on your sound, engage the Overdrive effect by pushing the Overdrive Activator Switch (at which
point the switch should illuminate in red). Set the Overdrive level (the inner portion of the dual concen-
tric knob) to the 12:00 position. Now strike a note repeatedly and slowly turn up the Drive control to
your liking.
Overdrive Level Control
Located on the inner portion of the dual concentric knob underneath the Overdrive Activator Switch, the
Level Control adjusts the factor by which the signal level is boosted before leaving the Overdrive circuit
and blending back into the clean signal. Some people refer to this element of an overdriven signal as the
“post” or the “master.” Rotating the control clockwise will increase the level of the distorted signal,
while going counter-clockwise will decrease it. It can be used in conjunction with the Drive control to
achieve “unity gain” (no overall level difference) with your clean sound, or to help you achieve as much
boost as you feel is necessary when engaging the effect.
Using The Overdrive Controls
As mentioned previously, the two controls are meant to work together to help get you the kind of over-
driven sound you want. For a mellow “fuzz” on the note, or just a touch of drive, set the Drive fairly low
and the Level fairly high. For a drastic tonal change involving heavy distortion while keeping your levels
intact during channel switching, set the Drive high and the Level low to medium (you’ll notice that you
need a certain amount of Level dialed in to make the circuit effective). As always, the best judge is your
6 • 750x OWNER’S MANUAL
 Loading...